
To get rid of mold on your shower caulk for good, you have to know why it shows up in the first place. It’s not just random bad luck. Mold has a simple recipe: constant moisture, warmth, and something to eat—like soap scum. Your shower is basically a perfect little ecosystem for it. Understanding this is the secret to both kicking it out and keeping it from coming back.
Why Mold Keeps Growing on Your Shower Caulk
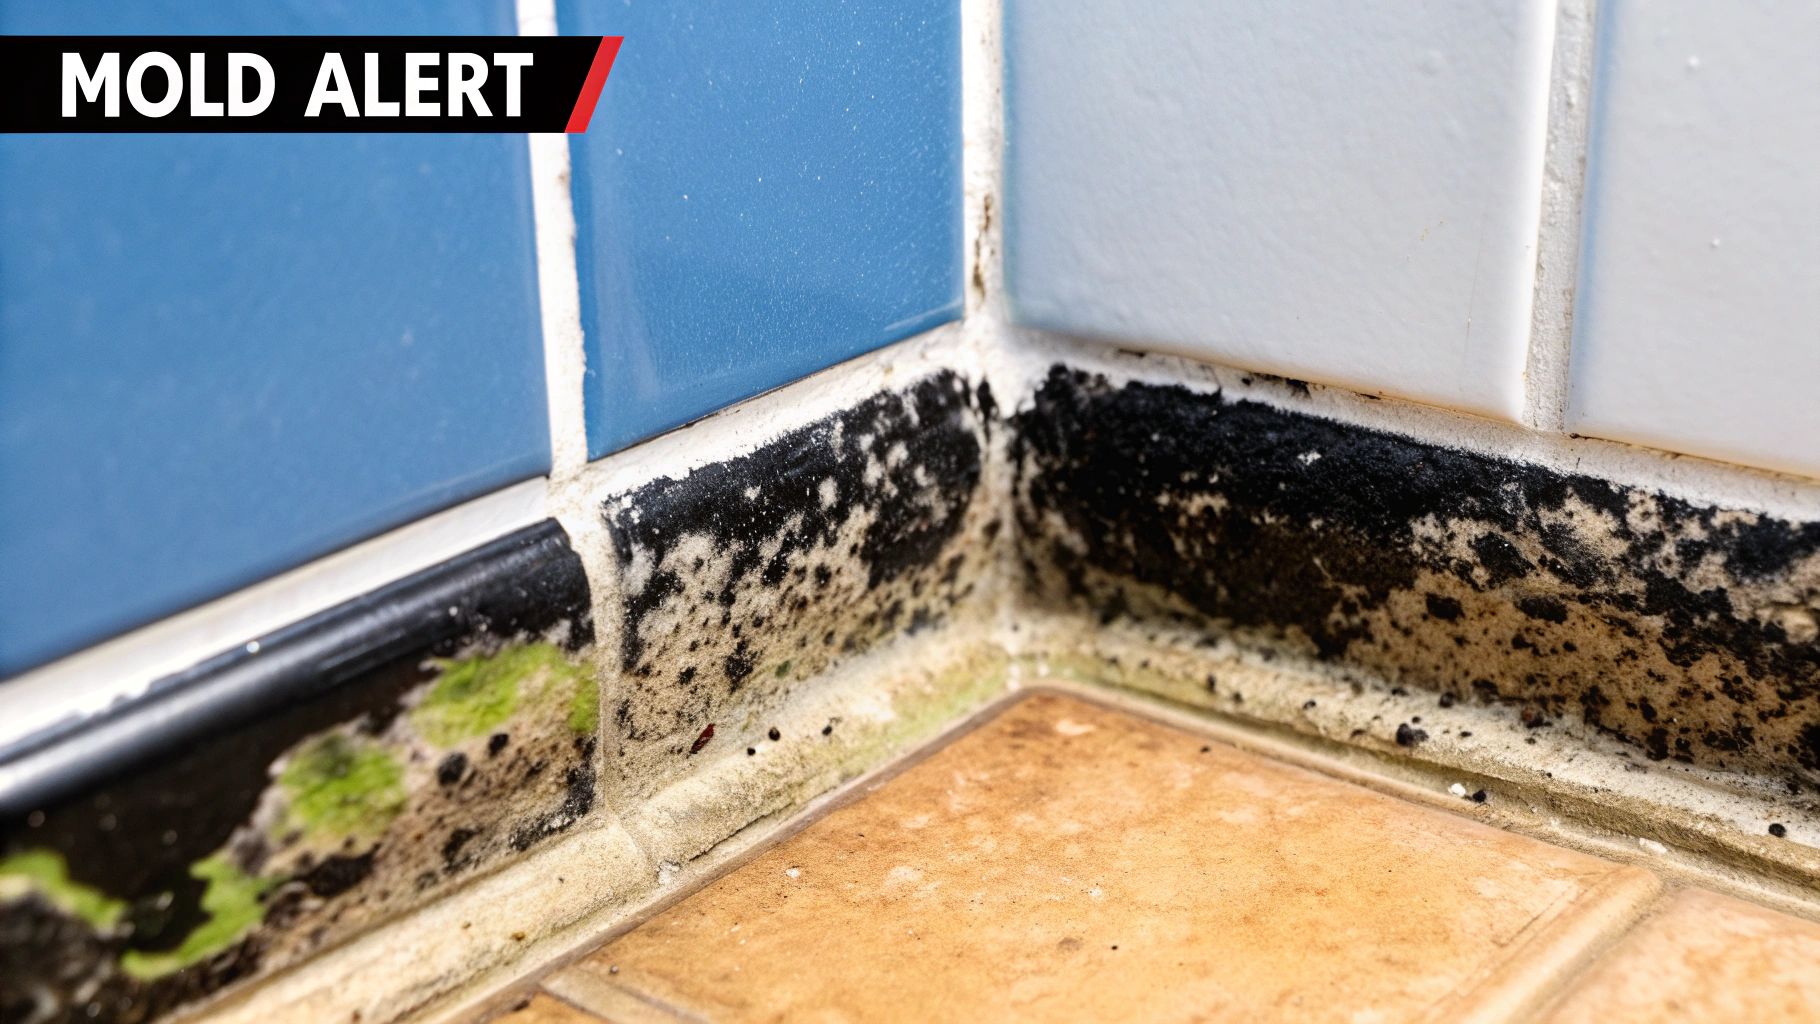
Ever feel like you're in a never-ending battle with those ugly black spots? You scrub them away, and a few weeks later, they're back. It's frustrating. But there are solid reasons this happens. Think of your shower as a five-star resort for mold spores, offering all the amenities they need to thrive.
The biggest culprit is moisture that just won't go away. Every time you take a shower, water hangs around the caulk lines. If that area never gets a chance to dry out completely, you’ve basically put out a welcome mat for mold. This is where good ventilation becomes your best friend.
The Problem with Poor Airflow
A bathroom without decent ventilation is practically a mold incubator. Running an exhaust fan isn't just a good idea; it's non-negotiable. You need to have it on during your shower and for at least 20-30 minutes after you get out. If you don't, all that steamy, humid air gets trapped, creating condensation on every surface—especially your caulk. That moisture is the lifeblood of mold.
Another simple habit that makes a huge difference? Leaving the shower door or curtain open after you're done. Keeping it closed traps all that damp air right where you don't want it, speeding up the mold growth cycle. Just cracking it open improves air circulation and helps things dry out so much faster.
Your Daily Habits Feed the Mold
Mold can’t live on water alone; it needs a food source. And it’s not picky. It will happily munch on the stuff left behind after you shower.
This includes:
- Soap scum: That lovely film of soap residue, body oils, and minerals.
- Shampoo residue: More of the same—plenty of nutrients for mold.
- Dead skin cells: An unavoidable part of showering that mold absolutely loves.
Cleaning these residues off your shower surfaces and caulk regularly cuts off the mold's food supply. When there's nothing to eat, it's a lot harder for a colony to get started.
A lot of people think mold only grows in a "dirty" bathroom. The truth is, a shower can look sparkling clean and still be a breeding ground if the conditions—moisture and a food source—are there. Prevention is really about managing the environment, not just scrubbing what you can see.
If you’ve tried everything and the mold just keeps coming back, it might be time to look for a bigger problem. Sometimes, a slow, hidden plumbing leak is the real cause. Even a tiny drip behind a wall can create the constant dampness mold needs to flourish, making all your surface cleaning useless. In that case, you may need professional plumbing repair services to fix the root issue.
Finally, the caulk itself might be the problem. Old caulk gets brittle, cracks, and starts to pull away from the wall. This creates tiny gaps and pockets where water and grime collect, giving stubborn mold the perfect hidden sanctuary to grow.
Choosing the Right Cleaner for the Job
Walking down the cleaning aisle to find a mold remover can feel overwhelming. You're faced with a wall of options, from heavy-duty chemicals to "all-natural" sprays, and it's hard to know what actually gets the job done. The truth is, the best choice really depends on how bad your mold problem is and what kind of ingredients you're comfortable using in your home.
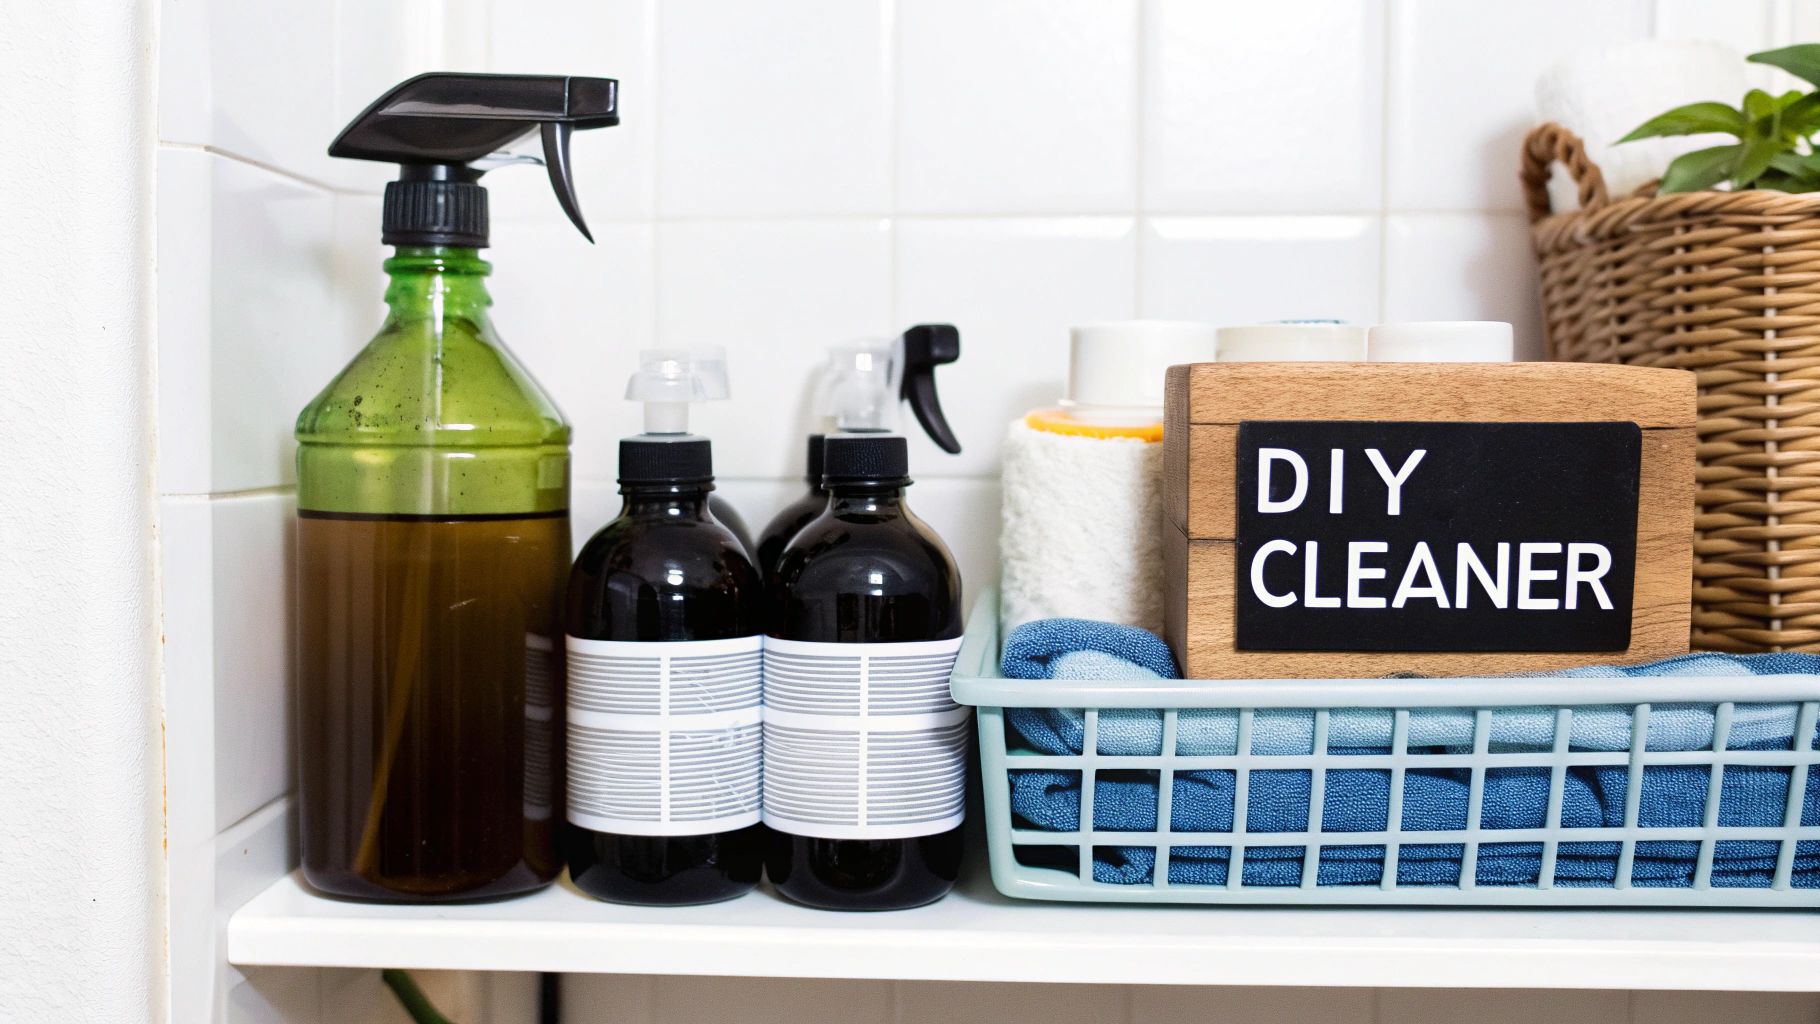
You might not even need a specialized product. For many situations, a cleaner you already have under the sink can work wonders. These everyday household items have their own unique strengths when it comes to fighting mold on non-porous surfaces like your shower caulk.
Comparing Your Go-To Household Cleaners
Let's break down the three most common DIY options: bleach, vinegar, and hydrogen peroxide. Each one can knock out mold, but they all work a bit differently and require some specific safety measures.
To help you decide, here's a quick comparison of what you can expect from each.
Comparing Common Mold Removal Agents
| Cleaning Agent | Effectiveness on Mold | Safety Precautions | Best For |
|---|---|---|---|
| Chlorine Bleach | High. Kills surface mold and removes stains effectively. | Harsh fumes; requires excellent ventilation. Can damage colored caulk. | Tough, surface-level stains on white caulk only. |
| White Vinegar | Moderate to High. Acidic nature kills mold at the root. | Strong smell during use. Won't remove existing stains. | Persistent mold issues where you need to kill the root, not just bleach the surface. |
| Hydrogen Peroxide (3%) | Moderate. Antifungal agent that kills mold without harsh fumes. | Less effective on deep-set stains. Can lighten some materials. | A safer alternative to bleach for those sensitive to strong chemicals. |
As you can see, there's a trade-off between power and safety. Bleach is the classic powerhouse, vinegar gets to the root of the problem, and hydrogen peroxide offers a gentler approach.
For a deeper dive into making your own effective cleaning solutions, check out our guide on homemade cleaning product recipes. It’s a great way to use what you already have and save a trip to the store.
The most common mistake is thinking that if the black stain is gone, the mold is gone. Bleach is fantastic at whitening, but for stubborn cases, the mold's "roots" can linger inside the caulk, meaning it'll just grow right back.
When to Bring in a Commercial Mold Remover
Sometimes, a DIY approach just won't cut it, especially if the mold has been setting up camp for a while. That's when it's time to reach for a commercial mold and mildew remover. These products are specifically formulated to do two things: kill the mold and obliterate the ugly stains it leaves behind.
It's a huge market—in fact, the global market for these products hit an estimated USD 2.34 billion in 2024, which shows just how many homeowners are fighting this same battle.
When you're shopping, keep an eye out for products that contain enzymes. Unlike basic chemicals that just kill what's on the surface, enzyme-based cleaners actually break down the mold spores and the slimy biofilm they create. This offers a much more thorough clean and is often the key to preventing mold from making a quick comeback on your shower caulk.
Your Action Plan for Tackling Caulk Mold
Alright, you've got your tools ready, so it's time to get to work. Getting mold out of shower caulk isn't about brute force scrubbing; it's about being smart. A step-by-step approach is what kills the mold at its root and brings your caulk back to life without damaging it.
First things first: safety and prep. These steps are non-negotiable. Mold spores and cleaning fumes are no joke, so protecting yourself and your bathroom is the top priority.
Setting the Stage for Success
Good preparation is what separates a quick, successful job from a frustrating, messy one. Don't skip these crucial first moves—they make sure your cleaner can do its job and you stay safe.
Crack open a window or flip on your bathroom’s exhaust fan. Good airflow is your number one defense against breathing in harsh fumes from bleach or even strong vinegar. It helps clear out chemical smells and whisks away any mold spores you kick up during cleaning.
Next, clear the deck. Get all the shampoo bottles, soap bars, razors, and anything else out of the shower. This gives you a clear shot at every inch of caulk and stops cleaners from splashing onto your stuff. It’s also a good idea to make sure the caulk is bone dry before you start; this helps the cleaner sink in and work better.
This simple visual breaks down the safety-first workflow you need to follow.
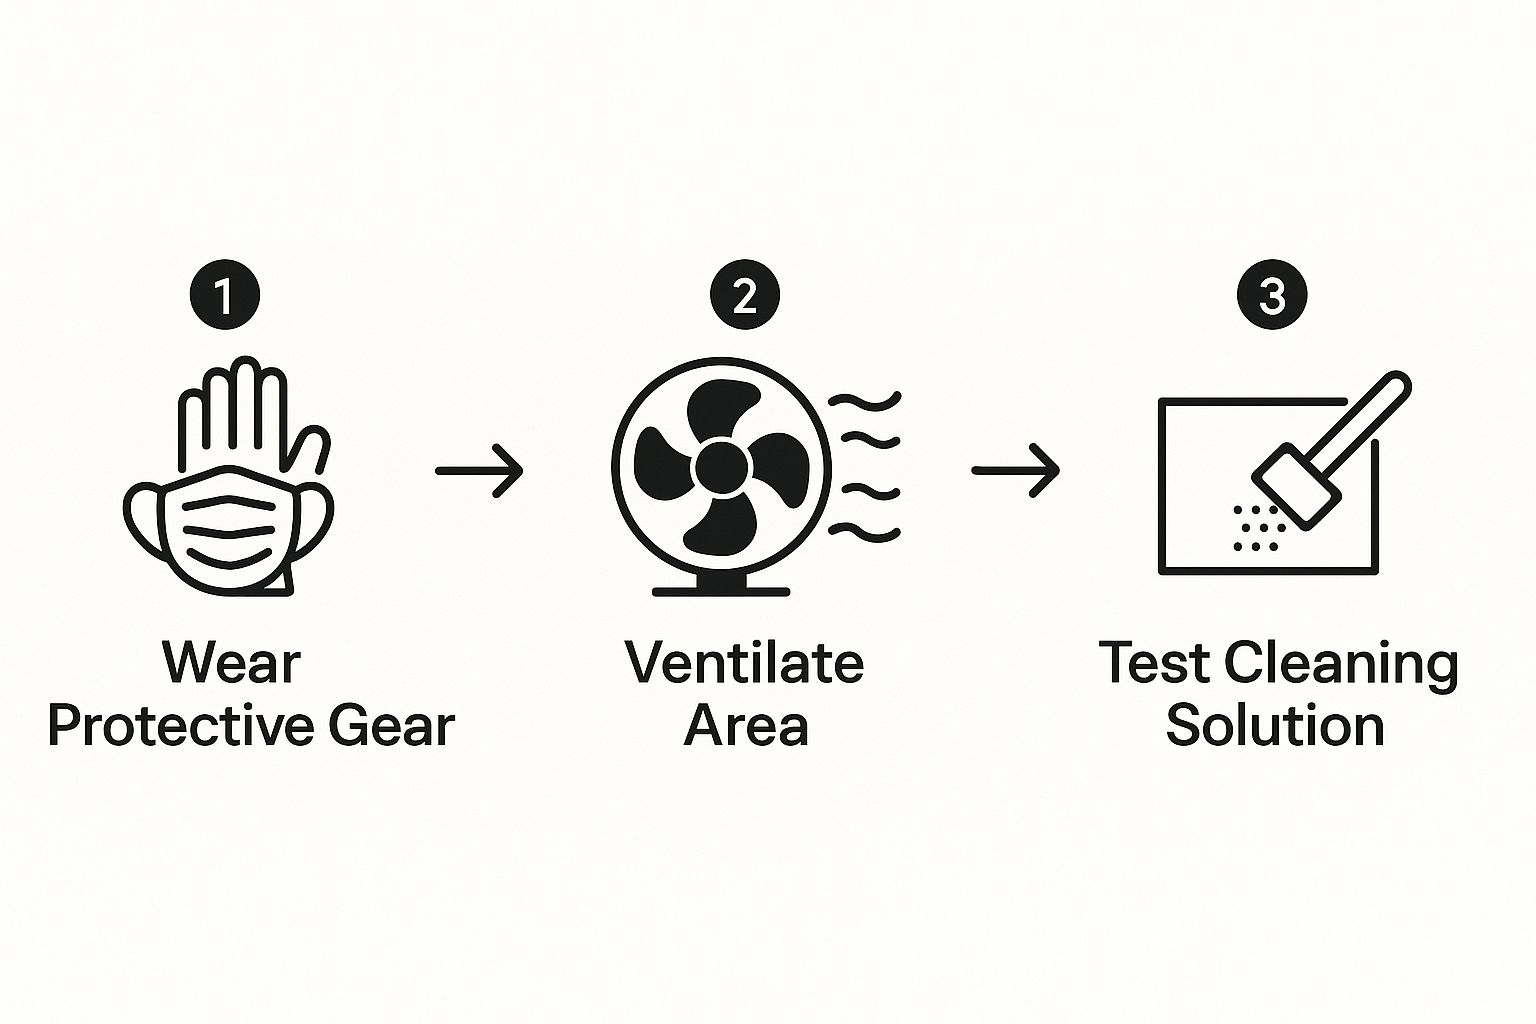
The key takeaway here is the sequence: protect yourself, get the air moving, and always test your cleaner on a small, hidden spot first. You don't want to trade a mold problem for a discoloration problem.
Applying Your Cleaner for Maximum Impact
Now that your space is prepped, you can apply your cleaning solution. The real goal here is to maximize how long the cleaner stays in contact with the mold. This gives the active ingredients time to soak into the caulk and kill the mold deep down. A quick spray-and-wipe just won't cut it for anything more than light surface mildew.
For liquid cleaners like a bleach-and-water mix or straight vinegar, a spray bottle is perfect for getting a good, even coat. Make sure you completely saturate the moldy caulk lines.
Pro Tip: For those deep, stubborn stains that laugh at a simple spray, cotton coils or even rolled-up paper towels are a secret weapon. Soak them in your cleaner (bleach is fantastic for this), press them right against the moldy caulk, and just leave them overnight. This technique holds the cleaner directly on the mold for hours, letting it work its magic without drying out.
How long you let the cleaner sit is everything.
- For light mildew: A 30-60 minute soak will usually do the trick.
- For serious mold: You’ll want to let the cleaner sit for several hours. As mentioned above, going overnight is often the best bet for the toughest jobs.
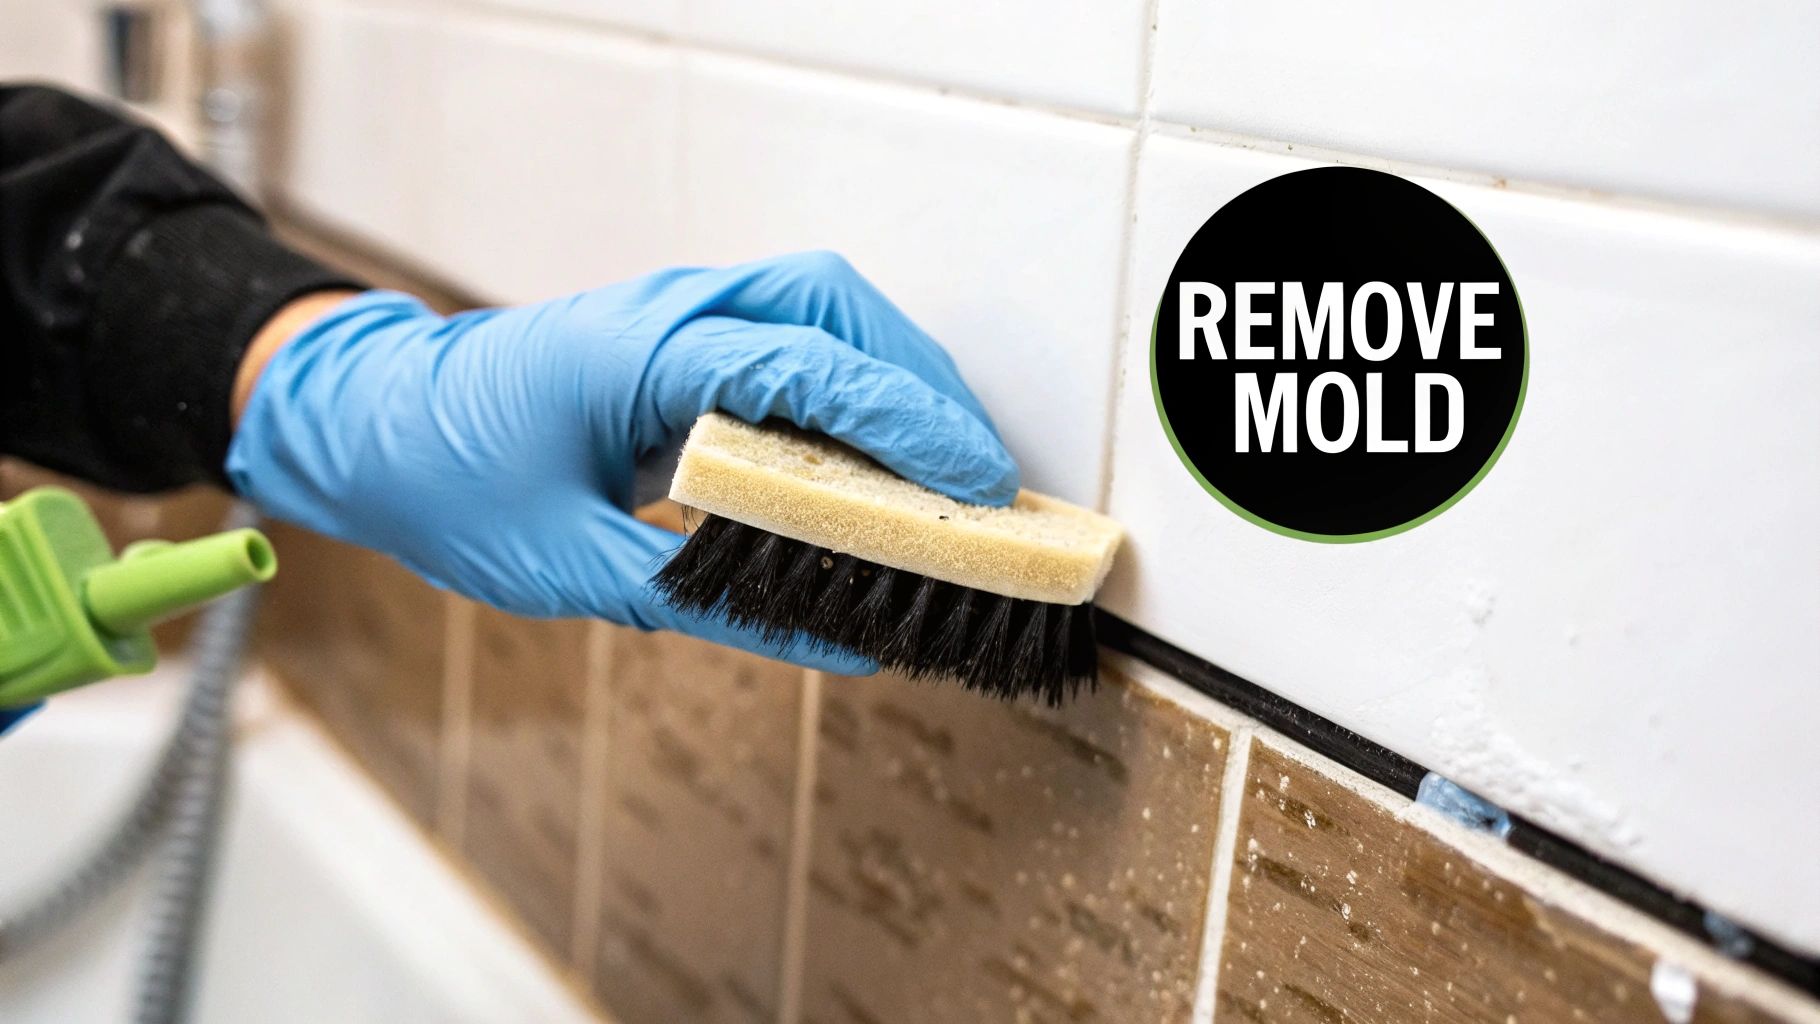
The Final Scrub and Rinse
After the solution has had plenty of time to work, you're ready for the final push. Grab a small, stiff-bristled brush—an old toothbrush is perfect for this—and scrub the caulk lines. The scrubbing action lifts the now-dead mold and any lingering stains right off the surface. If you're facing a really tough situation, our guide on how to get black mold out of your shower dives into more advanced techniques.
Once you’ve scrubbed everything loose, give the whole area a thorough rinse with cool water. Turn on the showerhead and wash all the cleaner and moldy gunk down the drain.
Last step: dry the caulk completely with a clean cloth or a microfiber towel. Getting rid of every last drop of moisture is essential if you want to stop the mold from coming right back. Let the shower air out for a few more hours before you use it again.
When to Stop Scrubbing and Start Replacing Caulk
Sometimes, no matter how much elbow grease you put in or what miracle cleaner you try, those ugly mold stains in your shower caulk just refuse to go away. It’s frustrating, but it’s also a clear sign the problem is more than skin deep. The mold has worked its way into the sealant, not just on top of it.
If your caulk is visibly cracked, peeling away from the tile, or has gone hard and brittle, cleaning is officially off the table. At this point, the caulk has failed. It's no longer flexible and has lost its watertight seal, creating tiny pockets where moisture gets trapped. That’s a perfect breeding ground for mold to flourish, completely protected from your sponge and sprays.
Identifying Caulk That Needs Replacement
Knowing when you're fighting a losing battle will save you a ton of time and effort. Sometimes a fresh start is the only real solution.
You’ll know it’s time to remove mold from shower caulk for good and replace it when you spot these issues:
- Stubborn Stains: The black or pinkish marks won’t fade, even after a serious cleaning session with bleach or a potent mold killer.
- Cracked or Brittle Texture: The caulk line looks dry and has little splits or cracks running along it. It has zero pliability left.
- Peeling Edges: You can see obvious gaps where the caulk is pulling away from the shower wall or tub.
- Soft or Gummy Spots: In some areas, the caulk might feel mushy or sticky. This is a bad sign—it means the material has broken down and is trapping moisture behind it.
Mold in caulk only gets worse as the material ages, which is typically around the five-year mark in a frequently used shower. Old caulk becomes more porous and damaged, creating the perfect hideouts for mold colonies. Home maintenance experts agree that timely replacement is key to preventing mold from becoming a recurring nightmare.
Why You Should Never Caulk Over Old Caulk
I see this all the time, and I get the temptation. It seems so much easier to just run a clean new bead of caulk right over the old, discolored line. Don't do it. This is one of the biggest DIY mistakes you can make, and it will only compound the problem.
When you trap old, moldy caulk under a new layer, you’re essentially creating a sealed, dark, damp terrarium for that mold to thrive in.
Covering up moldy caulk is like putting a bandage on an infected wound. It hides the mess for a little while, but the infection underneath just spreads and eventually destroys the new sealant from the inside out.
For a solution that actually lasts, you have to get all the old stuff out. Scrape it, dig it, and clean the surface thoroughly. This ensures your new sealant can bond properly to a clean, dry surface, giving you a truly waterproof and mold-resistant barrier.
When you're ready to recaulk, make sure you grab a 100% silicone sealant specifically made for kitchens and baths. Look for one that actively advertises mold-resistant properties—it’s your best defense against having to do this job all over again in a few years.
Keeping Mold From Coming Back
It feels great to finally scrub that mold off your shower caulk, but the real win is making sure it never comes back. The good news is that prevention isn't about another round of intense scrubbing or harsh chemicals. It’s all about a few small shifts in your daily habits.
The mission is simple: turn your shower from a mold paradise into a place where it just can't grow.
The entire strategy boils down to moisture control. Mold needs water to thrive, so your number one job is to get that shower as dry as possible, as fast as possible, after every use. It might sound like a hassle, but we're talking about a minute or two that makes all the difference.
Building Your Daily Prevention Routine
The most bulletproof way to keep your caulk looking brand new is to build a simple post-shower checklist. These little actions completely disrupt the damp, humid conditions mold needs to get a foothold.
- Run That Fan: Your bathroom exhaust fan is your best friend in the fight against mold. Flip it on before you step into the shower and let it run for at least 20-30 minutes after you’re done. This pulls all that steamy air right out of the room.
- Squeegee Everything: Grab a cheap shower squeegee and make it a non-negotiable habit. A quick wipe-down of the glass and walls gets rid of the water droplets that would otherwise evaporate and spike the room's humidity.
- Leave the Door Open: Trapping damp air inside the shower is an open invitation for mold. Once you're out, leave the shower door or curtain open to let the air circulate and speed up drying.
The secret to a permanently mold-free shower isn't one huge cleaning blitz—it's the small, consistent things you do every single day. Think of it like brushing your teeth; a little daily maintenance prevents a much bigger, more painful problem down the line.
Proactive Weekly Maintenance
On top of your daily routine, a quick weekly spray-down can stop mold spores before they even think about settling in. You don’t need anything harsh for this. Just mix equal parts white vinegar and water in a spray bottle.
Once a week, give the caulk lines a light mist and just let it air dry. The vinegar’s acidity creates a surface that mold absolutely hates.
This kind of proactive approach is becoming more common, fueling a growing market for mold remediation. The global market for mold cleaning services and products, including those to remove mold from shower caulk, was valued around USD 163 million in 2025 and is expected to keep growing as people become more aware of mold-related health risks.
For an even deeper dive into bathroom-specific strategies, check out our guide on how to prevent bathroom mold.
Sometimes, mold problems go beyond the shower. If you’re noticing musty smells or seeing spots near your HVAC system, it could be a sign of a bigger issue. For those whole-home concerns, you can find proven solutions for stopping mold in your home. By combining smart daily habits with weekly prevention, you can finally win the war against shower mold.
Common Questions About Shower Caulk Mold
Even after you've scrubbed everything clean, it's natural to have a few questions. Getting a handle on how mold works, the health risks, and which cleaners actually get the job done gives you the confidence to keep your bathroom mold-free for good.
Let's clear the air on some of the most common concerns we hear from homeowners.
Is That Black Stuff in My Shower Dangerous?
This is usually the first question people ask. While the everyday mold you find on your shower caulk isn't the infamous toxic black mold (Stachybotrys chartarum), that doesn't mean it's harmless.
For people with allergies, asthma, or other sensitivities, any mold exposure can be a problem. It can easily trigger coughing, sneezing, and general respiratory irritation. It's always best to get rid of it.
Natural vs. Chemical: Which Cleaner Wins?
It’s the classic showdown: can simple white vinegar really stand up to the whitening power of bleach? The honest answer is, it depends on what you're trying to do.
Vinegar is fantastic at killing mold spores at the root because it’s acidic, which makes it a secret weapon for preventing regrowth. The downside? It won't do much for those dark, ugly stains that have already set in.
Bleach, on the other hand, is a master at obliterating stains and killing surface mold. But it often doesn't sink deep enough into porous caulk to kill the roots. For a really stubborn mold problem, your best bet is often a one-two punch: use bleach to get rid of the stains, then follow up with vinegar to handle the deep-down problem.
The most effective strategy isn't about picking one over the other—it's about using them for what they're good at. Bleach handles the cosmetic issue, while vinegar tackles the root cause to remove mold from shower caulk for the long haul.
How Quickly Does Mold Come Back?
You just spent your Saturday morning scrubbing, and the thought of seeing those black specks again is infuriating. So, how fast can mold return? Under the right conditions—think warmth, lingering moisture, and a food source like soap scum—mold can start growing back in as little as 24 to 48 hours.
This is exactly why your post-shower routine is so important. If you leave the bathroom door shut and the shower damp, you're rolling out the welcome mat for mold.
But if you make a habit of turning on the fan, wiping down wet surfaces, and letting things air out, you can go months—or even years—without another major mold battle. A little prevention every day is so much easier than a deep clean every month. The fight isn't over when you put the scrub brush away; it's won with those small daily habits.
Battling shower mold can feel like a never-ending cycle. If you're ready to hand the job over to the pros, Custom Maids is here to help. Our experienced team can get your bathroom back to a sparkling, healthy clean. Get a free consultation today!