
To get rid of soap scum for good, you need a simple solution that can cut through both the soap residue and the hard water minerals clinging to your shower. I've found that the most effective methods don't require expensive specialty products. Instead, common household items like vinegar and dish soap or a simple baking soda paste work wonders to break down that stubborn, chalky film on glass, tile, or fiberglass.
Why Soap Scum Builds Up and How to Beat It
That frustrating, milky film clinging to your shower surfaces is more than just dirt—it’s a chemical reaction happening right before your eyes. Soap scum forms when the fatty acids and talc in your bar soap mix with minerals like calcium and magnesium, which are common in hard water.
This reaction creates a sticky, insoluble substance that stubbornly adheres to every surface it touches. Think of it this way: your soap is designed to grab onto dirt and oil, but when hard water is in the mix, it grabs onto those minerals, too. The result is that unsightly residue left behind long after the water has dried.
The Two Main Culprits
Understanding what causes this buildup is the first step toward winning the battle. In my experience, it almost always comes down to two key factors.
- Your Soap Choice: Traditional bar soaps are the biggest offenders. They're loaded with talc and fatty acids that are highly reactive with the minerals in your water.
- Your Water Type: If you live in an area with hard water, you have a much higher concentration of dissolved minerals, which dramatically speeds up soap scum formation.
This isn't just an eyesore; that buildup can harbor bacteria and even clog your drains over time. It's a huge issue for homeowners everywhere. In fact, the global market for drain cleaners and related solutions has reached USD 2.18 billion. This figure really highlights how common—and frustrating—the problem is. You can read more about the growing cleaning solutions market to see just how widespread this issue is.
Tackling soap scum isn't about scrubbing harder; it's about using the right ingredients to dissolve the chemical bond. An acidic cleaner like vinegar breaks down the mineral deposits (the 'scum'), while a surfactant like dish soap lifts away the soap residue and body oils.
Key Factors Contributing to Soap Scum Buildup
To really pinpoint what's happening in your shower, it helps to break down the most common causes and how much they contribute. This will help you adjust your cleaning strategy for the best results.
| Contributing Factor | Impact Level | Explanation |
|---|---|---|
| Hard Water | High | High concentrations of calcium and magnesium directly react with soap to form insoluble scum. This is the primary catalyst for significant buildup. |
| Bar Soap Usage | High | Contains talc and fatty acids that are the key ingredients in the chemical reaction creating soap scum. |
| Infrequent Cleaning | Medium | Allows layers of soap scum to build up, making it much harder to remove over time. Regular maintenance prevents the scum from hardening on surfaces. |
| Poor Ventilation | Low | Slows down the drying process, giving water more time to evaporate and leave mineral deposits behind, which contributes to the overall buildup. |
By identifying whether your main issue is hard water, the type of soap you use, or your cleaning frequency, you can create a targeted plan that stops soap scum before it even starts.
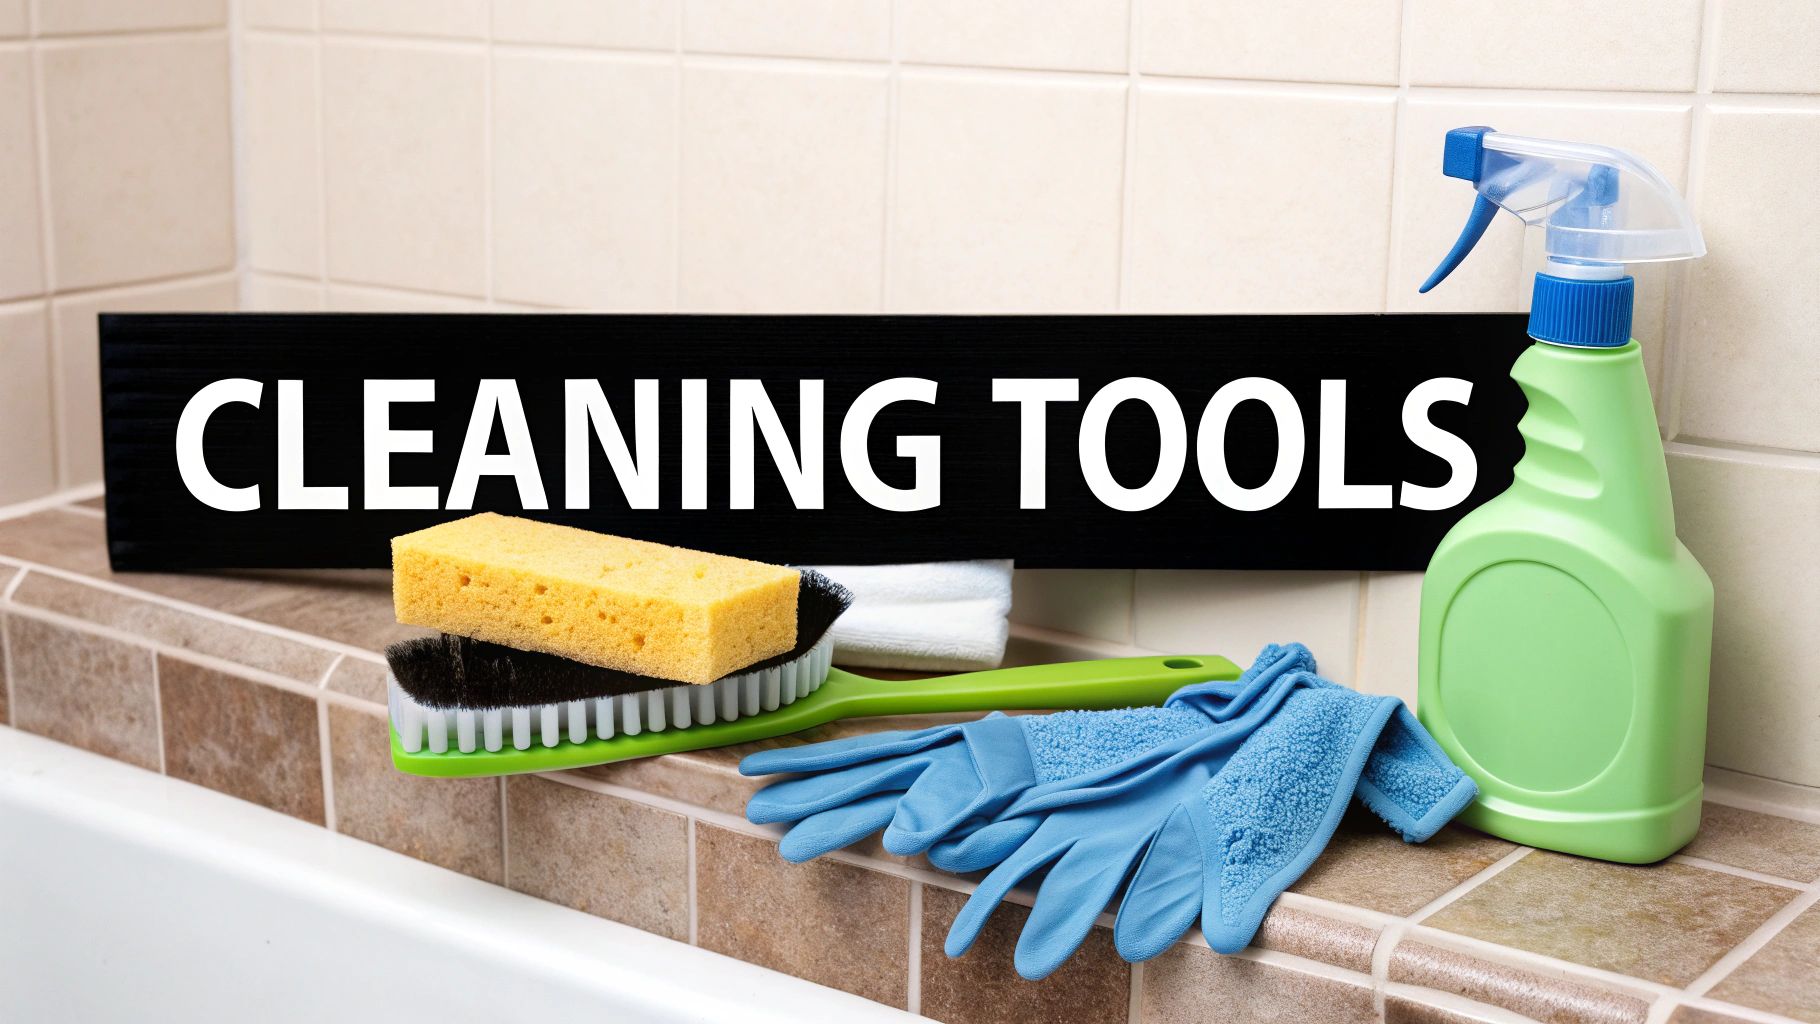
Powerful DIY Soap Scum Removers from Your Pantry
Before you reach for an aggressive commercial cleaner, take a peek inside your kitchen pantry. You might be surprised to find some of the most effective soap scum fighters are already sitting on your shelves, ready to be mixed into powerful, low-cost solutions.
You really don’t need harsh chemicals to get a sparkling clean shower. Everyday household staples like white vinegar and baking soda are fantastic at dissolving the mineral deposits and soap residue that create that stubborn, filmy mess. These DIY methods work incredibly well and give you total control over the ingredients you’re using in your home.
This shift toward gentler, homemade cleaners isn’t just a niche trend. The global market for natural household cleaners was valued at USD 6.97 billion in 2024 and is growing fast, all thanks to people looking for safer alternatives. You can dig deeper into this consumer shift toward eco-friendly cleaning on Grandviewresearch.com.
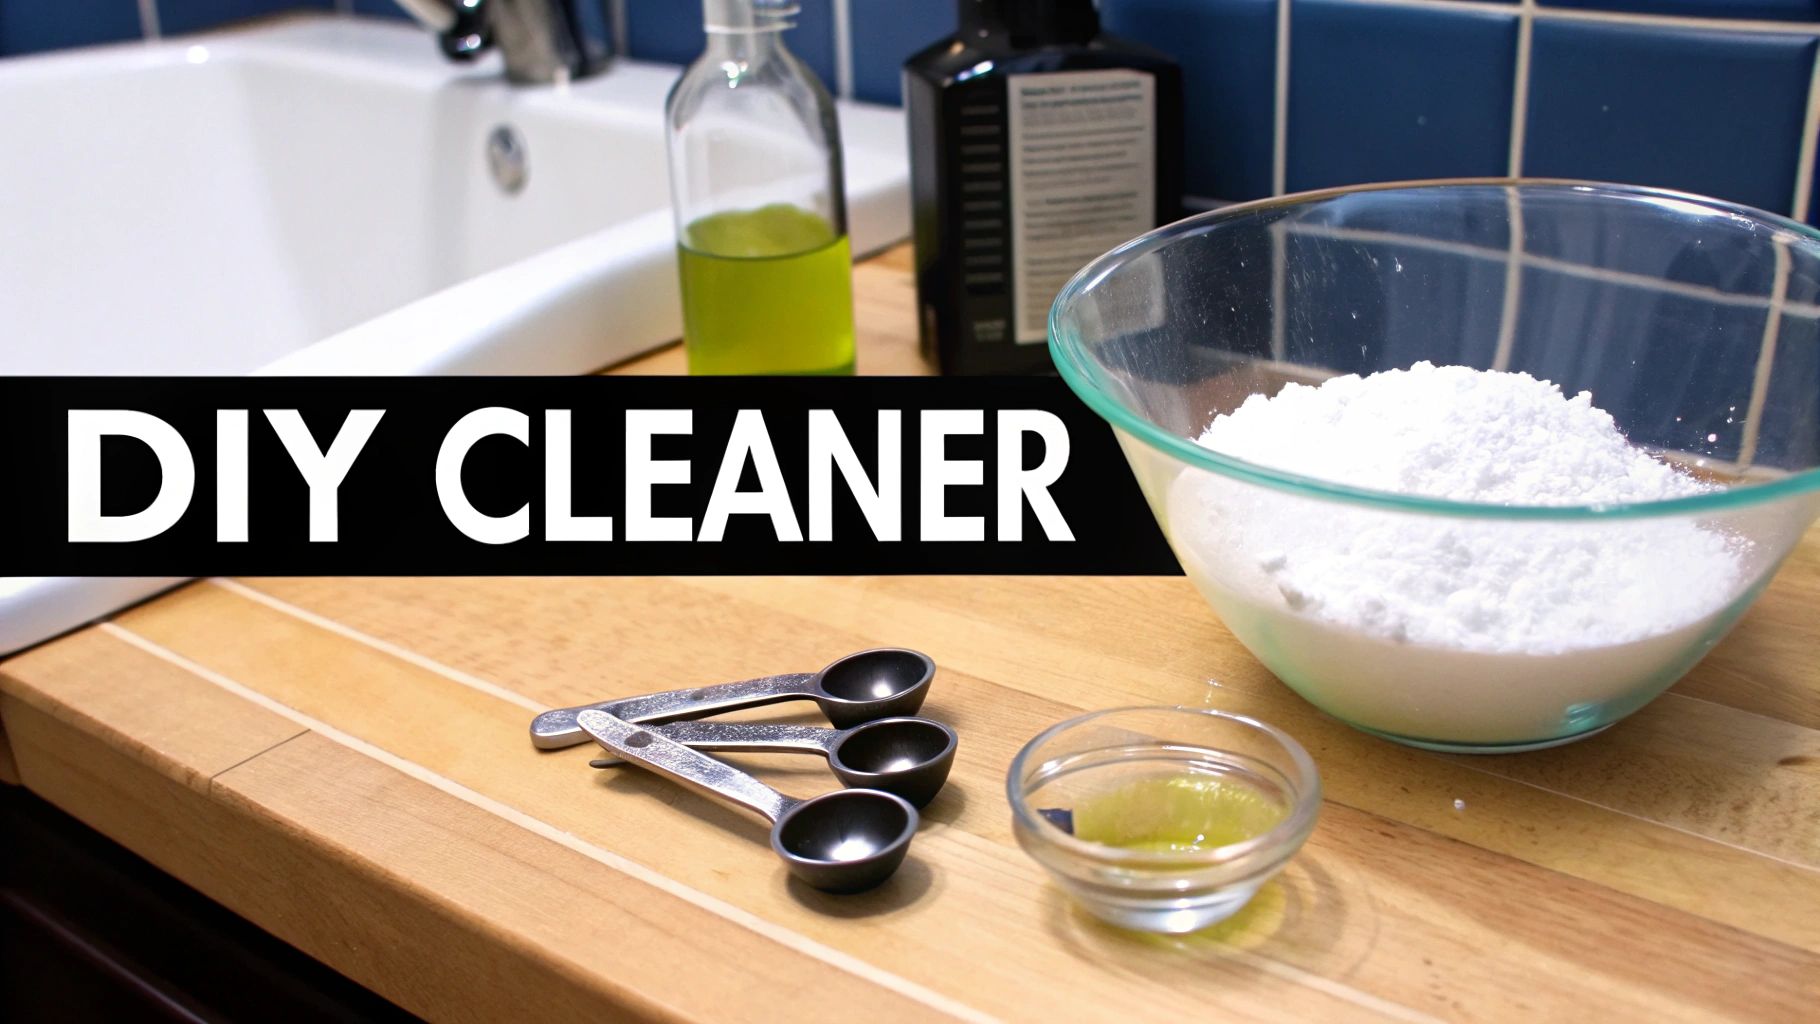
The Dynamic Duo: Vinegar and Dish Soap
One of the most reliable DIY soap scum removers I've ever used is a simple 50/50 mix of white vinegar and dish soap. The magic is in how these two ingredients work together to tackle different parts of the problem.
- White Vinegar: Its acetic acid is a rockstar at breaking down the hard water minerals—calcium and magnesium—that form the backbone of soap scum.
- Dish Soap: A good quality dish soap acts as a surfactant, lifting away the greasy soap residue and body oils that bind everything together.
To mix it up, gently warm one cup of white vinegar in the microwave (warming it helps it dissolve minerals faster) and pour it into a spray bottle. Add one cup of dish soap, cap it, and slowly tilt the bottle back and forth to combine. Just be careful not to shake it, or you'll end up with a bottle full of suds.
Spray this solution generously all over your shower glass, tile, and fixtures, starting from the top and letting it run down. Let it sit for at least 15-30 minutes so the ingredients can get to work. If you're dealing with serious buildup, you might need to leave it on a bit longer.
The Gritty Power of a Baking Soda Paste
While the vinegar spray is great for everyday grime, sometimes you run into thick, caked-on layers of soap scum that need a little more elbow grease. This is where a baking soda paste is your best friend. Baking soda is a mild abrasive that provides just enough scrubbing power to dislodge stubborn gunk without scratching most surfaces.
Making the paste couldn't be simpler. Just mix about a half-cup of baking soda with enough dish soap or water to form a thick consistency, almost like cake frosting.
Pro Tip: Apply this paste directly onto the problem areas with a non-scratch sponge. Scrub in gentle, circular motions, paying extra attention to the spots with the heaviest buildup. Let the paste sit for about 15 minutes before rinsing everything thoroughly with warm water.
I find this method works especially well for fiberglass and acrylic showers, where you have to be careful not to use anything too abrasive. It's always a good idea to test the paste on a small, hidden spot first—especially on delicate surfaces or glass—to make sure it doesn’t cause any dulling or scratching. Finish up with a final wipe-down using a microfiber cloth, and your shower will be left shining.
Choosing The Right Commercial Soap Scum Cleaner
Sometimes, that homemade vinegar spray just isn’t going to cut it. When you’re up against years of thick, stubborn soap scum, turning to a commercial cleaner is often the fastest way to get your shower sparkling again. But walking down the cleaning aisle can be overwhelming—sprays, foams, gels... where do you even start?
The secret is to stop looking at the brand names and start looking at the ingredients. Don't just grab the first bottle you see. The most powerful commercial cleaners use specific chelating agents or acids to dissolve the mineral and soap cocktail that creates that filmy mess in the first place.
What To Look For On The Label
To get the job done right, you need to know which ingredients actually work. Here are the power players to look for on the back of the bottle:
- Acids (Glycolic, Lactic, Sulfamic): These are the heavy hitters. They work by chemically breaking down the calcium and magnesium deposits that act like glue, holding the soap scum together.
- Chelating Agents (like EDTA): Think of these as magnets for minerals. They grab onto the ions in hard water, stopping them from reacting with your soap to form scum.
- Surfactants: These are the lifters. They break the surface tension, allowing the cleaner to get underneath the grime and wash away the greasy, oily components of the scum.
The popularity of bar soap is a big reason so many of us fight this battle. The global bar soap market was valued at a whopping USD 30.16 billion in 2023 and is expected to keep growing. While great for your skin, the compounds in many bar soaps are the main culprits behind that cloudy film when they mix with hard water minerals.
Expert Insight: Foaming cleaners are your best friend for vertical surfaces like shower walls and glass doors. They cling instead of dripping, giving the active ingredients more time to work their magic. For thick, caked-on patches on the shower floor or a tub ledge, a gel formula gives you more targeted power.
Comparison of Top Commercial Soap Scum Removers
With so many products on the shelf, it can be tough to decide which one is right for your specific needs. This table breaks down a few popular options to help you choose the best tool for the job.
| Product Type | Best For (Surface) | Key Active Ingredient | Pros | Cons |
|---|---|---|---|---|
| Foaming Spray | Glass doors, tile walls | Lactic Acid, Surfactants | Clings to vertical surfaces, great coverage | Can have strong fumes, may need ventilation |
| Liquid Spray | Fiberglass, acrylic | Glycolic Acid | Fast-acting, easy to apply | Might drip down surfaces too quickly |
| Abrasive Cream | Porcelain, ceramic | Mild abrasives, Surfactants | Physically scrubs away tough buildup | Can scratch delicate surfaces like acrylic |
| Gel Cleaner | Grout lines, shower floors | Sulfamic Acid, Chelating Agents | Targets thick, concentrated scum | Slower to apply over large areas |
Each type has its place, and having the right one on hand can make all the difference between a quick wipe-down and a full-on scrubbing marathon.
This chart shows just how much more effective a targeted commercial cleaner can be compared to common DIY methods for really tough jobs.
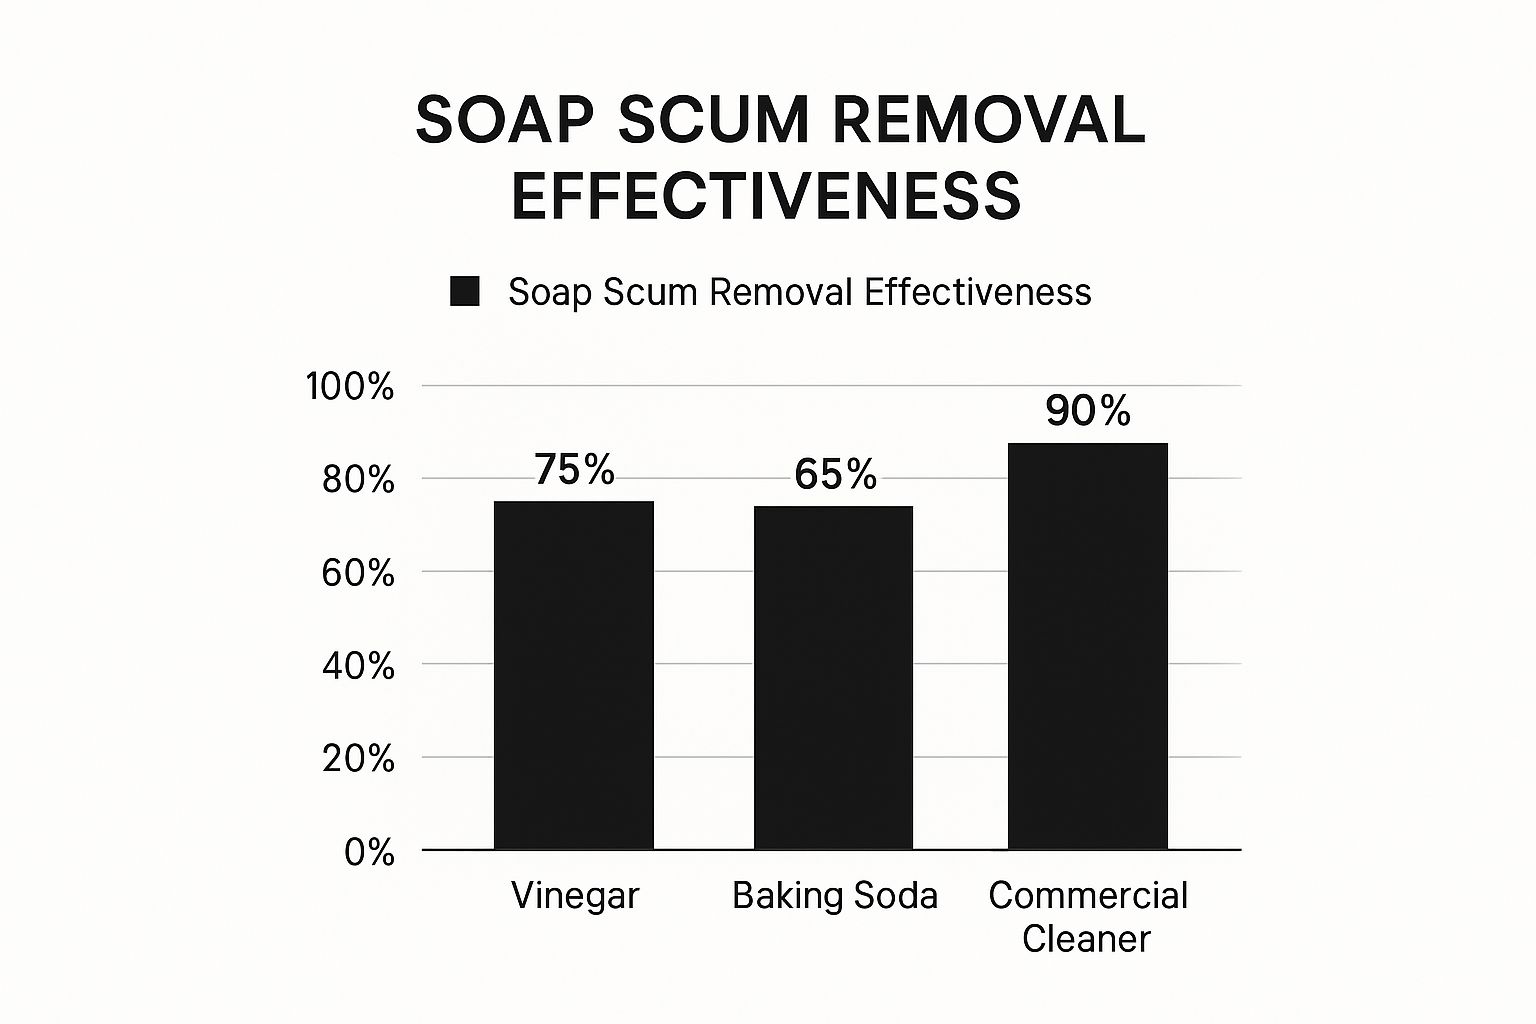
As you can see, while homemade solutions are great for maintenance, a well-formulated commercial product really brings the cleaning power when you need it most.
And if you're tackling scum in the shower, you might be seeing similar buildup in the tub. For more advice, take a look at our guide on https://custom-maids.co/blogs/news/how-to-get-rid-of-stains-in-bathtub.
To make sure you're always prepared for any cleaning challenge, it helps to have a complete household cleaning supplies checklist handy. That way, you’ll never be caught without the right tool for the job.
Tackling Different Shower Surfaces The Right Way

Grabbing the first cleaner you see under the sink is a recipe for disaster. That powerful solution perfect for tough tile and grout might just permanently scratch or dull a delicate acrylic shower wall. Knowing how to remove soap scum from shower materials the correct way isn't just about getting things clean—it's about protecting your investment.
A one-size-fits-all approach simply doesn’t cut it here. Each surface, from sparkling glass doors to textured fiberglass stalls, has its own rules for what works and what will cause damage. Using the wrong tool or chemical can lead to hazy finishes, ugly scratches, or even permanent discoloration.
Getting Streak-Free Glass Shower Doors
Glass is the ultimate tattletale—it shows every single streak, water spot, and of course, soap scum. The mission is to dissolve that chalky film without leaving a cloudy mess behind. Your best friend for this task is a mild acid, which effortlessly cuts through the mineral deposits in soap scum.
For day-to-day upkeep, a simple spray bottle filled with equal parts white vinegar and water is often all you need. If you're dealing with a more stubborn, greasy buildup, add a few drops of dish soap to the mix to help lift it away.
The real secret to a flawless finish is the final step. After cleaning and rinsing, grab a quality squeegee and wipe away every last drop of water. This one habit is the single most effective way to prevent future soap scum and hard water spots.
For a deeper dive into this common frustration, check out these expert glass shower door cleaning tips for consistently brilliant results.
Cleaning Tile and Grout Without Damage
While most tile is pretty tough, the real battlefield is the porous grout lines where soap scum loves to camp out and harden. You can use stronger cleaners on tile, but you still need to avoid anything so abrasive that it scratches the glaze.
A simple paste made from baking soda is your go-to weapon here. It’s just abrasive enough to scrub the gunk out of grout without hurting the surrounding tile.
- Make the Paste: Mix baking soda with a little water or dish soap until it has a thick, spreadable consistency, like toothpaste.
- Apply and Scrub: Dip an old toothbrush or a small grout brush into the paste. Work it directly into the grout lines using a circular motion.
- Let It Work: Give the paste about 15 minutes to sit and break down the grime. Then, just rinse it away thoroughly with warm water.
This targeted method gets your grout looking fresh and keeps your tile looking pristine. For more general advice on keeping your entire washroom spotless, take a look at our complete guide to [https://custom-maids.co/blogs/news/bathroom-cleaning-tips].
Gently Treating Fiberglass and Acrylic
Fiberglass and acrylic are much softer materials that scratch incredibly easily. This is where gentle but effective cleaning is non-negotiable. Abrasive powders or scouring pads will leave permanent marks, and harsh chemicals can cause these surfaces to yellow or become dull over time.
Stick to a non-abrasive liquid cleaner. The same vinegar and dish soap spray we talked about for glass works wonders here. Always pair it with a soft sponge or a microfiber cloth for cleaning. Never, ever reach for steel wool or scouring pads—they will ruin the finish instantly. If you're unsure about a cleaner, always test it on a small, hidden spot first.
How to Prevent Soap Scum from Coming Back
Getting rid of existing soap scum is one thing, but keeping it from staging a comeback is the real win. The secret isn't about scrubbing harder; it's about being smarter. A few simple, proactive habits can stop the buildup before it even gets a foothold, keeping your shower sparkling with just a tiny bit of daily effort.
The idea is to short-circuit the chemical reaction that creates soap scum in the first place. You can do this by managing moisture, rethinking your soap, and tackling the root cause—hard water. Trust me, a few small tweaks to your routine will save you hours of cleaning down the road.
Adopt Simple Daily Habits
The absolute best way to prevent soap scum is to stop it from drying and hardening on your shower surfaces. This takes less than a minute after each shower, but it pays off big time.
- Use a Squeegee: After every shower, take 30 seconds to wipe down the glass doors and tiled walls with a squeegee. This simple action removes the vast majority of water droplets and soap residue before they have a chance to dry into that chalky film. It's the single most effective trick in the book.
- Wipe Down with a Towel: No squeegee? No problem. An old towel or a microfiber cloth does the job just as well. A quick wipe-down leaves surfaces dry and dramatically cuts down the potential for new buildup.
These tiny habits stop mineral-rich water from evaporating and leaving deposits behind, which is exactly how scum gets started.
Make Smart Product Swaps
The type of soap you use can either be your best friend or your worst enemy in the fight against scum. Traditional bar soaps are the main offender because their fatty acids react aggressively with the minerals in hard water.
A simple switch can nearly eliminate the problem on its own.
Think about swapping your bar soap for a liquid body wash or shower gel. Most liquid cleansers are made with synthetic detergents instead of actual soap. These detergents are much less likely to react with hard water minerals, meaning they rinse clean without leaving that notorious scummy film behind.
Another great tool is a daily shower spray. You can find them at the store or whip up your own with a bit of vinegar and water. A light mist after you shower helps dissolve any fresh residue and keeps surfaces cleaner for longer.
Tackle the Source of the Problem
While daily habits are a game-changer, they mostly treat the symptoms. If you live in an area with particularly hard water, you're fighting an uphill battle. The ultimate long-term solution is to treat the water itself.
Installing a water softener for your whole house removes minerals like calcium and magnesium right at the source. This not only stops soap scum in your shower but also cuts down on limescale buildup in your pipes, faucets, and appliances. It’s a bigger investment upfront, but it saves countless hours of cleaning and can even extend the life of your plumbing. For anyone dealing with those stubborn mineral deposits elsewhere, our guide on how to remove hard water stains offers more targeted advice.
Tackling Your Top Soap Scum Questions
Even when you feel like you've got a handle on the cleaning process, a few nagging questions can pop up mid-scrub. Getting a straight answer can be the difference between giving up in frustration and getting that shower to sparkle. Let's clear up some of the most common questions we hear about getting rid of soap scum for good.
How Long Does It Really Take to Remove Heavy Buildup?
If you're staring down years of thick, caked-on soap scum, this isn't going to be a quick five-minute wipe-down. Your best friend in this fight is patience. A single spritz of even the most powerful cleaner just isn't going to cut through it all in one go.
For those really tough jobs, you need to think in layers. Start by applying a strong cleaner—a commercial gel or a potent vinegar solution works great—and let it sit for at least 30 to 60 minutes. This isn't just a suggestion; that dwell time is absolutely critical for the cleaner to penetrate and start dissolving those stubborn layers.
After it's had time to work, give the area a good scrub, rinse it off, and see where you're at. Don't be surprised if you need to repeat the whole process two or even three more times to fully get rid of it. The biggest mistake people make is trying to scrub it all off in one go, which almost always ends up damaging the shower surface.
Is It Ever Okay to Use Abrasive Cleaners on Glass Doors?
Let me make this simple: absolutely not. It's tempting, I know. When you're faced with tough scum on a glass door, reaching for steel wool or a scouring pad feels like the logical next step. But trust me, you'll regret it. Those tools will carve fine, permanent scratches all over the glass, ruining its clarity forever.
Instead, always reach for non-abrasive tools that are safe for glass.
- Microfiber cloths are your go-to for wiping and polishing.
- Soft sponges offer gentle friction without the risk of scratching.
- Magic erasers can be surprisingly effective on stubborn spots without damaging the glass.
- A plastic scraper is perfect for carefully lifting off thick, caked-on gunk.
The secret is to let the cleaning solution dissolve the scum, not to brute-force it off with aggressive scrubbing. The goal is a clean shower, not a scratched one.
What’s the Difference Between Soap Scum and Hard Water Stains?
People mix these two up all the time, but they're not quite the same thing. They often show up together, but knowing what you're dealing with helps you clean more effectively.
Soap scum is what you get when the fatty acids in your bar soap mix with the minerals in hard water. It creates that waxy, chalky film that feels kind of greasy or sticky.
Hard water stains, on the other hand, are pure mineral deposits—mostly calcium and magnesium—that get left behind when water evaporates. These are usually crustier, harder, and have a more crystalline look.
The good news? Acidic cleaners like vinegar work wonders on both. The acid dissolves the mineral components in each, breaking down their structure so you can simply wipe them away.
Feeling like soap scum is winning the battle? Let the professionals take over. Custom Maids has been making homes in Mid-Michigan spotless since 1982. Schedule your free consultation today and see just how easy a clean home can be.