
Alright, before you dive in and start scrubbing, a little prep work goes a long way. Think of it as setting the stage for a successful (and safe) cleaning session. Getting these few things right from the start means you won't be spreading spores around or breathing in nasty fumes. It's about doing the job right the first time.
Your Game Plan for Tackling Mildew
Before you even touch a sponge, a bit of strategy is key. A few crucial steps now will save you a world of headaches later. Our goal isn't just to wipe the surface clean but to do it safely, without letting those pesky spores find a new place to call home.
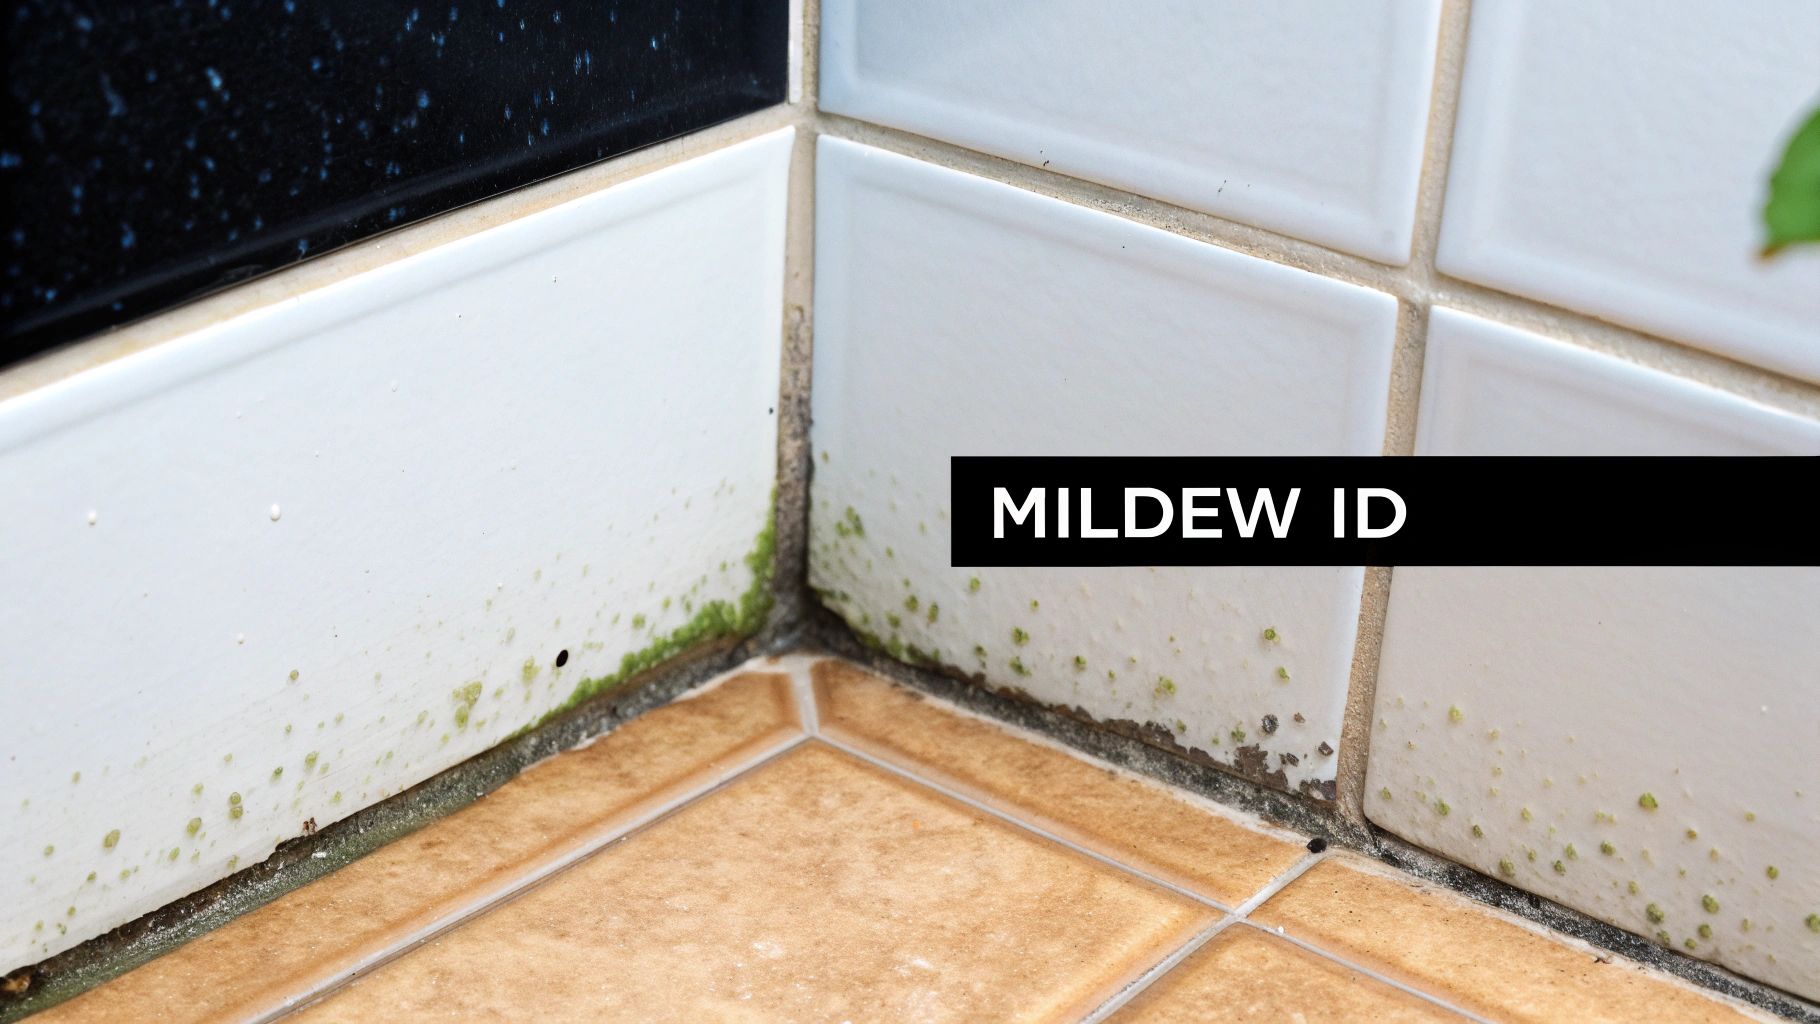
First, Confirm It's Actually Mildew
Let's make sure we're fighting the right enemy. Mildew is a type of surface mold that usually looks powdery or downy. You'll spot it as gray, white, or sometimes yellowish patches lying flat on surfaces like shower grout, window sills, or damp clothes.
Mold, on the other hand, is the bigger, badder cousin. It's often fuzzy or slimy and can be black, green, or other dark shades. The real kicker is that mold digs deep into materials like drywall or wood, which points to a much more serious moisture issue. If you're looking at a large, dark, fuzzy patch, you might have more than a simple mildew problem on your hands.
Gear Up for Safety
Working with any kind of fungi means dealing with airborne spores and cleaning chemicals. Trust me, safety is non-negotiable. Protect yourself before you start.
- Gloves: Grab a pair of waterproof gloves, like the rubber ones you use for dishes. They'll keep your hands safe from the mildew and the cleaning solutions.
- Mask: An N95 respirator mask is your best bet. It will stop you from breathing in any spores that get kicked up while you're cleaning.
- Eye Protection: A pair of goggles or safety glasses is a must to shield your eyes from any accidental splashes.
Let the Fresh Air In
Proper ventilation is your secret weapon. When you start cleaning, you're going to disturb spores and potentially create some strong fumes from your cleaners. So, open up any windows and doors nearby to get the air moving.
If you’re stuck in a small bathroom or a basement with poor airflow, bring in a box fan. Just make sure to point it outward through a doorway or window to help pull the contaminated air out of the room.
This isn't just about clearing out fumes. Good airflow helps stop the spores you're cleaning from just settling somewhere else in your house and starting a new colony. It’s a critical step in actually containing the problem.
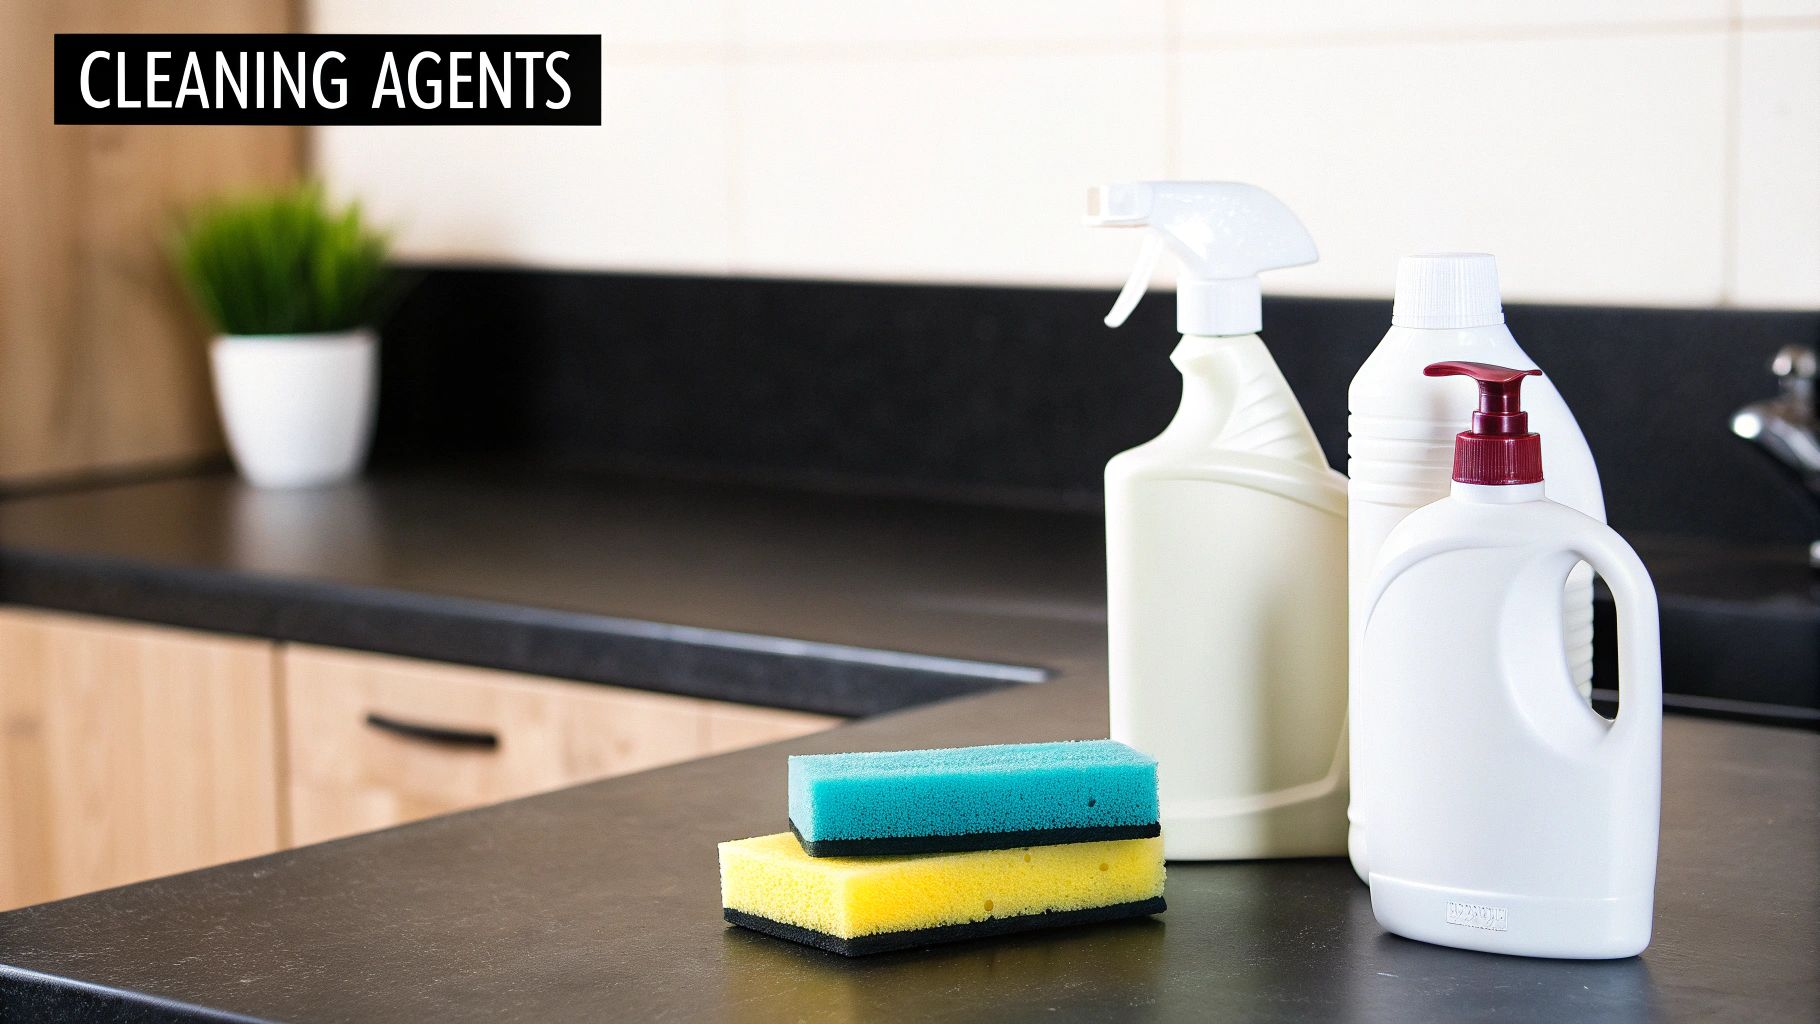
Choosing The Right Mildew Cleaning Solution
Okay, you've got your safety gear on and the windows open. Now it's time to pick your weapon. Not all mildew is created equal, so grabbing the right cleaner is key to getting the job done without accidentally bleaching your favorite bathmat.
The good news? You probably don't need to reach for the harshest chemicals right away. Many times, simple things you already have in your pantry will do the trick, especially for smaller flare-ups.
DIY vs. Commercial Cleaners
When I'm dealing with porous surfaces like wood or even drywall, my go-to is almost always a simple mix of equal parts white vinegar and water. The vinegar’s acidity is fantastic because it gets down into the surface to kill the mildew at its root, something bleach often struggles with. It's a classic for a reason.
On the other hand, for really stubborn spots on non-porous surfaces—think grimy bathroom tile grout or a shower door—a commercial mildew remover or a carefully diluted bleach solution (one cup of bleach per gallon of water) can knock it out fast. These are designed to kill surface fungi and blast away those ugly stains.
More and more people are taking this seriously. In fact, the global mildew cleaner market was valued at around USD 1.2 billion in 2024 and is expected to more than double by 2033. It’s a clear sign that homeowners are more aware of the health risks.
This image below breaks down the primary health concerns linked to mildew exposure.
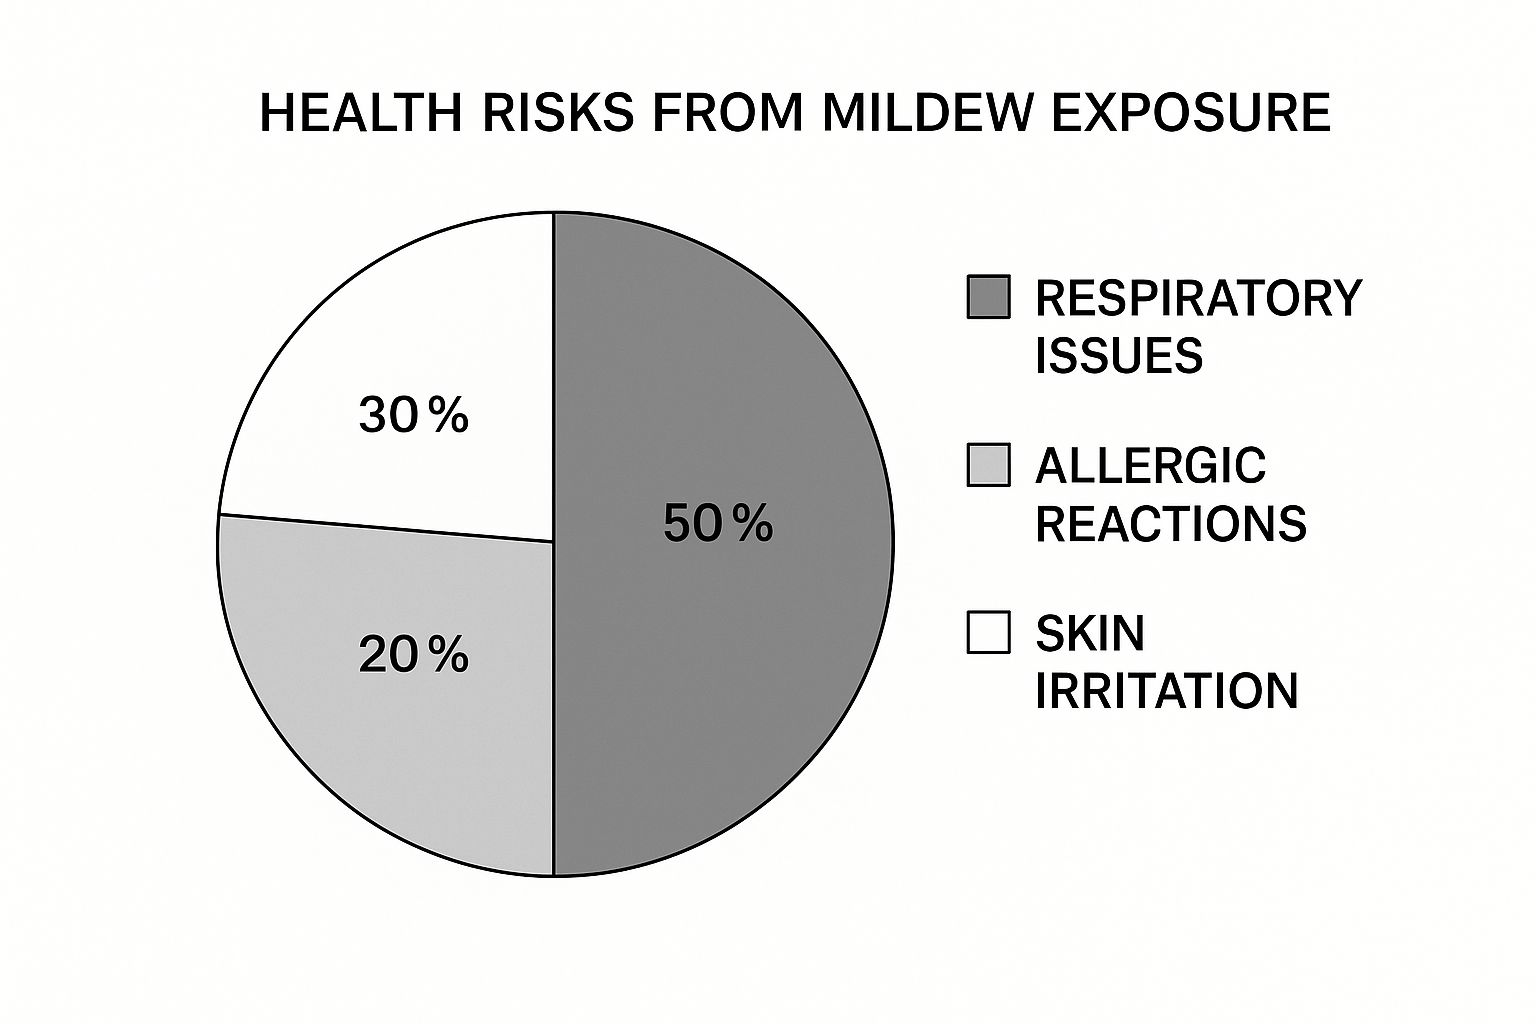
As you can see, respiratory issues are the biggest concern, which really drives home why it's so important to remove mildew properly.
Comparing Your Mildew Cleaning Options
To help you decide what's best for your situation, I've put together a quick comparison of the most common options. Think of it as a cheat sheet for tackling mildew on different surfaces around your home.
| Cleaning Solution | Best For (Surface Type) | Effectiveness Rating | Safety Notes |
|---|---|---|---|
| White Vinegar | Porous surfaces (wood, drywall), fabric, carpets | High | Safe for most surfaces, non-toxic. The smell dissipates as it dries. |
| Baking Soda Paste | Grout, textured surfaces, appliances | Moderate-High | Gentle abrasive, non-toxic. Great for scrubbing without scratching. |
| Bleach Solution | Non-porous surfaces (tile, grout, glass, concrete) | Very High | Never mix with ammonia or other cleaners. Requires excellent ventilation. Can discolor fabrics and damage surfaces. |
| Borax Solution | Wood, drywall, painted surfaces | High | Natural inhibitor that helps prevent regrowth. Keep away from children and pets. |
| Commercial Cleaner | Specific surfaces listed on the product label | Very High | Follow label directions precisely. Often contains strong chemicals requiring PPE and good ventilation. |
No single solution is perfect for every job. The trick is to match the cleaner to the surface and the severity of the problem. Always start with the gentlest effective option first.
Powerful Homemade Recipes
If you're leaning toward a DIY approach, you have some great options that go beyond just vinegar. These recipes use simple ingredients to deliver some serious cleaning power.
- Baking Soda Paste: Just mix baking soda with a little water until you get a thick paste. Slap it onto the mildew, let it sit for a bit, then give it a good scrub. The gentle grit is perfect for getting into grout lines or textured shower floors.
- Borax Solution: Mix one cup of borax into a gallon of water. This stuff is a fantastic natural fungicide. The best part? You can spray it on and just let it dry. The residue left behind actually helps stop mildew from coming back.
Here’s a pro tip I’ve learned the hard way: avoid using soap or detergent in your DIY cleaners. It sounds like a good idea, but the residue it leaves behind can become food for new mildew spores, making your problem even worse down the road.
If you're interested in more eco-friendly ways to keep your home sparkling, be sure to check out our complete guide on natural cleaning solutions and recipes. It’s full of ideas for tackling messes without harsh chemicals.
The bottom line is to pick the solution that works for your specific problem. Start gentle, and only bring out the big guns if you absolutely have to.
How to Remove Mildew from Common Household Surfaces
Mildew doesn’t play favorites. It'll happily set up shop anywhere with a bit of moisture and warmth, from the grout in your shower to the back of a forgotten wooden dresser. The trick is knowing that each surface presents a unique cleaning challenge. You've got to match your technique and cleaning solution to the material to knock out the problem without causing damage.
This isn't just about a little scrubbing, either. The demand for effective mildew removers is surging. In 2024, the global market was valued at around US$ 874 million, and it's expected to hit about US$ 1.8 billion by 2034. This jump shows just how seriously homeowners are taking mildew removal. You can dig into the full market analysis from Fact.MR for more details on that trend.
Let's get into the nitty-gritty for the most common spots where mildew loves to grow.
Tackling Mildew on Walls and Grout
Painted walls and bathroom grout are basically prime real estate for mildew. Since these surfaces are non-porous or semi-porous, you can usually take a slightly more assertive approach and get great results safely.
A diluted bleach solution—think one part bleach to ten parts water—or a good commercial mildew cleaner is often your best bet. Spray the solution on, let it sit for about 15 minutes to do its work, and then get in there with a stiff-bristled brush. For tight grout lines, an old toothbrush is an absolute lifesaver.
After scrubbing, rinse the surface completely with clean water and dry it thoroughly with a towel or fan. This last step is non-negotiable. Leaving any moisture behind is like rolling out the welcome mat for mildew to come right back. For more strategies on keeping damp areas clean, our guide on essential bathroom cleaning tips has some great insights.
Cleaning Mildew from Wood Surfaces
Wood is a different story; it needs a much gentler touch. Harsh cleaners like bleach can strip the finish and discolor the wood, so it’s smart to stick with milder, natural options. My personal go-to is a simple mix of equal parts white vinegar and water.
Lightly dampen a soft cloth with the vinegar solution—you want it damp, not soaking wet—and gently wipe the mildew off, always following the grain of the wood. If you run into a stubborn spot, you can use the same solution but scrub lightly with a soft-bristled brush.
After cleaning, it's absolutely vital to dry the wood immediately and completely with a clean, dry cloth. I even like to place a fan nearby to circulate air and make sure not a single trace of moisture is left. I once cleaned out an old hutch and tucked a few cedar rings inside afterward—it helped absorb any leftover dampness and left a really pleasant scent.
Removing Mildew from Fabrics and Upholstery
Finding mildew on a shower curtain, your clothes, or upholstered furniture is frustrating, but it's usually fixable. The key is to act fast and use the right method for the fabric.
- Machine-Washable Fabrics: For things like shower curtains or clothing, start by pre-treating the mildew stain with a mix of lemon juice and salt. Let it sit in the sun for a few hours if you can—the sun's UV rays are a natural mildew killer. After that, wash the item in the hottest water the fabric can safely handle, adding a cup of white vinegar or borax to the wash cycle.
- Upholstery: When it comes to furniture, mix a few drops of a mild, non-ammonia detergent with water to create some suds. Use a sponge to apply only the suds to the mildew, scrubbing gently. Wipe the area clean with a damp cloth, then blot it dry with a towel. Make sure it's completely dry before anyone sits on it again.
Understanding how to treat different materials is crucial. For instance, knowing how to safely and effectively clean natural stone surfaces can teach you principles you can apply elsewhere. Material-specific care is what prevents damage and ensures you get a truly deep clean.
Advanced Tactics for Stubborn Mildew
So you’ve hit the mildew with vinegar, and it’s still staring back at you. When the easy stuff doesn't work, it’s time to bring out the big guns. These are the strategies the pros use when facing down a truly stubborn mildew problem.
First, you have to understand that what you see is just the tip of the iceberg. The real fight is against the hidden moisture and the spores you can't even see.
Before you grab a single cleaning bottle, pull out a HEPA-filtered vacuum. This one step is a total game-changer. Gently vacuum the dry mildewed area before you start scrubbing. This sucks up all the loose spores and stops them from going airborne and setting up shop somewhere else in your house. It's a simple move that contains the problem from the get-go.
Finding the Source of the Problem
Mildew that keeps coming back is a sure sign of a bigger problem—a persistent moisture source. You can scrub until your arms give out, but if you don't find and fix that leaky pipe or condensation issue, the mildew is guaranteed to return.
This is where a little bit of tech becomes your best friend. A digital moisture meter is an absolute must-have for this kind of detective work. These little gadgets have two prongs you press into drywall or wood, giving you an instant moisture reading beneath the surface. Test the area around the mildew, then test a dry spot nearby. The difference will tell you exactly where the water is hiding, letting you trace it back to the source.
Don’t just clean the symptom—cure the disease. Hunting down that hidden leak behind a wall or under a floorboard is the only way to permanently solve a recurring mildew issue. A moisture meter turns frustrating guesswork into a precise investigation.
Choosing a Specialized Cleaner
Sometimes, your homemade vinegar solution just doesn't have the right kind of power. That’s when you need to turn to specialized products built for the tough cases.
- Enzyme Cleaners: These are your best bet for organic mildew stains on things you can't just bleach, like delicate fabrics or carpet. The enzymes literally digest the biological matter of the mildew, breaking down the stain and the odor without harsh chemicals.
- Biocides: When mildew has dug its roots deep into porous stuff like wood or drywall, you might need a biocide. These are potent fungicides designed to kill mildew at its root and stop it from growing back. Just be sure to use them with extreme caution—that means full ventilation and proper protective gear.
These advanced tactics are becoming more common thanks to better tools. Pros are now using things like moisture meters and HEPA vacuums to nail down and wipe out mildew for good. You can see more about how the industry is changing over at CuttingEdgeWindowCleaningServices.com. Adopting a professional mindset is really the secret to learning how to remove mildew permanently.
Keeping Your Home Mildew-Free for Good
Getting rid of mildew is one thing, but making sure it stays gone is the real win. Long-term prevention isn’t about marathon cleaning sessions every weekend. It's about creating simple, sustainable habits that turn your home into a no-go zone for mildew.
The strategy boils down to three key areas. The most important one? Controlling humidity. Mildew absolutely needs moisture to grow, so your main job is to keep your indoor humidity levels below 60%. A cheap hygrometer from the hardware store makes this super easy to track.
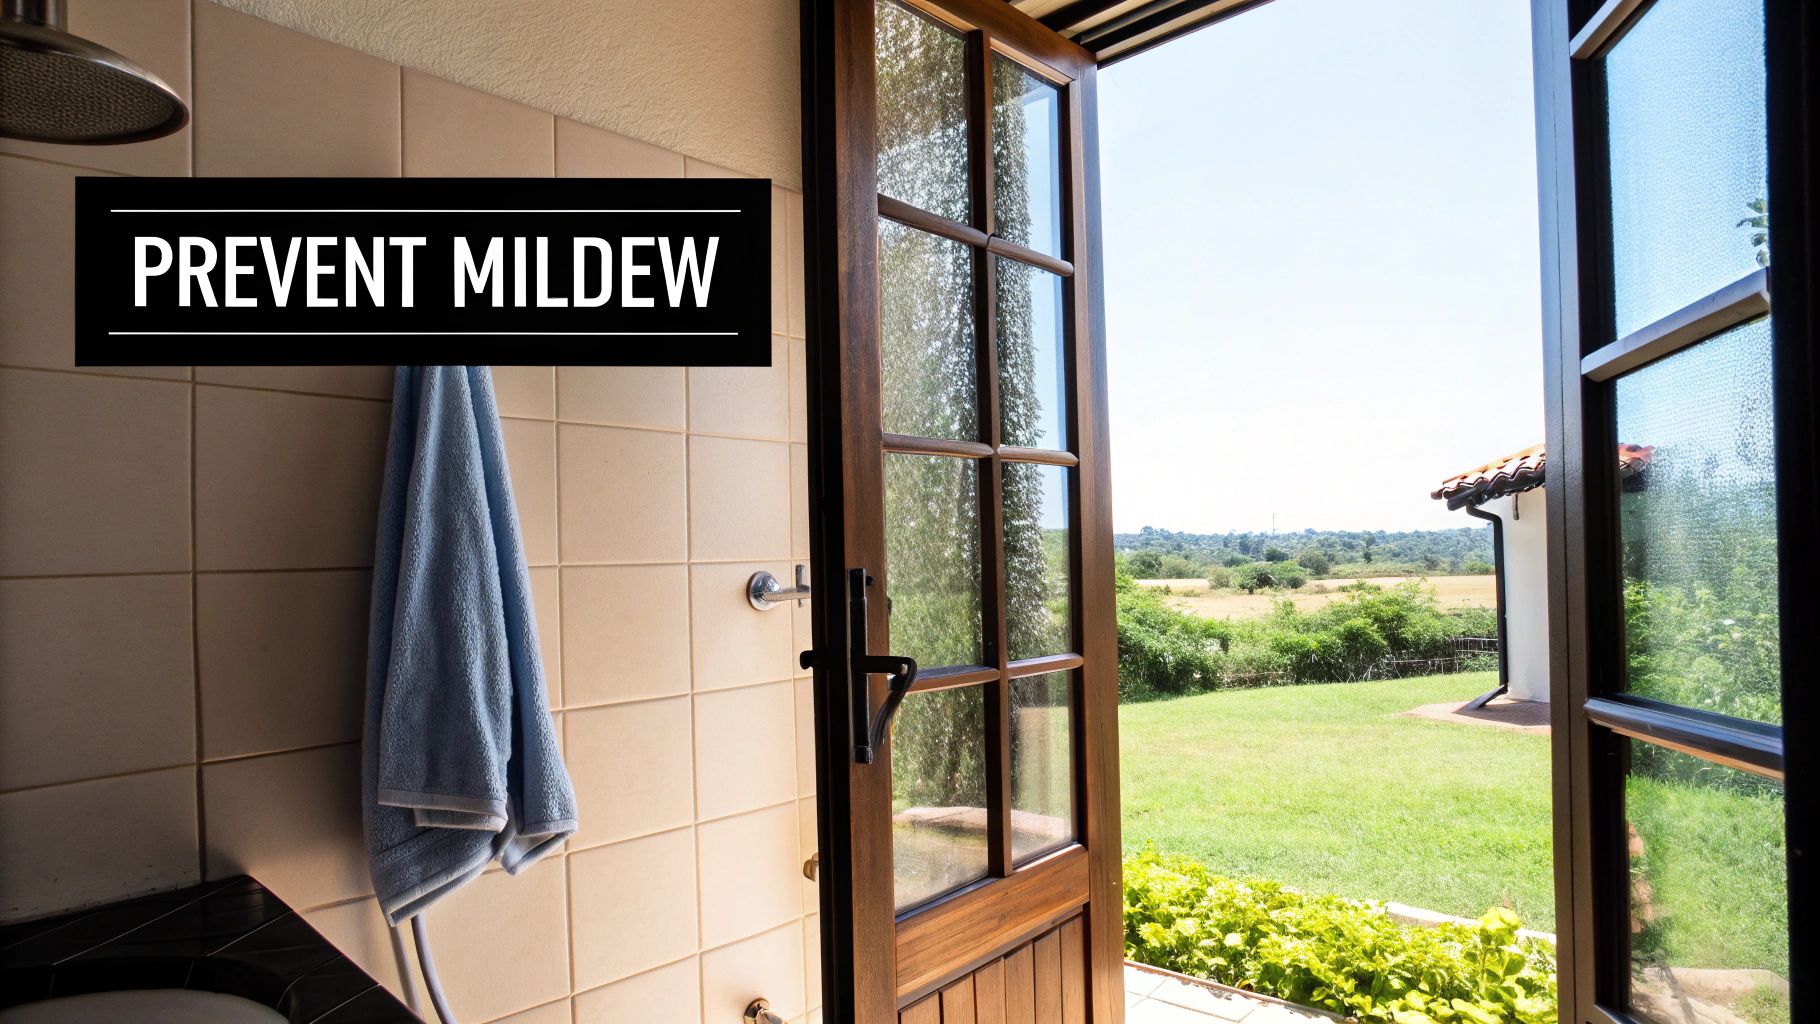
Master Your Airflow and Moisture
Your next best weapon is improving air circulation. Damp, stagnant air is basically a welcome mat for mildew spores. A few small tweaks to your daily routine can make a world of difference.
- Use Exhaust Fans Religiously: Always run the bathroom fan during a shower and leave it on for at least 20-30 minutes after you’re done. This simple step pulls all that steam and moisture out before it has a chance to settle on your walls and ceiling.
- Strategic Dehumidifier Placement: If you've got a damp basement or laundry room, stick a dehumidifier right in the middle of the room. Keeping it away from the walls helps it pull in air from all directions, making it way more effective.
- Embrace Cross-Ventilation: On dry days, crack open windows on opposite sides of your house for a few hours. This creates a natural breeze that flushes out all the stale, moist air that’s been hanging around.
Think of it this way: an environment where moisture can't linger is an environment where mildew can't grow. It’s like drying a towel. If you leave it crumpled in a corner, it gets musty. Hang it up with good airflow, and it dries fast. Your home is no different.
Proactive Maintenance and Smart Choices
Finally, a little bit of regular maintenance goes a long way in stopping moisture problems before they even begin. Remember, even a tiny, slow leak can create a massive, hidden mildew colony behind a wall or under a cabinet.
Make a habit of checking the plumbing under your sinks, around toilets, and near appliances for any signs of dripping. Look for condensation on your window seals, too—that can be a red flag for a leak or poor insulation that needs attention. For a deeper dive into moisture hotspots, check out our guide on how to prevent bathroom mold for some targeted strategies.
And next time you’re painting a bathroom or kitchen, grab a can of mildew-resistant paint. These paints are formulated with antimicrobial agents that stop mildew growth in its tracks, giving you an extra layer of defense right where you need it most. Combine that vigilance with smart product choices, and you'll win the war against mildew for good.
Common Questions About Mildew Removal
When you're dealing with a mildew problem, a lot of questions pop up. Getting the right answers is crucial for handling the job confidently and avoiding bigger headaches down the road. Let’s clear up a few of the most common uncertainties we hear from homeowners.
What Is the Difference Between Mold and Mildew?
It's easy to get these two confused, but think of mildew as a specific, less aggressive type of mold. It usually looks like a powdery or downy patch of white, gray, or yellow that sits right on top of a surface. Because it doesn't burrow deep, it's much simpler to clean up.
Other molds, on the other hand, are often fuzzy or even slimy. They show up in darker colors like green or black and can really dig into materials like drywall or wood. If you see that, you're likely looking at a bigger moisture issue that needs a more serious game plan.
Can I Just Paint Over Mildew?
That’s a hard no. Slapping a coat of paint over mildew is like putting a band-aid on a broken arm—it hides the issue for a minute, but the problem underneath just gets worse. The fungus is still alive and well, trapped under the paint, where it will happily continue to grow.
Pretty soon, you'll see that fresh paint job start to bubble, peel, and flake off. You absolutely have to kill and remove the mildew completely before a paintbrush even enters the room. Trust me, proper removal is the only way to solve it for good.
Attempting to cover up mildew doesn't solve the problem; it just feeds it. The mildew will compromise the new paint job and continue to release spores from its hidden location, impacting your home's air quality.
When Should I Call a Professional?
If the mildew covers a large area—generally anything more than 10 square feet—it's time to call in the pros. You should also get an expert opinion if you smell a strong, musty odor you can’t track down or suspect it’s growing inside your HVAC system.
Professional help is also a must after any major water damage, like a flood. And if anyone in your home has severe allergies, asthma, or a weakened immune system, it's always safer to let trained professionals with the right gear handle the cleanup.
Is Vinegar or Bleach Better for Killing Mildew?
The right choice really depends on what you're cleaning. Bleach is a beast of a disinfectant and works wonders on hard, non-porous surfaces like tile, glass, or your bathtub. It’s perfect for sanitizing and lifting stains from those kinds of materials.
But for porous surfaces like wood, drywall, or fabric, white vinegar is your best friend. Its natural acidity lets it seep into the material to kill the mildew at its roots. Best of all, it does the job without the risk of discoloration or harsh fumes that come with bleach.
Feeling overwhelmed by mildew and other tough cleaning jobs? The team at Custom Maids has been making homes in Mid-Michigan spotless since 1982. Let us handle the deep cleaning so you can relax. Learn more about our professional cleaning services today!