
Tired of spending hours scrubbing your bathroom only for it to look grimy again in a few days? You're not alone. The bathroom is a high-traffic area that battles constant moisture, soap scum, and bacteria, making it one of the toughest rooms to keep consistently clean. But what if you could achieve a sparkling, sanitized bathroom with less effort and better, longer-lasting results?
The secret isn't about cleaning harder; it's about cleaning smarter. Forget generic advice that falls flat. This comprehensive guide delivers proven, professional-grade bathroom cleaning tips that target the root cause of common problems, from stubborn grout stains to persistent mildew. We'll explore powerful, often-overlooked techniques that save you time and transform your cleaning routine from a dreaded chore into an effective system.
Whether you're a homeowner in Michigan aiming for a spotless home, a renter trying to maintain your space, or simply someone looking for more efficient methods, you'll find actionable solutions here. We will cover specific strategies, including the Squeegee Method for shower walls, a powerful baking soda and vinegar grout revival, and even steam cleaning for deep sanitization. Get ready to turn your bathroom into the pristine, relaxing sanctuary it's meant to be.
1. The Squeegee Method for Shower Walls
One of the most effective professional bathroom cleaning tips doesn't involve harsh chemicals or intense scrubbing; it's a simple, proactive habit. The Squeegee Method is a preventive cleaning technique that involves using a rubber-bladed squeegee to remove water from shower walls, glass doors, and tiles immediately after every use. This 60-second routine is the secret to preventing the buildup of hard water spots, soap scum, and the pink or black mildew that thrives in damp environments.
By eliminating moisture before it can evaporate and leave mineral deposits or feed mold spores, you fundamentally change your cleaning approach from reactive to proactive. This method is so effective that high-end hotels and luxury spas, such as the Ritz-Carlton, often provide in-shower squeegees to maintain their pristine facilities effortlessly. It’s a small daily investment that pays huge dividends, drastically reducing the frequency and effort needed for deep cleaning your shower.
How to Implement the Squeegee Method
To make this habit stick, convenience is key. Store the squeegee on a hook inside the shower. The goal is to make it as easy as grabbing your towel.
- Start from the Top: Always begin at the top of a wall or glass panel and work your way down. Gravity will pull any remaining water downward, so this ensures you aren't re-wetting areas you've already cleared.
- Use Overlapping Strokes: Pull the squeegee downward in a single, smooth motion. Overlap each stroke by about an inch to avoid leaving streaks.
- Wipe the Blade: After each downward pass, quickly wipe the rubber blade on a towel or cloth. This prevents you from redepositing collected water and soap scum back onto the shower surface.
- Choose the Right Tool: Opt for a squeegee with a comfortable handle and a replaceable rubber blade. A quality blade will provide a streak-free finish and can be swapped out when it becomes worn or stiff.
Key Insight: Consistency is more important than perfection. Even a quick, imperfect squeegee session after every shower is far more effective at preventing buildup than an intensive weekly scrub. This simple action disrupts the environment that soap scum and mildew need to form.
The following infographic illustrates the simple, three-step process for integrating the Squeegee Method into your daily routine.
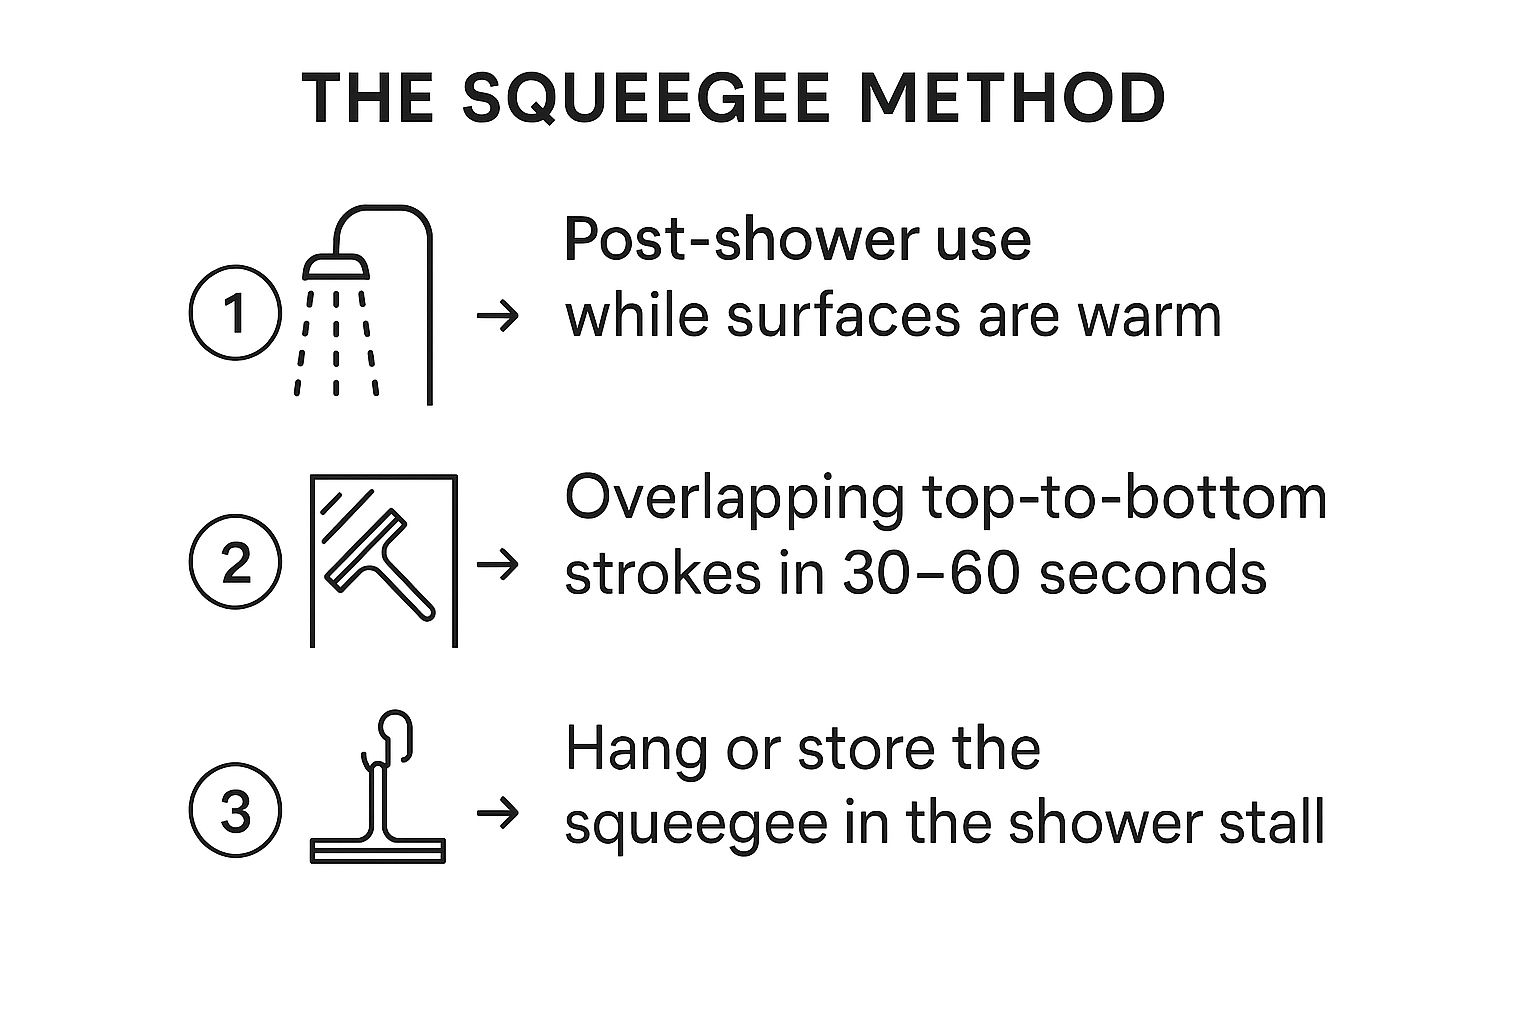
As the diagram shows, this process is designed for maximum efficiency, turning a potentially dreaded chore into a quick, satisfying habit performed immediately after showering.
2. Baking Soda and Vinegar Grout Revival
Reviving dingy, stained grout doesn't require a professional or a cocktail of harsh chemicals. One of the most powerful bathroom cleaning tips is a classic two-step process using household staples: baking soda and vinegar. This method harnesses the gentle abrasive power of baking soda to scrub away grime and the acidic nature of white vinegar to dissolve soap scum, mineral deposits, and kill mildew, leaving grout lines clean and bright.
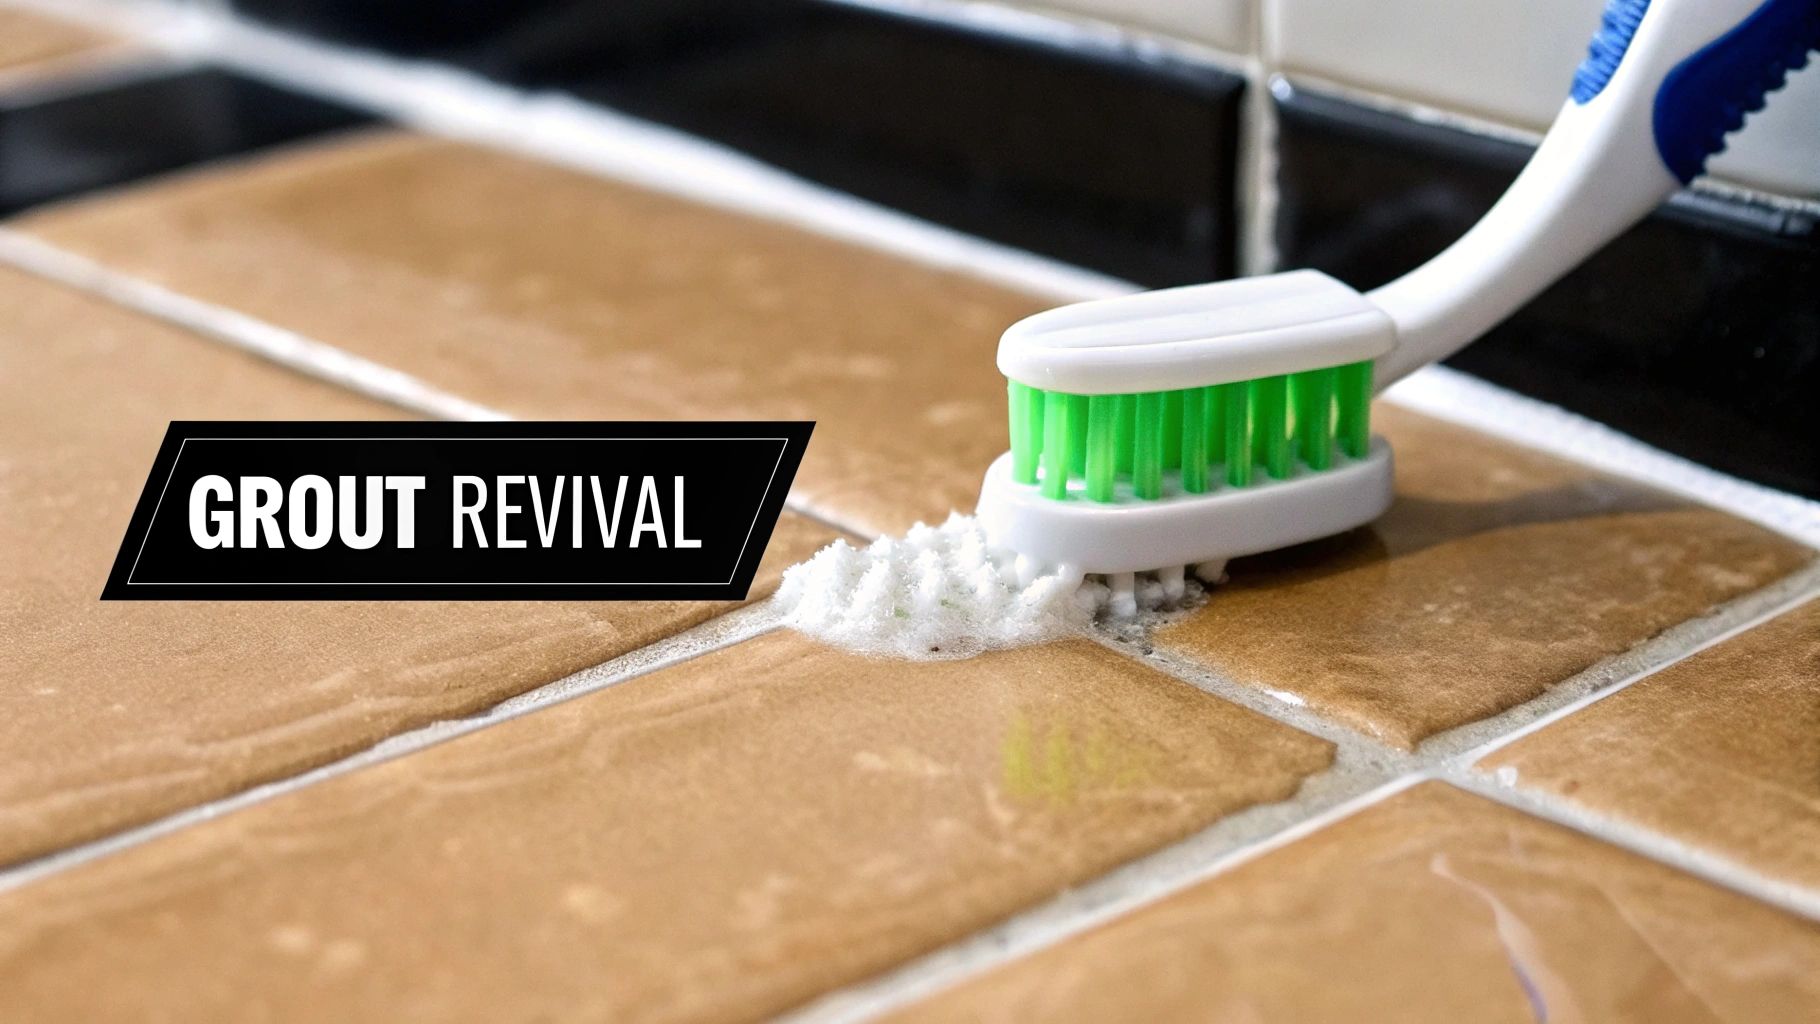
This eco-friendly solution is a cornerstone of the green cleaning movement and is frequently demonstrated on home improvement shows by experts like Bob Vila. It offers a powerful, non-toxic alternative to bleach-based cleaners that can damage tile and irritate your lungs. The satisfying fizzing reaction when the vinegar meets the baking soda is visual proof that the combination is actively working to lift dirt from the porous grout surface. For more in-depth guidance on tile and grout maintenance, you can explore this guide to cleaning tile and grout on custom-maids.co.
How to Implement the Grout Revival Method
Patience and a bit of elbow grease are the key ingredients for this technique. The process is straightforward but requires following the steps in the correct order for maximum effectiveness.
- Create the Paste: In a small bowl, mix baking soda with just enough water to form a thick, spreadable paste. Apply this paste directly onto the grout lines, ensuring full coverage. Let it sit for at least 10 minutes to begin breaking down surface dirt.
- Activate with Vinegar: Fill a spray bottle with white vinegar and liberally spray it over the baking soda paste. The mixture will begin to bubble and fizz. This chemical reaction helps to dislodge stubborn grime deep within the grout.
- Scrub and Rinse: Once the fizzing subsides, use a small, stiff-bristled brush (an old toothbrush is perfect) to scrub the grout lines. Work in small sections for better control and focus.
- Rinse Thoroughly: After scrubbing, rinse the entire area with clean water to wash away all the baking soda and vinegar residue, revealing your revitalized grout.
Key Insight: The secret to this method's success is the two-part application. Applying the baking soda paste first allows its alkaline properties to loosen grime, while the subsequent vinegar spray creates an acid-base reaction that provides a deep, effervescent clean that scrubbing alone can't achieve.
3. Daily Toilet Bowl Cleaning Hack
Another powerful bathroom cleaning tip transforms a dreaded chore into a nearly effortless overnight task. The Daily Toilet Bowl Cleaning Hack is a maintenance strategy that uses the fizzing power of denture cleaning tablets or specialized toilet bowl tablets to do the hard work for you. By simply dropping a tablet into the bowl before bed, you allow its active ingredients to work for hours, breaking down stains, dissolving mineral rings, and killing odor-causing bacteria while you sleep.
This proactive approach prevents the stubborn buildup that typically requires vigorous scrubbing with harsh chemical gels and a toilet brush. Busy parents and lifestyle influencers have popularized this method, reporting significant reductions in deep-cleaning frequency. It's also a standard practice in many senior living facilities and vacation rental properties, where maintaining a high standard of cleanliness with minimal daily labor is crucial. This hack fundamentally shifts toilet care from a reactive battle against grime to a simple, preventative nightly routine.
How to Implement the Toilet Bowl Cleaning Hack
The key to this method is turning it into a consistent habit, ideally as part of your evening routine.
- Timing is Everything: Drop one tablet into the toilet bowl as the very last thing you do before going to bed. This maximizes the contact time, allowing the tablet to work undisturbed for 6-8 hours.
- Establish a Schedule: For general maintenance, using a tablet 2-3 times per week is highly effective. If you have particularly hard water or are tackling existing stains, you might start with daily use for the first week.
- The Morning Brush-Off: In the morning, before the first flush, give the bowl a quick swish with a toilet brush. The overnight action will have loosened any grime, so this step takes mere seconds and requires virtually no effort. Flush to reveal a sparkling clean bowl.
- Choose Your Tablet: While denture cleaning tablets are a popular and inexpensive option, you can also find toilet-specific cleaning tablets. For those with septic systems or a preference for green cleaning, look for tablets made with natural ingredients like citric acid.
Key Insight: This method leverages dwell time, one of the most critical principles of effective cleaning. By allowing the cleaning agents to sit and work overnight, you eliminate the need for aggressive scrubbing and harsh chemicals, achieving superior results with a fraction of the effort.
4. Steam Cleaning for Deep Sanitization
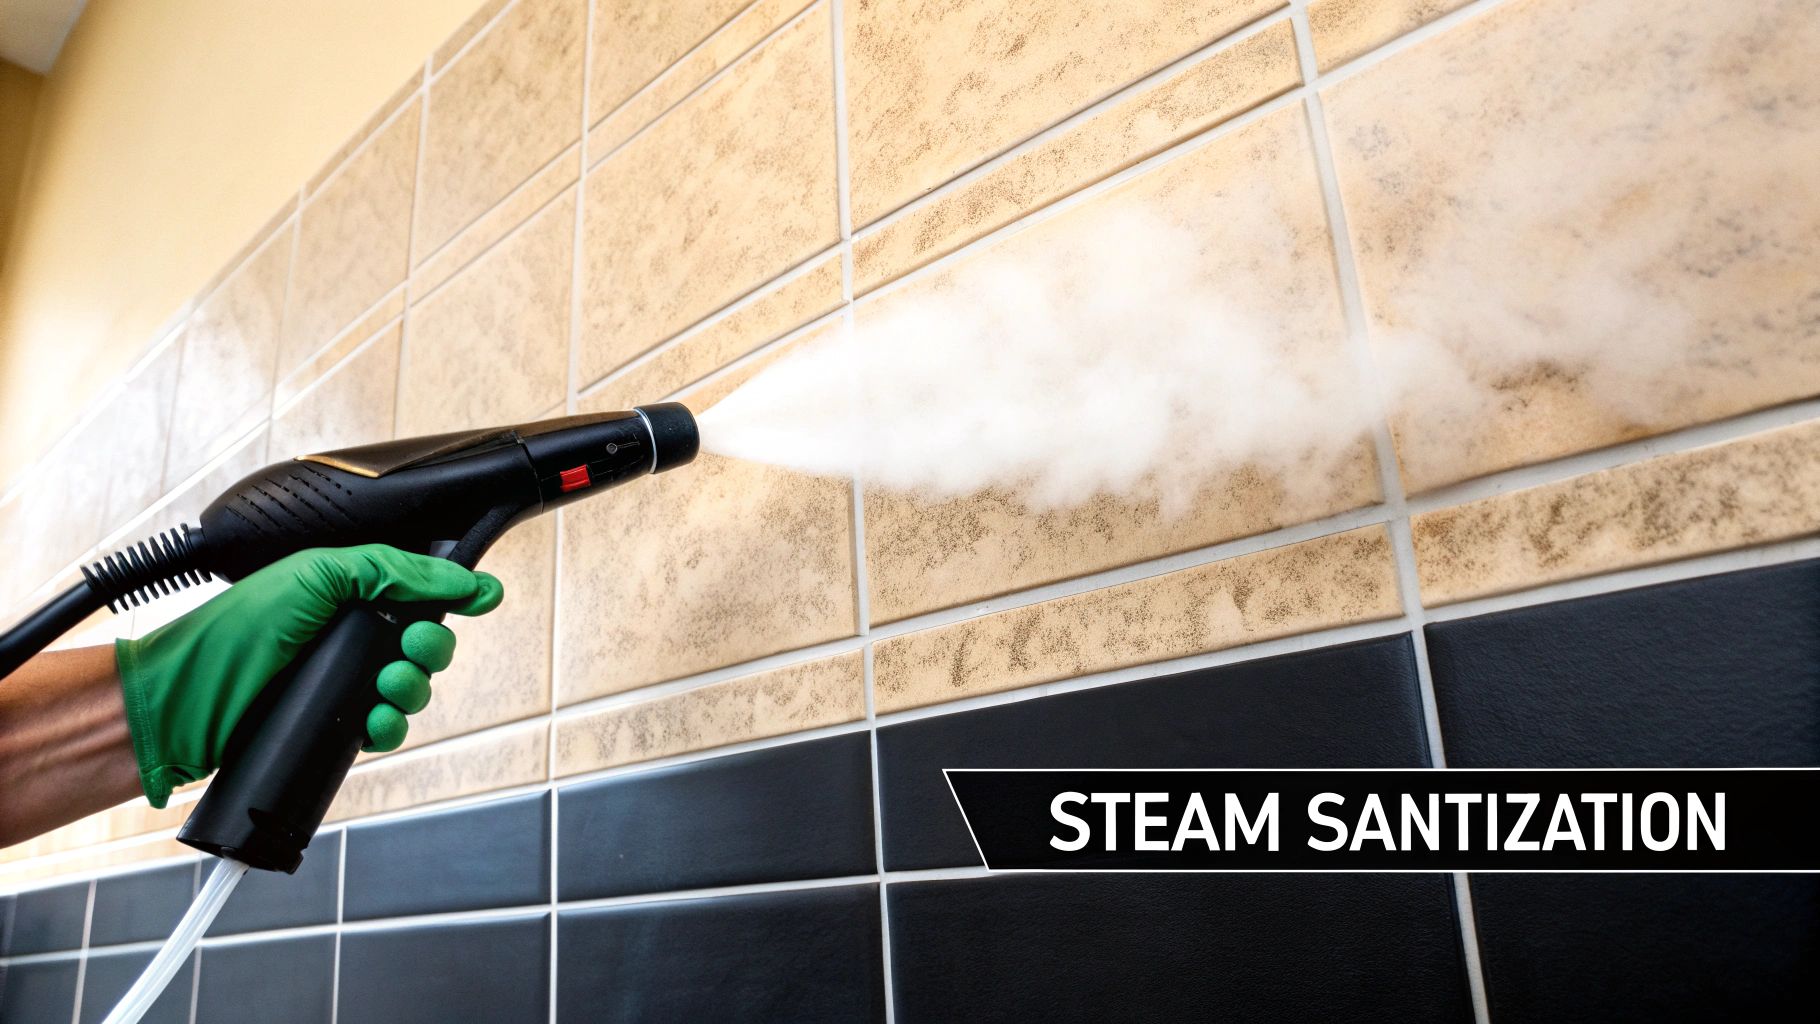
For a truly deep clean that sanitizes without harsh chemicals, steam cleaning is an unparalleled professional technique. This method uses high-temperature vapor (often over 200°F) to dissolve stubborn grime, soap scum, and kill 99.9% of bacteria, viruses, and mold spores on contact. The pressurized steam penetrates porous surfaces like grout and unsealed tile, pushing out dirt and germs that traditional scrubbing often misses, providing a hospital-grade level of cleanliness.
This chemical-free approach is one of the most effective bathroom cleaning tips for households with allergies, sensitivities, or young children. Its power to sanitize is why steam cleaning is a standard practice in healthcare facilities for infection control and is highly recommended by allergy specialists. Companies like Shark and Bissell have brought this professional technology into homes, making it accessible for anyone seeking a healthier, deeper clean.
How to Implement Steam Cleaning
Effective steam cleaning requires a methodical approach to ensure you are sanitizing surfaces, not just moving dirt around. A quality machine is a worthwhile investment; you can learn more about professional-grade steam cleaners to understand the available features.
- Prepare the Machine: Always use distilled water in your steam cleaner. This is a crucial step to prevent mineral buildup from tap water, which can clog the machine and reduce its effectiveness over time.
- Work in Small Sections: Start from the top and work your way down, cleaning in small, manageable sections. This strategy ensures the steam remains at its maximum temperature and effectively sanitizes the surface before you move on.
- Use Attachments Wisely: Use different nozzles for different tasks. A focused jet nozzle is perfect for blasting grime from grout lines and around faucet bases, while a brush attachment helps lift stubborn soap scum from tile walls and shower doors.
- Wipe as You Go: After steaming a section, use a clean microfiber cloth to wipe away the loosened grime and excess moisture. This prevents dirty water from resettling and drying back onto the surface.
Key Insight: The power of steam cleaning lies in its ability to sanitize porous materials. Grout lines, which are notoriously difficult to clean and can harbor mold, can be completely restored and sanitized with a concentrated blast of high-temperature steam, something surface-level chemicals cannot achieve.
5. Lemon and Salt Faucet Polishing
For a natural, effective solution to stubborn water spots and mineral buildup, look no further than your kitchen pantry. The Lemon and Salt Faucet Polishing technique is a powerful, non-toxic cleaning method that harnesses the acidic properties of lemon and the gentle abrasive power of salt. The citric acid in the lemon juice naturally breaks down hard water stains, rust, and soap scum, while the salt provides just enough texture to scrub them away without scratching delicate chrome, stainless steel, or brass finishes.
This age-old method is a staple in traditional Mediterranean cleaning practices and is favored by professional housekeepers who prefer natural solutions. Upscale restaurants often use this trick to keep their bathroom and kitchen fixtures sparkling, as it not only cleans but also deodorizes, leaving behind a fresh, clean citrus scent. It's a perfect example of how simple, accessible ingredients can deliver professional-grade results, making it one of the most reliable bathroom cleaning tips for a brilliant, chemical-free shine.
How to Implement the Lemon and Salt Polishing Technique
This method is best for a targeted deep clean of your faucets and fixtures whenever you notice significant buildup or dullness. All you need is a fresh lemon, some coarse salt (like kosher or sea salt), and a microfiber cloth.
- Prepare Your Scrubber: Cut a lemon in half. Dip the cut, fleshy side of one half directly into a small bowl of coarse salt, ensuring the surface is well-coated. The salt will adhere to the moist lemon.
- Scrub with a Circular Motion: Take the salted lemon half and rub it directly onto your faucet, handles, and base. Use firm but gentle circular motions, paying extra attention to areas with visible water spots or grime. The lemon juice will dissolve the minerals while the salt scrubs them loose.
- Let It Sit: After scrubbing, allow the lemon juice to sit on the fixture for about 5 to 10 minutes. This gives the citric acid time to work its magic and break down any remaining deposits.
- Rinse and Dry: Rinse the faucet thoroughly with warm water to wash away the lemon juice and salt. Immediately dry and buff the fixture with a clean, dry microfiber cloth to prevent new water spots from forming and to reveal a streak-free, brilliant shine.
Key Insight: The combination of acid and abrasion is what makes this method so effective. Unlike a simple spray cleaner, this technique provides a hands-on approach that physically lifts and removes stubborn buildup. Using coarse salt is crucial, as fine table salt can dissolve too quickly and won't provide the necessary scrubbing action.
6. The Microfiber Cloth System
One of the most impactful professional bathroom cleaning tips involves not a chemical or a tool, but a system. The Microfiber Cloth System is a methodical approach that uses different colored microfiber cloths for specific bathroom surfaces, a technique designed to prevent cross-contamination and maximize cleaning power. The microscopic fibers in these cloths are incredibly effective at trapping dirt, grime, and bacteria with minimal need for harsh cleaners, using just water for many tasks.
This system elevates your cleaning from a random wipe-down to a strategic process. By assigning colors to tasks, for example, red for the high-germ toilet area and blue for glass, you eliminate the risk of transferring bacteria from the toilet to your sink faucet or mirror. This is standard practice in hospitals and professional janitorial services, where infection control is paramount. It’s a simple change that brings a professional level of hygiene and efficiency into your home, ensuring a truly sanitized space.
How to Implement the Microfiber Cloth System
The key to this system is creating clear, simple rules and sticking to them. Store your cloths folded and sorted by color so you can grab the right one without a second thought.
- Assign Colors to Zones: Create a simple color code and be consistent. A common professional system is: Red for toilets (high-risk areas), Yellow for sinks and countertops (low-risk surfaces), Blue for glass and mirrors, and Green for any other general surface cleaning.
- Use the "Fold-in-Eights" Technique: Fold a standard microfiber cloth in half, and then in half again. This gives you eight clean surfaces to work with. Once a section is dirty, simply flip to a clean one. This prevents you from smearing dirt around and maximizes the use of each cloth before it needs rinsing.
- Wash Correctly to Preserve Effectiveness: Wash microfiber cloths separately from other laundry, especially cotton items that produce lint. Use hot water and a small amount of detergent, but never use fabric softener or bleach, as these clog the microfibers and ruin their cleaning ability. Air-dry or tumble dry on low heat.
- Know When to Use Wet vs. Dry: Use a dry microfiber cloth for dusting, polishing, and buffing glass to a streak-free shine. Use a damp cloth (wrung out thoroughly) for scrubbing away soap scum, wiping down countertops, and general cleaning.
Key Insight: The effectiveness of a microfiber cloth comes from its structure, not the chemicals you add. The split fibers create a net-like surface that mechanically lifts and traps grime and microbes, reducing your reliance on chemical sprays and making it one of the most essential bathroom cleaning tips for a healthier home.
7. Hydrogen Peroxide Mold Prevention
For a powerful, non-toxic approach to stopping bathroom mold before it starts, one of the best bathroom cleaning tips is to use a 3% hydrogen peroxide solution. This is a preventive strategy that targets mold spores at a microscopic level. Unlike surface cleaners that may just wipe away visible growth, hydrogen peroxide is an oxidizing agent that destroys mold and fungus cells, effectively neutralizing the threat and inhibiting future growth in high-moisture areas like shower corners, grout lines, and around the base of the toilet.
This method is highly regarded in professional circles, including by water damage restoration companies that use it for mold remediation, and is often approved by green building certification programs due to its low environmental impact. Dermatologists may even recommend it for patients with mold allergies to help maintain a healthier home environment. It works by releasing oxygen, which chemically breaks down the cellular structure of mold, making it a powerful yet safe alternative to harsh bleach-based products.
How to Implement Hydrogen Peroxide Mold Prevention
To use this method effectively, you need a standard 3% hydrogen peroxide solution, which is readily available at most pharmacies and should be kept in its original dark bottle to prevent light from degrading it.
- Apply and Saturate: Fill a spray bottle with the 3% hydrogen peroxide. After your regular cleaning, lightly spray the solution onto mold-prone areas, such as tile grout, caulk seams, and damp corners. Ensure the area is well-ventilated during application.
- Let It Dwell: For maximum effectiveness, let the hydrogen peroxide sit and bubble on the surface for at least 10 minutes. This dwell time allows the oxidizing action to penetrate and kill any unseen mold spores. Do not rinse it away; let it air dry to create a protective barrier.
- Test on a Small Area First: While generally safe for most bathroom surfaces, it's wise to test the solution on an inconspicuous spot first, especially on colored grout or natural stone, to ensure it doesn't cause any discoloration.
- Establish a Routine: Use this spray treatment once a week or bi-weekly on problem spots to maintain a mold-free environment. For expert advice on a comprehensive strategy, you can learn more about how to prevent bathroom mold effectively.
Key Insight: The power of hydrogen peroxide lies in its residual effect. By allowing it to air dry on surfaces, you leave behind a film that continues to deter the settlement and growth of new mold spores, offering ongoing protection long after you've finished cleaning.
7 Bathroom Cleaning Tips Comparison
| Cleaning Method | Implementation Complexity 🔄 | Resource Requirements ⚡ | Expected Outcomes 📊 | Ideal Use Cases 💡 | Key Advantages ⭐ |
|---|---|---|---|---|---|
| The Squeegee Method for Shower Walls | Low - requires daily habit formation | Low - simple squeegee tool | Prevents water spots, soap scum, and mold growth | Regular shower maintenance; smooth surfaces | Reduces deep cleaning, cost-effective, prevents mold |
| Baking Soda and Vinegar Grout Revival | Medium - requires scrubbing and multiple steps | Low - common household ingredients | Whitens grout, removes stains, deodorizes | Deep grout cleaning; stain removal | Natural, non-toxic, effective on stubborn stains |
| Daily Toilet Bowl Cleaning Hack | Very Low - insert tablets before bed | Moderate - recurring cost of cleaning tablets | Maintains cleanliness, prevents stains and buildup | Maintenance cleaning; minimal effort needed | Minimal time, reduces harsh scrubbing, antibacterial |
| Steam Cleaning for Deep Sanitization | High - requires equipment, slower process | High - investment in quality steam cleaner | Hospital-grade sanitization, kills 99.9% pathogens | Deep cleaning; sensitive environments; allergy relief | Chemical-free, highly effective, sanitizes thoroughly |
| Lemon and Salt Faucet Polishing | Low - simple natural materials and process | Low - fresh lemons and salt needed | Removes mineral deposits, restores shine | Faucet and fixture polishing; removing water spots | Natural, pleasant scent, restores shine |
| Microfiber Cloth System | Medium - requires organized color-coding system | Moderate - initial purchase of quality cloths | Prevents cross-contamination, improves cleaning | Systematic cleaning; infection control | Reduces chemical use, reusable, superior cleaning |
| Hydrogen Peroxide Mold Prevention | Medium - requires cautious application and timing | Low - accessible 3% hydrogen peroxide solution | Kills mold spores, prevents regrowth | Mold-prone, high humidity areas | More effective than bleach, environmentally friendly |
Maintain Your Sparkle or Call in the Pros
Transforming your bathroom from a high-traffic utility room into a personal sanctuary begins with the right approach. Throughout this guide, we've explored a powerful arsenal of seven distinct bathroom cleaning tips, each designed to tackle a specific challenge with precision and efficiency. You are now equipped with the same strategies that professionals use to achieve a consistently sparkling and hygienic result. By moving beyond generic advice, you have gained a new perspective on cleaning that emphasizes prevention, consistency, and the power of simple, effective tools and ingredients.
Key Takeaways for a Pristine Bathroom
Let's quickly revisit the core strategies we've covered. The power of these methods lies not in their complexity, but in their consistent application.
- Daily Habits, Lasting Impact: The Squeegee Method and the Daily Toilet Bowl Cleaning Hack are prime examples of how just a minute or two each day can prevent the buildup of soap scum and stains, drastically reducing the effort needed for your weekly deep clean.
- Natural Cleaning Power: We demonstrated how common household items can outperform harsh chemicals. The Baking Soda and Vinegar Grout Revival and the Lemon and Salt Faucet Polishing techniques prove that a brilliant shine and restored grout are achievable with safe, eco-friendly solutions.
- Deep Sanitization and Prevention: For a truly hygienic space, proactive measures are essential. Utilizing Steam Cleaning for Deep Sanitization eliminates germs without chemicals, while the Hydrogen Peroxide Mold Prevention spray actively works to keep mildew at bay.
- The Right Tools for the Job: Finally, implementing a Microfiber Cloth System streamlines your process, prevents cross-contamination, and ensures you're cleaning effectively rather than just spreading dirt around.
Your Action Plan for Bathroom Brilliance
Mastering these bathroom cleaning tips is about building a sustainable routine. Start by integrating one or two new habits into your week. Perhaps you'll commit to using the squeegee after every shower or dedicate five minutes on Saturday morning to refreshing your grout. The goal is to make these actions second nature, turning a once-dreaded chore into a simple, manageable part of your home maintenance. The true value here extends beyond just a clean room; it’s about creating a healthier environment for your family and reclaiming your time and energy from strenuous, ineffective cleaning sessions. This proactive approach ensures your bathroom remains a welcoming, spa-like retreat every single day.
For residents and business owners in Bay City, Saginaw, and across Mid-Michigan, we understand that life can be demanding. Sometimes, you need a professional touch to reset your space or consistent help to maintain that perfect gleam. For those moments, professional assistance can be an invaluable investment in your home and well-being.
When your schedule is too packed or you simply want the peace of mind that comes with a guaranteed, meticulous clean, the expert team at Custom Maids is ready to help. We have been applying these same professional-grade bathroom cleaning tips and more for our clients in Michigan since 1982. Visit Custom Maids today to get your free estimate and let us bring the sparkle back to your home.