
To really deep clean a bathroom, you have to get your gear ready before you even think about starting. This isn’t just about grabbing a random spray bottle and a sponge. A proper deep clean requires a specific toolkit, from microfiber cloths and stiff-bristled brushes to the right protective gloves. Knowing which cleaner works for each surface—and having it all within arm's reach—is the secret to working smarter, not harder.
Your Essential Bathroom Deep Cleaning Toolkit
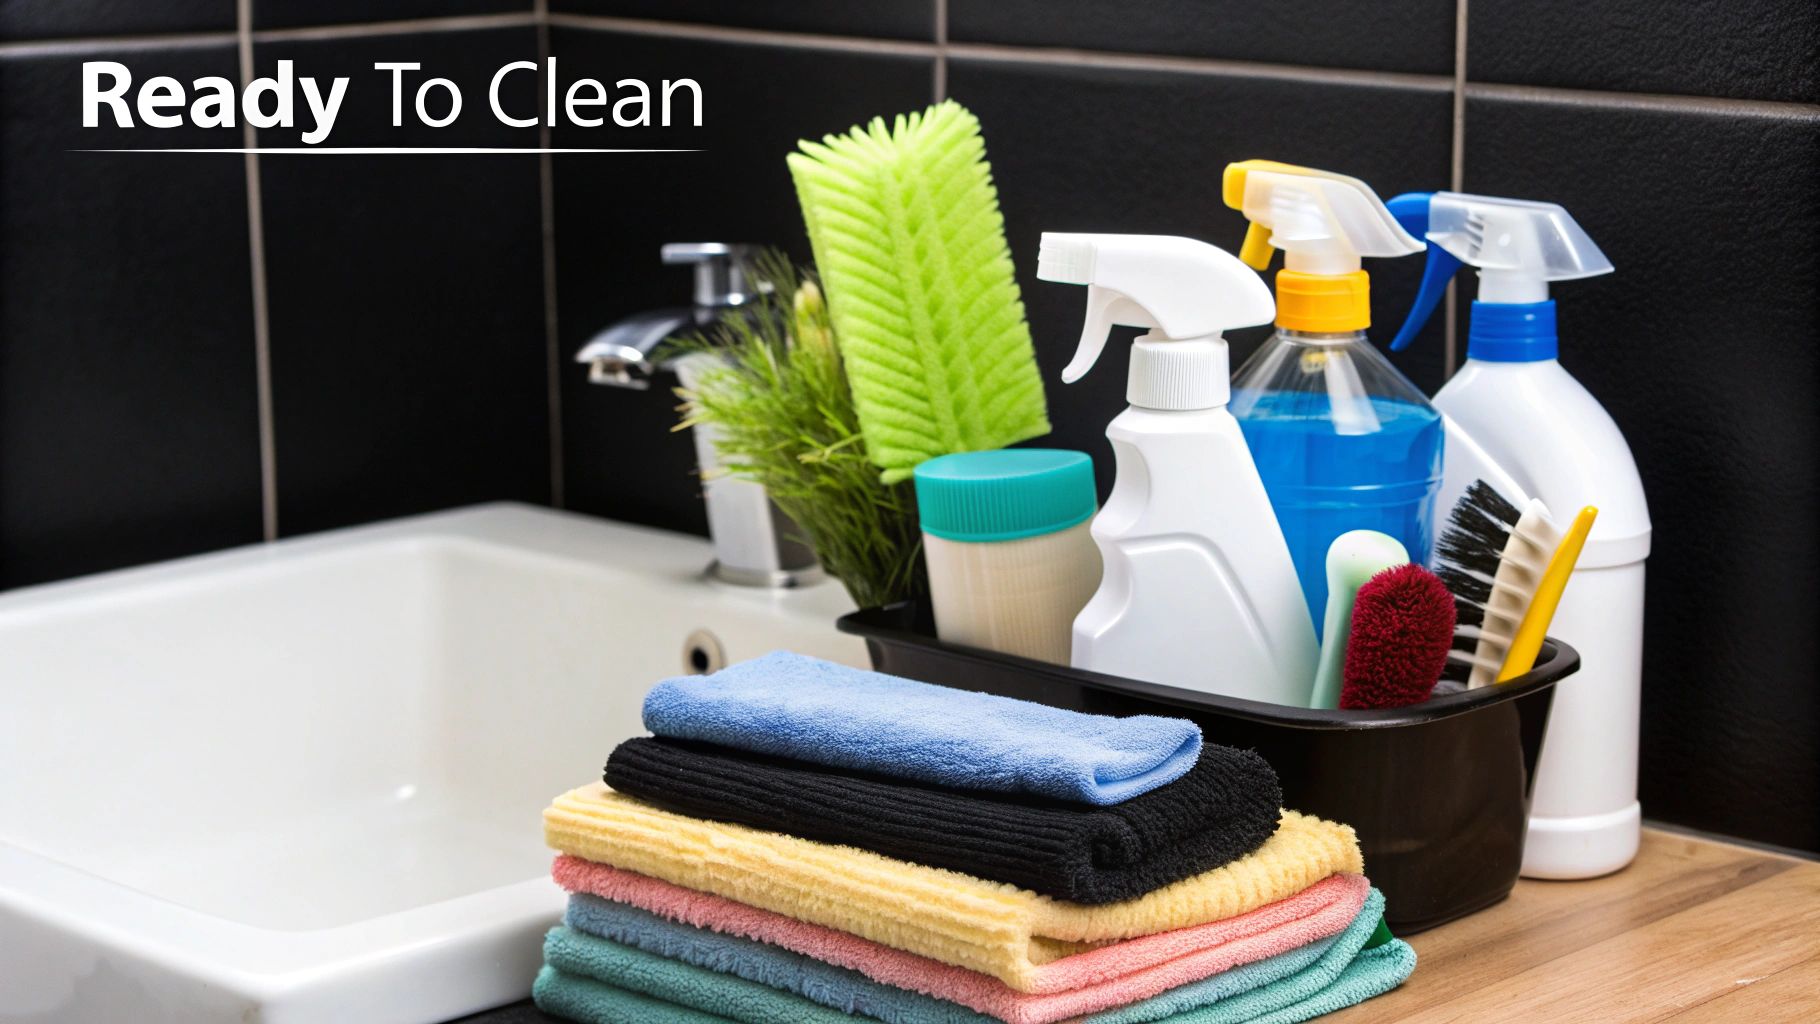
Before you can make your bathroom sparkle, you need to assemble the right squad of supplies. Think of it like a chef getting all their ingredients prepped and ready before the cooking begins. When everything is handy, the whole process just flows better and goes so much faster. A well-stocked cleaning caddy is the difference between a smooth job and constantly stopping to hunt for a brush or a different cleaner.
Honestly, the line between a frustrating clean and a deeply satisfying one often comes down to the tools. Trying to scrub away tough soap scum with a soft sponge is just a recipe for a sore arm and wasted time. Worse, using the wrong chemical on a surface can cause permanent damage.
To make sure you have everything you need, I've put together a quick checklist. This table breaks down all the must-have tools and cleaners so you can gather them up front.
Essential Bathroom Deep Cleaning Checklist
| Category | Essential Items | Best For |
|---|---|---|
| Tools | Microfiber Cloths (4-5), Stiff-Bristled Brush, Squeegee, Non-Scratch Sponges, Spray Bottles | Wiping surfaces, scrubbing grout, streak-free glass, tackling soap scum, DIY solutions |
| Cleaners | All-Purpose Cleaner, Glass Cleaner, Tub and Tile Cleaner, Disinfecting Toilet Bowl Cleaner | Countertops and cabinets, mirrors and chrome, showers and tubs, sanitizing the toilet |
| Protective Gear | Reusable Rubber Gloves, Good Ventilation (fan or open window) | Protecting hands from chemicals, ensuring safe air quality while cleaning |
Having these items ready to go in a portable caddy will cut your cleaning time down significantly and keep you from losing momentum.
Must-Have Cleaning Tools
Every deep cleaning mission is built on a solid foundation of great tools. These are the workhorses that do the heavy lifting—scrubbing grime, wiping away dirt, and leaving surfaces looking brand new. Don't underestimate how much a simple, high-quality tool can speed things up.
- Microfiber Cloths: Ditch the old rags. Microfiber is specifically designed to trap dust and soak up liquid without leaving linty streaks everywhere. You'll want at least 4-5 of them for different areas.
- Stiff-Bristled Grout Brush: This is your secret weapon against dingy, discolored grout lines. An old toothbrush can do in a pinch, but a real grout brush has much firmer bristles that get the job done right.
- Non-Scratch Sponges: Look for a sponge with a gentle abrasive side. It needs to be tough enough to cut through soap scum on tubs and tiles but not so harsh that it scratches the finish.
- Squeegee: This is absolutely essential for getting perfectly streak-free glass on shower doors and mirrors. A quick swipe after cleaning whisks away every last drop of water and cleaner.
- Spray Bottles: It's always a good idea to have a couple of empty ones on hand for mixing your own cleaning solutions, like a simple and effective vinegar-and-water mix.
A dedicated cleaning caddy is a true game-changer. Keeping all your supplies in one portable container means you can move from the sink to the shower to the toilet without breaking your rhythm.
The Right Cleaners For Every Surface
Using the right cleaner is just as crucial as using the right tool. Sure, an all-purpose cleaner is great for some things, but a true deep clean calls for specialized formulas that are made to dissolve specific kinds of bathroom messes.
For a comprehensive rundown of what to keep in your cleaning closet, our basic cleaning supplies checklist is a fantastic starting point for any homeowner. It ensures you're ready for anything.
Here’s the chemical arsenal you should have on deck:
- All-Purpose Cleaner: This is perfect for wiping down countertops, the outside of the toilet, and cabinet doors.
- Glass Cleaner: Use this on mirrors and chrome fixtures to make them shine brilliantly.
- Tub and Tile Cleaner: These are specifically formulated to dissolve stubborn soap scum and hard water deposits in the shower and tub.
- Disinfecting Toilet Bowl Cleaner: You need a specialized cleaner, usually with bleach or another disinfectant, to properly sanitize the inside of the toilet bowl.
Don't Forget Protective Gear
Last but not least, always think about your safety. Cleaning chemicals can be pretty harsh on your skin and tough to breathe in.
- Rubber Gloves: A good pair of reusable rubber gloves is a must. They’ll protect your hands from getting dried out or having a reaction to the cleaners.
- Ventilation: This is so important. Always, always open a window or turn on the bathroom's exhaust fan when you're working with strong cleaners to keep the air circulating.
The Pro Method for a Smarter Bathroom Clean
The real secret to a deep clean isn't about scrubbing until your arms ache; it's about having a smart strategy. Professionals have this down to a science, using a methodical approach that saves a ton of time and stops you from cleaning the same spot twice. It’s all about the order of operations, starting with clearing the decks and pre-treating the toughest grime.
This method boils down to two main phases: dry cleaning, then wet cleaning. By getting all the dry tasks—like dusting and sweeping—out of the way first, you’re removing all that loose debris before you add any liquid. This simple trick keeps you from turning dust and hair into a grimy paste, which makes the actual deep clean go so much smoother.
Start with Decluttering and Pre-Treating
Before a single drop of cleaner hits a surface, you need to clear the battlefield. Get everything off the countertops, the sides of the tub, the toilet tank, and the floor. That means shampoo bottles, soap dishes, toothbrushes, bath mats—all of it.
With the surfaces clear, it's time to pre-treat the grime hotspots. This gives your cleaners a head start, letting them break down all that buildup while you’re busy with other things.
- Toilet Bowl: Squirt your toilet bowl cleaner under the rim and let it run down, coating the entire bowl. Then, just leave it be for a while.
- Shower and Tub: Give the shower walls, glass doors, fixtures, and the tub itself a generous spray of a good tub and tile cleaner. Really hit those areas with soap scum or hard water stains.
- Sink: A light spray of all-purpose cleaner in the sink basin and around the faucet will start working on that dried-on toothpaste and any water spots.
Letting these cleaners sit for at least 15-20 minutes is a game-changer. You'll find most of the gunk wipes away with hardly any effort later. For more great shortcuts, you should check out these additional bathroom cleaning tips.
The Top-to-Bottom Dry Cleaning Phase
Okay, now that your pre-treatments are working their magic, you can get started on the dry cleaning. The golden rule here is simple: always work from top to bottom. Gravity is your friend—dust and hair will fall down, so you want to clean the high spots before you ever touch the low ones.
Grab a long-handled duster or a microfiber cloth on a broom and start with the highest points in the room. Get the cobwebs out of the ceiling corners, wipe down light fixtures (make sure they’re off and cool!), and don't forget the top of the exhaust fan vent.
From there, work your way down to the walls, window sills, and the tops of mirrors and cabinets. A dry microfiber cloth is perfect for grabbing dust off these surfaces. This step is so important because it gets rid of all the loose particles that would turn into muddy streaks the second you start spraying and wiping.
This image shows what comes next in the wet-cleaning phase: the deep scrub that's made so much easier because you did the dry work first.
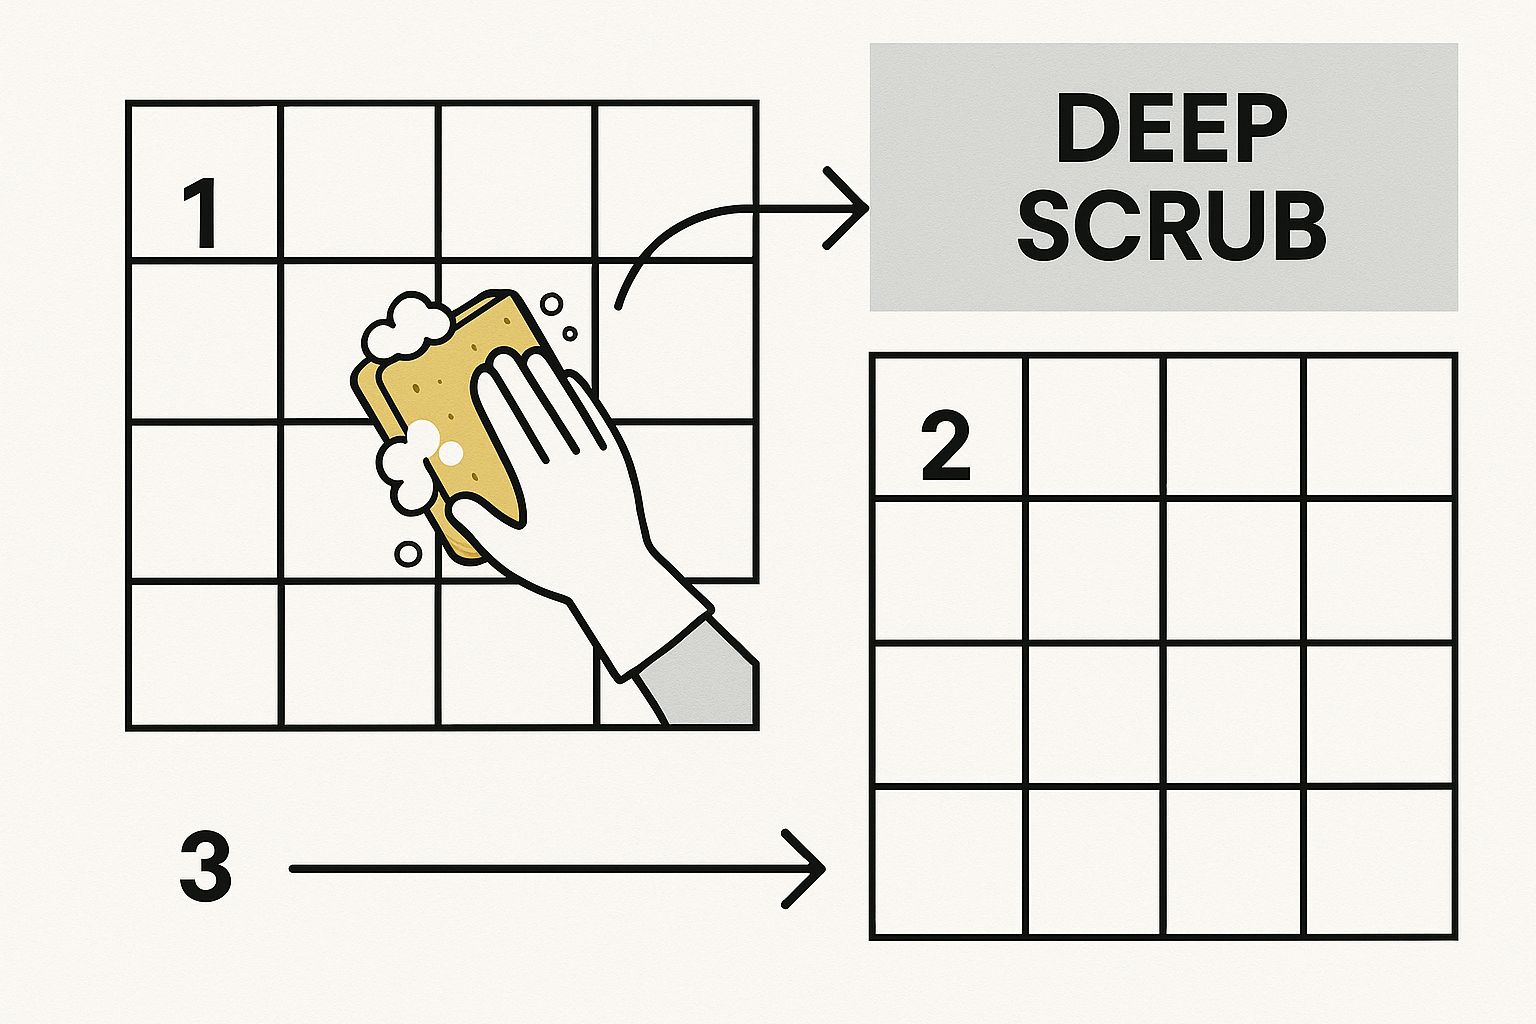
This just goes to show the kind of focused effort needed to beat set-in grime on surfaces like shower tile—a task that's way less intimidating after proper pre-treating and dusting.
Understanding the importance of regular deep cleaning is what makes this whole process less of a marathon session. When you keep up with it, the big deep cleans aren't nearly as scary. In fact, it turns out that 71% of people clean their bathroom at least once a week, proving that most of us are trying to stay on top of it. Regular upkeep just makes everything easier.
Tackling the Shower and Bathtub Grime
Let's be honest—the shower and bathtub area is where the real battle begins. It’s constantly hit with water, soap, and body oils, making it the perfect breeding ground for tough soap scum, cloudy hard water stains, and that awful pink or black mildew. This isn't just about looks; it's a hygiene issue that calls for a smart strategy, not just brute force.
This is where that pre-treating step we talked about really shines. The tub and tile cleaner has been busy breaking down the grime, which is going to make your job a whole lot easier. Now, it's time to get in there and finish it off.
Conquering Soap Scum and Hard Water Stains
Soap scum is that stubborn, waxy layer of soap residue, minerals, and body soil all mixed together. Hard water stains are the chalky mineral deposits left behind when water evaporates. They look similar but require slightly different tactics depending on the surface.
For most fiberglass, acrylic, or porcelain tubs and tile, a non-scratch scrub sponge is your go-to tool. Work in small, circular motions with firm, even pressure, and you’ll feel the grime start to loosen. If you're dealing with really caked-on buildup, a simple paste of baking soda and a few drops of water gives you extra scrubbing power without scratching anything up.
Pro Tip: For those hazy glass shower doors that never seem to get clear, white vinegar is the secret weapon. Its mild acid is amazing at dissolving the mineral deposits that cause that cloudy look. Just spray it on, let it sit for 10-15 minutes, then scrub and squeegee it off for a perfect, streak-free shine.
Glass doors can be a real pain to keep clean. If you want to keep that sparkle long after your deep clean, check out our in-depth guide on how to keep glass shower doors clean.
Addressing Mold and Mildew in Grout and Caulk
Grout and caulk are porous, which unfortunately makes them prime real estate for mold and mildew in a humid bathroom. Just spraying a cleaner on them won't cut it—you have to get into those lines and scrub the spores away. This is where a stiff-bristled grout brush becomes your most valuable player.
Start by applying your cleaner right on the grout lines. An old toothbrush can work, but a dedicated grout brush has firmer, angled bristles that are designed specifically for this job.
My Go-To Mildew Fighting Method:
- Create a Paste: Mix hydrogen peroxide with just enough baking soda to form a thick, toothpaste-like paste.
- Apply and Wait: Use your brush to work the paste directly onto the stained grout or caulk. Let it sit and bubble for at least 15-20 minutes.
- Scrub Thoroughly: Once it's had time to work, scrub the lines vigorously with your brush.
- Rinse Completely: Use your shower sprayer or a cup of clean water to rinse the whole area down.
For really stubborn black mold stains, you might need a bleach-based cleaner. If you go this route, make sure the bathroom is extremely well-ventilated—open a window and turn on the exhaust fan.
Revitalizing Your Showerhead and Fixtures
Have you noticed your shower's water pressure isn't what it used to be? Mineral buildup clogging the little nozzles on your showerhead is almost always the culprit. Thankfully, descaling it is a simple fix that makes a huge difference.
You don't even have to remove it. Just fill a sturdy plastic bag (a Ziploc works great) with white vinegar and secure it over the showerhead with a rubber band, making sure the head is completely submerged. Let it soak for at least an hour—or even overnight for really bad buildup. Afterward, just take the bag off and run the hot water for a minute to flush everything out.
For the faucet, handles, and drain cover, use your all-purpose cleaner and a soft cloth to wipe away water spots and grime. An old toothbrush or detail brush is perfect for getting into that tricky area around the base of the faucet where gunk loves to collect.
Sanitizing the Drain for a Fresher Shower
Last but not least, don't forget the drain. It’s an easy spot to overlook, but it can harbor odor-causing bacteria and cause slow draining. After you’ve cleared any hair from the cover, you can easily freshen it up.
Pour about half a cup of baking soda down the drain, and follow it with half a cup of white vinegar. You'll see it fizz and bubble as it works to break down buildup inside the pipe. Let that do its thing for about 15 minutes, then flush it all down with a kettle of very hot water.
Making Your Toilet and Sink Shine
The toilet and sink are easily the most-used fixtures in any bathroom, meaning they need some serious attention to get them truly clean. A quick swipe with a disinfecting wipe just isn't going to cut it for a deep clean. We need to go beyond the surface to tackle the hidden grime in every nook and cranny.
For the toilet, that means cleaning the entire fixture—not just the bowl. We're talking the tank, the base, the floor around it, and especially those frustrating seat hinges where dust and other gunk love to hide. For the sink, we’ll dissolve that caked-on toothpaste, banish hard water spots from the faucet, and finally clean out that often-forgotten overflow drain.
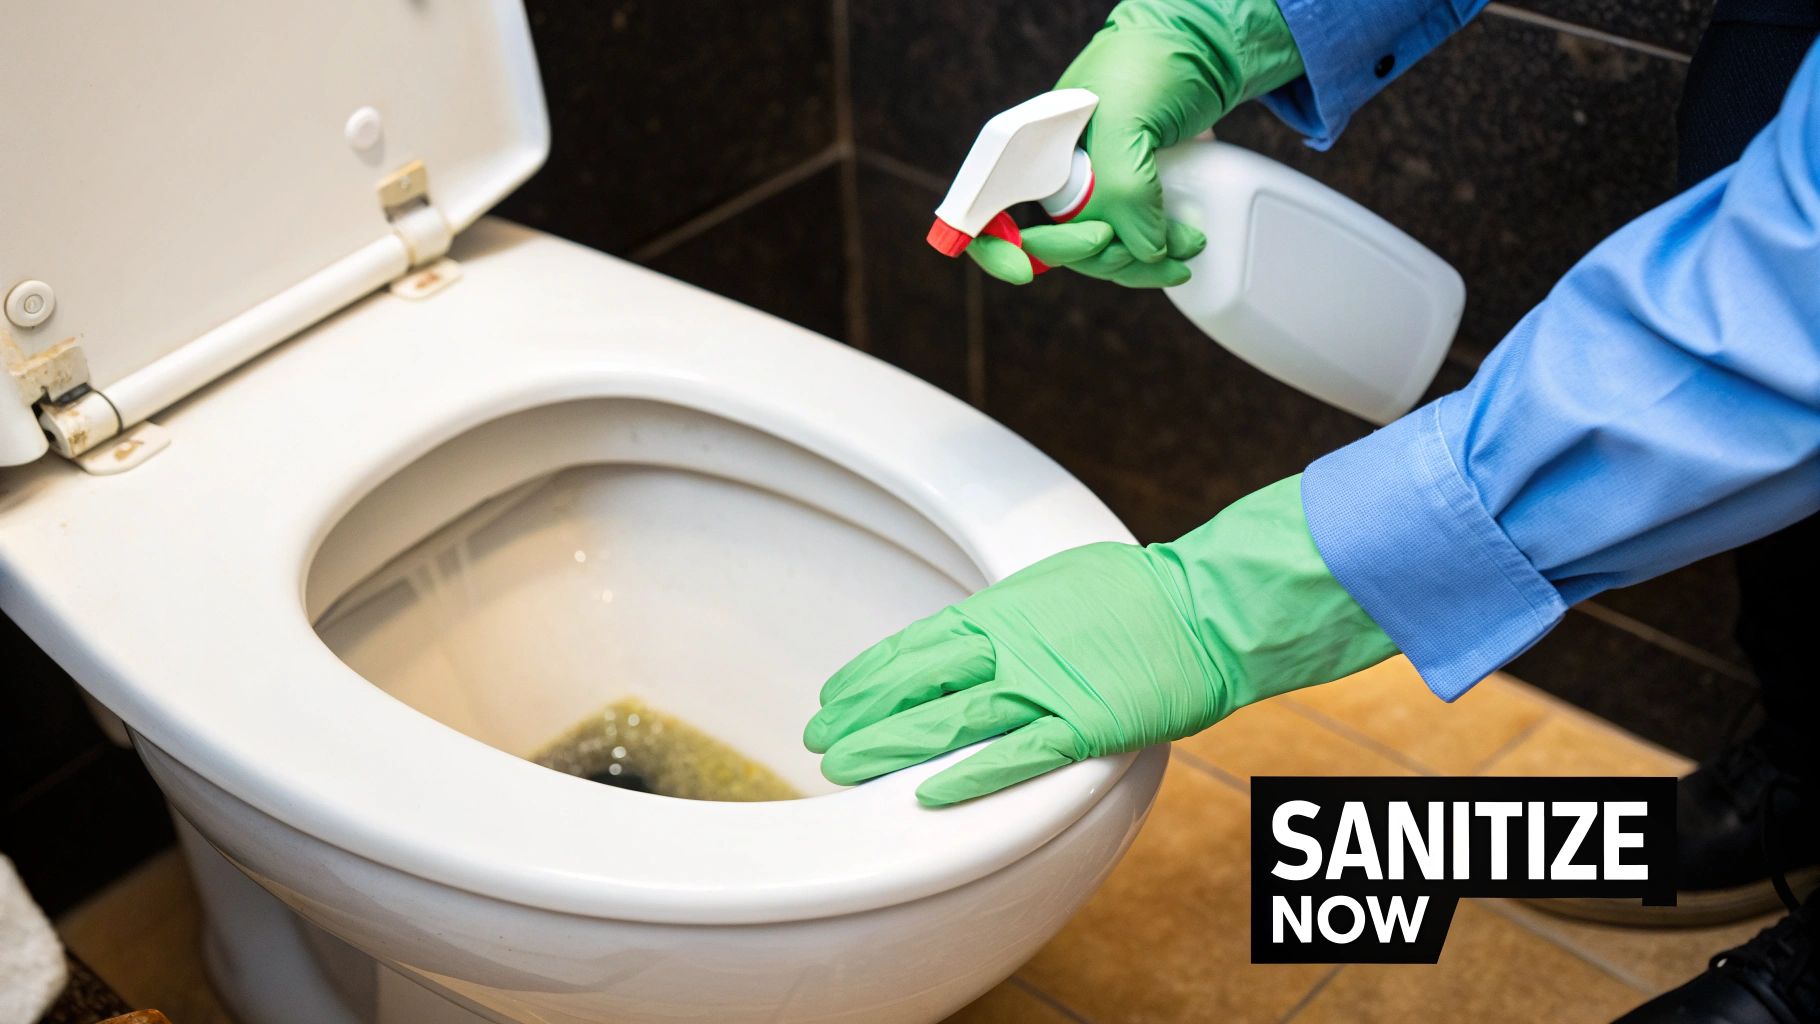
A Deeper Clean for Your Toilet
When it’s time to tackle the toilet, think of it as a multi-part mission. Start by spraying the entire exterior—from the tank top all the way down to the base—with your all-purpose disinfectant cleaner. Let that sit and work its magic while you focus on the bowl, which should already have your toilet bowl cleaner in it from the pre-treating step.
Grab your toilet brush and give the inside of the bowl a really thorough scrub. Make sure you get right up under the rim where stains and bacteria build up unseen. Once the bowl is sparkling, it’s time to wipe down the exterior. Use a microfiber cloth or paper towels, but work smart: start with the cleanest area (the tank) and work your way down to the dirtiest (the base).
Don't forget these often-missed spots:
- The Seat Hinges: Most toilet seats have plastic caps covering the bolts. Pop those off and use an old toothbrush or a detail brush to scrub out all the grime that collects in there. You'll be surprised what you find.
- Under the Rim: While you scrubbed the inside of the rim, don't forget the flat underside. Grab a disinfecting wipe and give it a good clean.
- The Base and Floor: Pay close attention to the caulk line and the floor immediately surrounding the toilet base. This area needs to be scrubbed and disinfected completely.
For a little global inspiration, look no further than Japan. The country’s commitment to restroom hygiene has made it famous for having the cleanest toilets in the world, setting a high bar for deep cleaning everywhere. This cultural focus doesn't just reduce germs; it elevates the entire experience. You can learn more about these international hygiene standards and see how they influence our own cleaning habits. Discover more insights about global toilet cleanliness on 2theloo.com.
Restoring Your Sink and Vanity Area
The sink and vanity area is a magnet for toothpaste splatters, soap scum, and water spots. Start by clearing everything off the countertops to give yourself a clean slate to work with. Spray down the sink basin, faucet, and counters with your all-purpose cleaner and let it sit for a few minutes to start breaking down the buildup.
Use a non-scratch sponge to scrub the sink basin, focusing on the area around the drain where grime is always the worst. An old toothbrush is your best friend here—it’s perfect for getting into the tight spots around the base of the faucet and the handles.
Tackle these key areas for a complete clean:
- The Faucet: To get rid of those stubborn hard water spots on chrome fixtures, a cloth dampened with plain white vinegar works wonders. Gently rub the spots away, then rinse with water and buff dry with a clean microfiber cloth for a brilliant, streak-free shine.
- The Overflow Drain: That little hole near the top of the sink can harbor some seriously smelly bacteria. Dip a small bottle brush in your cleaning solution and give the inside of the opening a good scrub to clear out any gunk.
- The Mirror: My favorite trick for a truly streak-free mirror is to skip the sprays altogether. First, wipe it down with a damp microfiber cloth to remove all the residue and toothpaste flecks. Then, follow up immediately with a completely dry, clean microfiber cloth to buff it to a perfect shine. No film, no streaks.
Finally, wipe down your countertops, making sure to get behind the faucet. Use your detail brush again to clean the cabinet and drawer handles. Once every surface is clean and dry, you can put your toiletries back, leaving the entire vanity area looking refreshed and new.
The Final Details: Floors and Finishing Touches
We've saved the bathroom floor for the very last step, and for good reason. Think about it—every bit of dust, every stray hair, and every drip of cleaner from the surfaces above has landed right there. By cleaning it now, you only have to do it once. That’s the secret to an efficient deep clean.
The floor is the foundation of the room's cleanliness. You can scrub the shower until it shines, but if the grout lines are grimy, the whole room will still feel dirty. It's time to bring it all together and finish strong.
Revitalizing Your Bathroom Floor and Grout
How you clean your floor really depends on the material, whether it's tile, vinyl, or something else. But almost every bathroom floor has one common enemy: dirty grout. Because it's porous, grout is a magnet for dirt and mildew, which is why it gets discolored so fast.
For ceramic or porcelain tile, a simple homemade paste works wonders and is perfectly safe.
- Mix Your Solution: Grab a small bowl and mix equal parts baking soda and hydrogen peroxide. You're looking for a thick, spreadable paste.
- Apply and Wait: Use an old toothbrush to apply the paste directly onto the grout lines. Let it sit and bubble for about 15-20 minutes. You'll see it working as it penetrates the stains.
- Scrub and Rinse: After waiting, give the grout a vigorous scrub with the brush. You'll see the grime lift right off. Once you're satisfied, mop the entire floor with clean water to rinse away the residue.
Pro Tip: Always start mopping in the corner farthest from the door and work your way out. This little trick keeps you from trapping yourself or leaving footprints on your freshly cleaned floor.
If you have vinyl or laminate flooring, skip the harsh brushes and abrasive cleaners—they'll just cause damage. Instead, go for a gentle, pH-neutral floor cleaner mixed with warm water. A microfiber mop is your best friend here because it cleans effectively without leaving behind puddles that could seep into the seams.
Polishing the Finishing Touches
With all the main surfaces sparkling, it's time to zero in on the small, high-touch details that often get missed. These are the touches that elevate a standard clean to a professional one. They might seem small, but they make a huge difference in how clean the room feels.
Here are the final checkpoints before you can call it a day:
- Exhaust Fan Cover: This thing is a dust magnet. If you can, carefully remove the cover and wash it in the sink with warm, soapy water. If it’s fixed in place, use a vacuum with a brush attachment to clear the vents, then finish with a damp microfiber cloth.
- Light Switches and Door Handles: These are some of the germiest spots in the house. A quick wipe-down with a disinfecting wipe or a cloth sprayed with your all-purpose cleaner will take care of fingerprints and germs.
- Shower Curtain and Liner: Take down the fabric shower curtain and toss it in the washing machine (just follow the label's instructions). You can often wash the plastic liner on a gentle cycle with a few old towels to act as scrubbers, or just scrub it down in the tub.
Finally, empty the trash bin and give it a quick wipe with a disinfectant wipe before putting in a new bag. Once you've re-hung the shower curtain and put your clean bath mats back, you're done. Your deep clean is officially complete.
Your Top Bathroom Deep Cleaning Questions, Answered
Even with the best game plan, a few questions always seem to pop up during a big clean. Let's tackle some of the most common ones we get asked. These quick, practical answers will help you clear those hurdles and keep that sparkling-clean feeling going for longer.
You’ve done the hard work, so let's make it last. Knowing the right cleaning frequency, the best tricks for tough spots, and which products are safe for your surfaces is the key to working smarter, not harder.
How Often Should You Deep Clean Your Bathroom?
A light weekly clean is essential for hitting high-traffic spots like the toilet and sink, but a full-on deep clean belongs on your calendar every one to two months. That’s the sweet spot for knocking out the heavy buildup of soap scum, hard water stains, and mildew that a simple wipe-down won't touch.
Of course, life can change that timeline. If your bathroom sees heavy traffic from a big family or struggles with poor ventilation (hello, constant dampness), you’ll want to bump that up to every three to four weeks. This keeps things hygienic and prevents grime from getting out of control.
A deep clean isn't just about making the bathroom look nice—it's about hitting the reset button. You're tackling the hidden grime that builds up over time. Stick to a schedule, and you'll find that each deep clean gets faster and feels way less intimidating.
What Is the Best Way to Clean Grout?
Dingy grout can make a spotless bathroom look dirty. It’s one of the biggest culprits of a less-than-fresh feeling. For most mildew and discoloration, a homemade paste of baking soda and hydrogen peroxide works wonders—and it's much gentler than aggressive chemicals.
- Make the Paste: Mix baking soda and hydrogen peroxide in a small bowl until it forms a thick, toothpaste-like consistency.
- Apply and Let It Work: Use a small, stiff brush (an old toothbrush is perfect for this) to work the paste right into the grout lines. Let it sit and bubble for at least 10-15 minutes.
- Scrub and Rinse: Give the lines a vigorous scrub. You'll see the gunk start to lift right off. Rinse the whole area with clean water to finish.
If you’re facing down some really stubborn black mold stains, you might need to bring in a specialized grout cleaner with bleach. Just be sure to get the air flowing by opening a window and turning on the exhaust fan.
Can I Use Vinegar on All Bathroom Surfaces?
White vinegar is a powerhouse for a deep clean. It's non-toxic and absolutely brilliant at dissolving mineral deposits from hard water and slicing through soap scum. It works beautifully on ceramic tile, glass shower doors, sinks, and chrome fixtures.
But here’s where you need to be careful.
NEVER use vinegar—or any acidic cleaner—on natural stone surfaces. This includes:
- Marble
- Granite
- Travertine
- Limestone
The acid in the vinegar will literally eat away at the stone. This causes etching, which is a chemical burn that dulls the finish and can permanently damage the surface. If you're ever unsure, always test your cleaner on a small, hidden spot first before going all in.
Feeling like a deep clean is too much to handle alone? The professionals at Custom Maids have been making homes in Mid-Michigan shine since 1982. Let us do the dirty work for you. Head over to https://custom-maids.co to book your free consultation today