
Moving is a whirlwind of boxes, logistics, and deadlines. Amid the chaos, the final move-out clean holds significant financial weight, directly impacting your security deposit. Neglecting this crucial step can lead to hefty deductions, turning a new beginning into a frustrating expense. This comprehensive cleaning checklist for moving is designed to be your definitive guide, transforming an overwhelming job into a manageable series of tasks.
We will break down the seven most critical areas that landlords and new homeowners inspect, from deep cleaning appliances to sanitizing bathrooms. This guide provides actionable steps to ensure no detail is overlooked. Whether you're a renter aiming to reclaim your full deposit or a seller preparing to impress potential buyers, this checklist will help you leave your old space immaculate. Let's get started on making your move as smooth and profitable as possible.
1. Deep Kitchen Cleaning
The kitchen is often the most time-consuming room on any cleaning checklist for moving, and for good reason. It’s the heart of the home where grease, food residue, and grime build up over time. A thorough deep clean here is non-negotiable, especially for renters aiming to recover their full security deposit or homeowners preparing a property for sale. This process involves more than just a surface wipe-down; it means tackling every nook, cranny, and appliance until the room is pristine.

Real estate agents frequently note that a sparkling kitchen can help a home sell faster, while professional cleaning services report that kitchens can take up to 40% of their total time on a move-out job. This underscores its importance. Dedicating a few hours here can make a significant financial difference, as one Seattle tenant demonstrated by recovering their full $1,500 deposit after a focused four-hour kitchen deep clean.
Actionable Cleaning Strategy
To tackle the kitchen efficiently, follow a top-to-bottom approach to prevent re-soiling cleaned areas.
- Start High: Begin by wiping down the interiors and exteriors of all cabinets and cupboards. Don't forget the tops, where dust and grease settle.
- Appliances Next: The oven and refrigerator are major tasks. Create a paste of baking soda and water to scrub stubborn, baked-on food from the oven. For the fridge, remove all shelves and drawers and wash them separately in warm, soapy water.
- Surfaces and Fixtures: Degrease the stovetop, backsplash, and countertops. Use a vinegar solution to polish faucets and remove hard water stains from the sink.
- The Final Pass: Finish by cleaning the dishwasher filter, wiping down walls, and finally, mopping the floor, making sure to get into corners and under cabinet edges. Pulling out appliances to clean behind and underneath them is a crucial last step.
2. Bathroom Sanitization and Descaling
Following the kitchen, the bathroom is another critical area on any cleaning checklist for moving that demands meticulous attention. It's a hotspot for soap scum, hard water deposits, and potential mold or mildew growth, which are major red flags during property inspections. A full sanitization and descaling goes beyond a simple wipe-down; it involves restoring fixtures, grout, and surfaces to their best possible condition, ensuring the space is hygienic for the next resident.
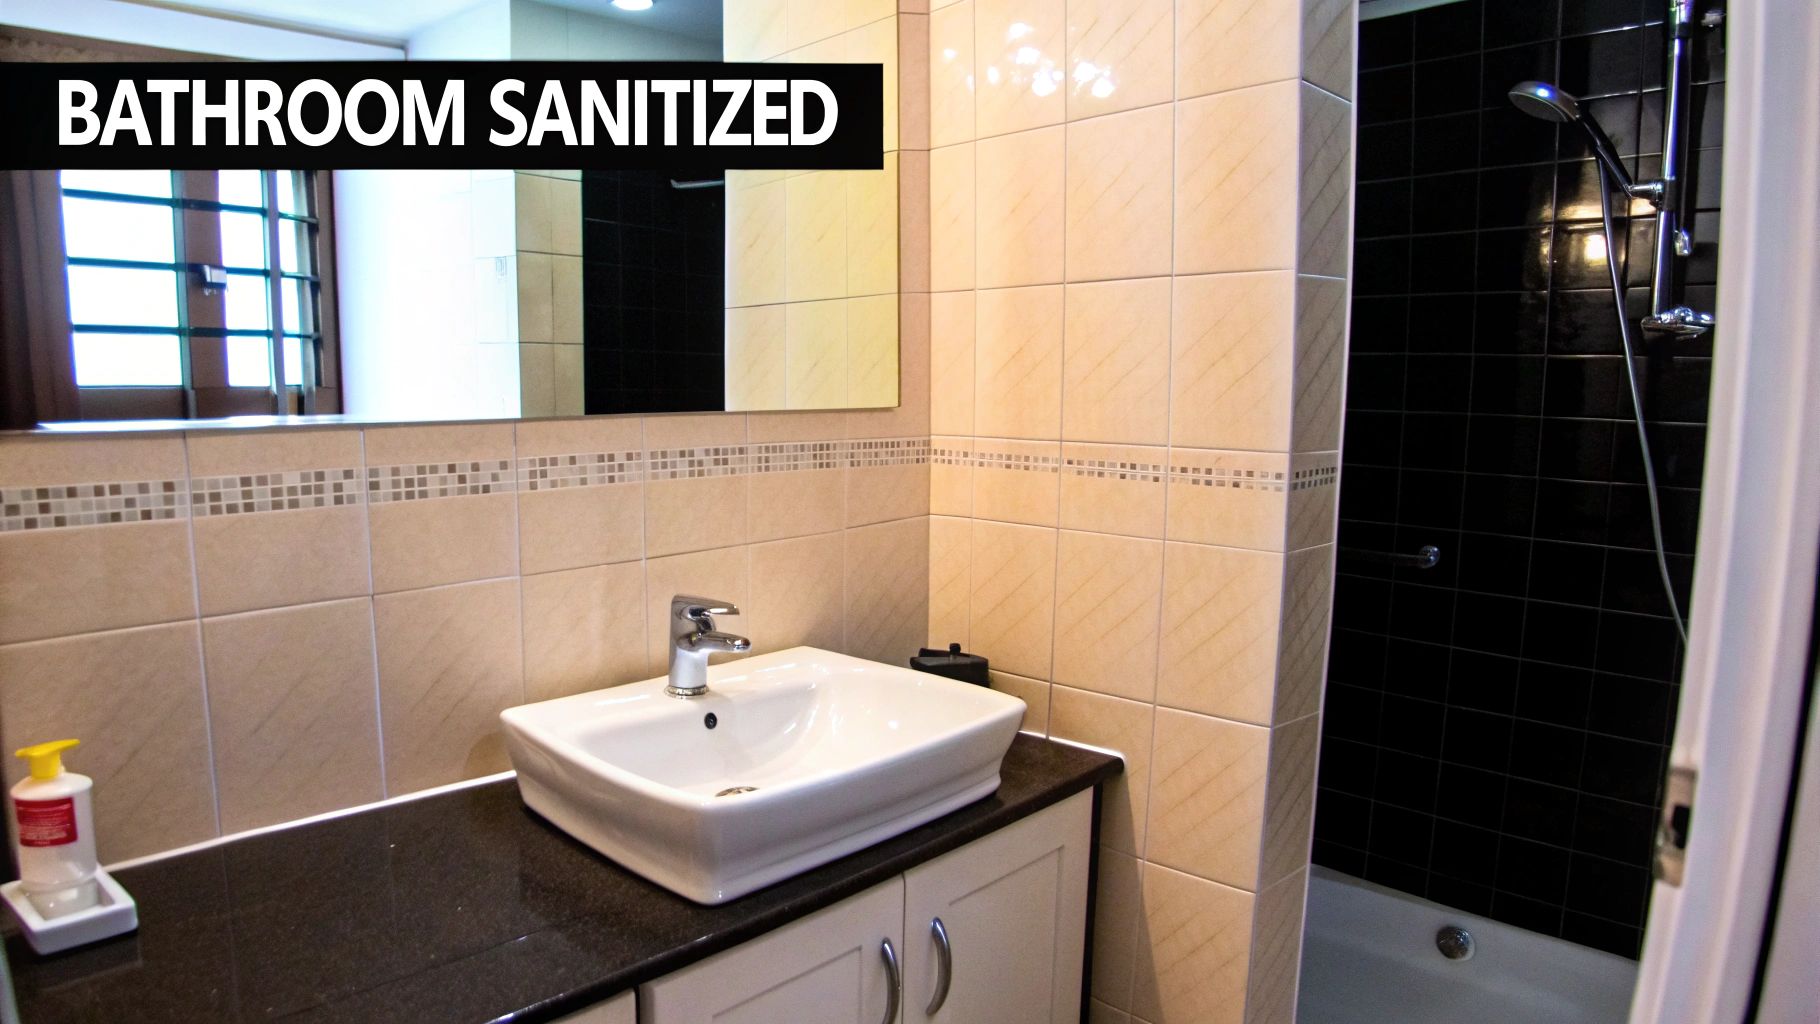
The effort invested here yields a high return. Property management companies report that a significant percentage of security deposit deductions are related to inadequate bathroom cleaning. For example, a Boston renter recently avoided over $200 in professional cleaning fees by dedicating two hours to deep cleaning grout and removing hard water stains. This highlights how a focused effort can prevent financial penalties and smooth the move-out process.
Actionable Cleaning Strategy
To properly sanitize and descale a bathroom, work methodically and allow cleaning products time to be effective.
- Tackle Buildup First: Apply a toilet bowl cleaner and let it sit for at least 15-30 minutes before scrubbing. For shower doors, faucets, and showerheads with mineral deposits, use a commercial descaler like CLR or a vinegar-soaked cloth, letting it sit to dissolve the buildup.
- Grout and Tile: Spray any mold or mildew with a targeted remover and follow the product's instructions for wait time before scrubbing. Use an old toothbrush or a small grout brush to scrub grout lines with a paste of baking soda and water.
- Surfaces and Storage: Thoroughly clean and disinfect the sink, vanity, and mirror. Don't forget to wipe out the inside of all cabinets and medicine chests.
- Final Details: Clean the exhaust fan cover to remove dust buildup, as this is often overlooked. Wash or replace the shower curtain and liner. Lastly, sweep and mop the floor thoroughly, paying close attention to the area around the base of the toilet and along the baseboards.
3. Wall and Baseboard Cleaning
Often overlooked in a standard cleaning routine, walls and baseboards frame every room, and their condition significantly impacts the overall impression of a property. This task on your cleaning checklist for moving addresses the gradual accumulation of scuff marks, fingerprints, dust, and grime. A thorough wall and baseboard cleaning can transform a room from looking lived-in to move-in ready, making it a crucial step for both renters and sellers.
The financial impact of this task is substantial. For example, a Los Angeles tenant reported saving over $400 in potential painting fees by meticulously cleaning walls before their final inspection. Similarly, real estate staging experts frequently prioritize wall cleaning before showings, noting that clean baseboards alone can improve a room’s perceived cleanliness by up to 30%. This attention to detail shows a property has been well-maintained and helps secure a full security deposit return or a faster sale.
Actionable Cleaning Strategy
A systematic, top-to-bottom approach is the most effective way to clean walls and baseboards without creating more work.
- Prep and Dust First: Begin by dusting the walls and baseboards. Use a vacuum with a brush attachment or a long-handled duster to remove loose dust, cobwebs, and debris, paying special attention to corners and trim.
- Spot Treat Marks: For isolated scuff marks and smudges, a melamine foam sponge (like a Magic Eraser) can be highly effective. Always test it on an inconspicuous spot first, as it can be abrasive and may affect some paint finishes.
- Wash the Walls: Mix a gentle cleaning solution of warm water and a few drops of mild dish soap. Use a soft sponge or microfiber cloth, wring it out well to avoid drips, and wash the walls in sections, working from top to bottom. For more specific guidance, you can explore detailed methods for how to clean bathroom walls.
- Finish with Baseboards: Once the walls are clean, use the same solution to wipe down all baseboards, trim, and molding. A microfiber cloth is perfect for getting into the detailed grooves of the trim. Address any remaining nail holes with a small amount of spackle if required by your lease agreement.
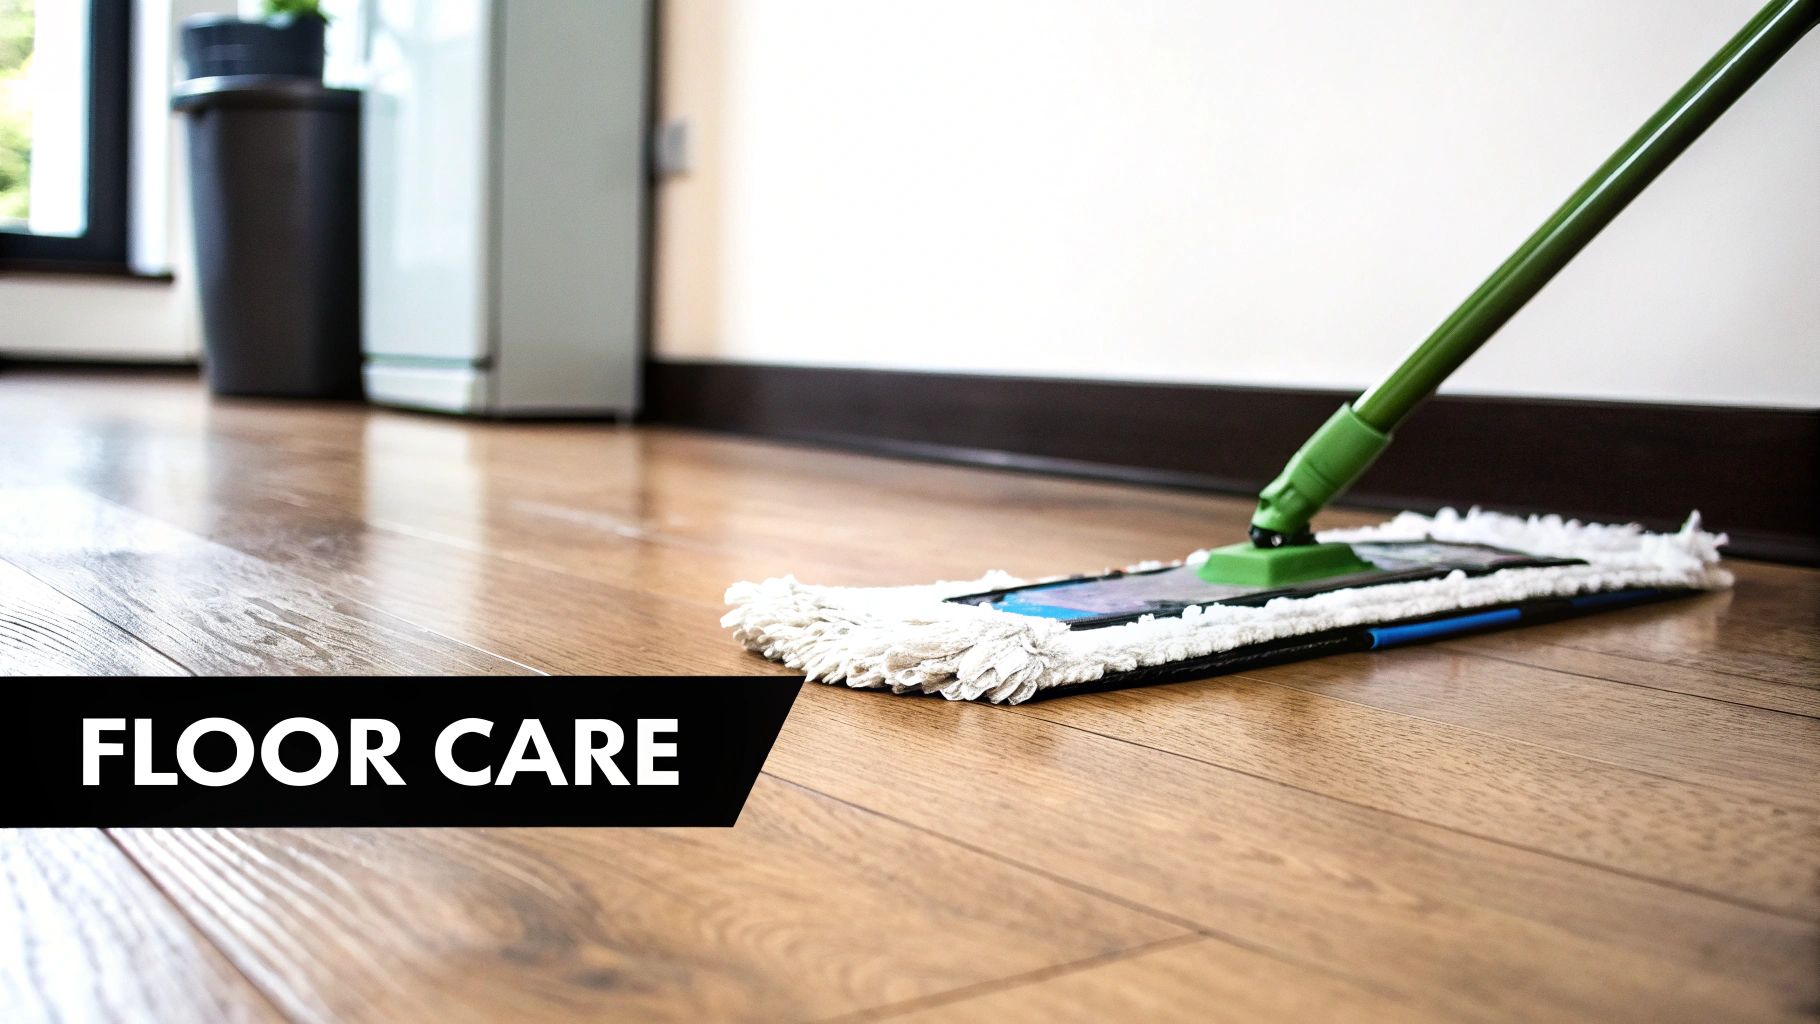
4. Floor Deep Cleaning and Care
Flooring covers the largest surface area of any home and its condition is a primary focus during move-out inspections. Comprehensive floor care is a critical part of any cleaning checklist for moving because it directly reflects the property's overall wear and tear. This task goes beyond a simple sweep; it involves deep cleaning every flooring type, from vacuuming carpets and mopping tiles to spot-treating stains and caring for delicate hardwood, ensuring the home looks well-maintained.

The financial impact of neglecting floors can be substantial. Property managers report that floor damage and dirtiness account for nearly 45% of all security deposit deductions. On the other hand, a proactive approach pays off. One Denver family, for instance, avoided a potential $800 carpet replacement fee by investing just $150 in professional steam cleaning to remove stubborn stains. Proper cleaning can also extend the life of materials like hardwood, delaying costly refinishing needs by several years.
Actionable Cleaning Strategy
Adapt your cleaning method to each flooring type and work methodically after all other rooms are dusted and wiped down to avoid re-contaminating your work.
- Preparation is Key: Start by thoroughly vacuuming all floors, regardless of material. Use crevice tools to clean along baseboards, in corners, and under cabinet edges where dust and debris accumulate.
- Material-Specific Cleaning: Use the correct cleaner for each surface. A pH-neutral solution is best for hardwood, while a vinegar-and-water mix can work for some tile. For carpets with significant soiling, renting a steam cleaner or hiring a professional is often the most effective choice.
- Tackle Grout and Stains: For tiled floors, use a grout brush and a specialized cleaner to scrub away discoloration. Address any scuffs on vinyl or laminate with a microfiber cloth and a gentle cleaning solution.
- Final Touches: Mop from the farthest corner of the room toward the exit. Allow floors to dry completely before walking on them or conducting a final walkthrough to prevent new marks. For more detailed guidance, see this resource on how to clean hardwood floors.
5. Window and Glass Surface Cleaning
Crystal-clear windows and mirrors can dramatically brighten a space, making it feel larger and better maintained. This task on your cleaning checklist for moving goes beyond a quick spritz; it involves a detailed cleaning of all glass surfaces, including windows, frames, tracks, and sills. This attention to detail is a powerful signal to landlords or potential buyers that the property has been cared for, maximizing its appeal and enhancing natural light.
Professional cleaners often report that windows are among the top five items scrutinized during a move-out inspection. Real estate photographers consistently clean windows before a shoot, understanding their massive impact on property photos. One San Francisco tenant even secured a glowing reference after meticulously detailing all 22 windows in their apartment, impressing the landlord with their thoroughness.
Actionable Cleaning Strategy
For a professional, streak-free finish, approach window and glass cleaning with a systematic method. Always clean on a cloudy day to prevent the cleaning solution from drying too quickly and causing streaks.
- Prepare the Area: Start by vacuuming window tracks, sills, and screens to remove loose dirt, dust, and cobwebs. This prevents creating a muddy mess when you introduce a cleaning solution.
- Create Your Solution: Mix a simple, effective solution of one part white vinegar to one part water in a spray bottle. For tougher grime, add a few drops of dish soap.
- Wipe with Proper Tools: Spray the solution directly onto the glass. Using a squeegee or a clean microfiber cloth, wipe from the top down to catch any drips. Avoid paper towels, which can leave behind lint.
- Don't Forget the Details: Wipe down the window frames and sills with a damp cloth. If accessible, clean the exterior of ground-floor windows as well. Finish by cleaning all mirrors and glass doors throughout the home.
6. Light Fixture and Ceiling Fan Cleaning
Often overlooked during routine cleaning, light fixtures and ceiling fans accumulate a surprising amount of dust, grime, and even dead insects. When preparing a home for a move, these elevated surfaces become a focal point for inspectors and potential buyers. A dusty ceiling fan or a light fixture clouded with dirt can make an otherwise clean room feel neglected, which is why this task is a crucial part of any comprehensive cleaning checklist for moving.
Property managers consistently flag dirty ceiling fans and light fixtures in final move-out reports, often leading to cleaning fees. For instance, one Chicago renter successfully avoided deductions from her deposit by dedicating just 30 minutes to cleaning all eight light fixtures in her apartment. Professional cleaning companies always include this task in their move-out packages because they know its impact on creating a truly pristine impression.
Actionable Cleaning Strategy
Safety and efficiency are key when cleaning fixtures. Always turn off the power at the circuit breaker for ceiling fans and light fixtures before you begin.
- Ceiling Fans: Use the pillowcase method to contain dust. Slide an old pillowcase over each blade and pull it back slowly, trapping the dust inside. For a deeper clean, wipe the blades with a damp cloth afterward. For specific instructions on this often-overlooked area, you can refer to a detailed guide on cleaning ceiling fans.
- Light Fixtures: After letting bulbs cool, carefully remove any glass shades or covers. Wash them in warm, soapy water, rinse, and dry completely before reattaching.
- Bulbs and Hardware: Use a dry microfiber cloth to wipe down light bulbs and the fixture’s base and hardware. This is also the perfect time to replace any burnt-out bulbs.
- High and Hard-to-Reach Areas: An extendable duster is your best tool for chandeliers and vaulted ceiling fixtures. Never spray cleaner directly onto electrical components; apply it to your cloth first.
7. Appliance Deep Clean and Maintenance
Appliances are often the focal point of move-out inspections, and their condition can heavily influence security deposit returns. This step goes beyond a simple wipe-down, requiring an intensive cleaning of all major appliances like the refrigerator, oven, dishwasher, microwave, washer, and dryer. It involves tackling interior mechanisms, filters, drip pans, and hidden areas where grime, food residue, and lint accumulate over time.
Appliance condition is a common source of conflict, with some studies finding that up to 70% of move-out cleaning disputes involve their cleanliness. As one New York tenant demonstrated, investing in this area pays off; they avoided a potential $500 deduction by hiring a professional service for just $120. Ensuring appliances are pristine is a critical part of any thorough cleaning checklist for moving.
Actionable Cleaning Strategy
Tackle each appliance individually with a focused plan to ensure nothing is missed. Remember to take photos of the clean appliances for your records.
- Refrigerator and Oven: Start with the fridge early so it has time to air out. Remove and wash all shelves and the drip pan. For the oven, create a non-toxic paste of baking soda and water to scrub the interior, avoiding the harsh fumes of chemical cleaners.
- Dishwasher and Microwave: Run the dishwasher on an empty hot cycle with a cup of white vinegar on the top rack to descale and sanitize it. For the microwave, heat a bowl of water and lemon slices for a few minutes to loosen caked-on food for easy wiping.
- Washer and Dryer: Clean the washing machine's rubber gasket with a mildew remover or vinegar solution. Critically, disconnect the dryer and clean the exhaust hose to remove lint buildup, a significant fire prevention step.
- Final Details: Once the interiors are clean, pull appliances away from the wall (if possible) to clean behind and underneath them. For tips on making the exteriors shine, you can learn more about how to clean stainless steel appliances.
7-Point Cleaning Checklist Comparison
| Cleaning Task | Implementation Complexity 🔄 | Resource Requirements ⚡ | Expected Outcomes 📊 | Ideal Use Cases 💡 | Key Advantages ⭐ |
|---|---|---|---|---|---|
| Deep Kitchen Cleaning | High 🔄🔄🔄 | Multiple specialized cleaners & tools ⚡⚡⚡ | High: Secure deposits, sanitary & value add 📊📊📊 | Move-outs, selling homes with kitchen focus | Maximizes deposit return, thorough degreasing ⭐⭐ |
| Bathroom Sanitization and Descaling | Medium 🔄🔄 | Strong chemicals, grout tools ⚡⚡ | High: Prevent fees, health safety, mold removal 📊📊 | Move-outs with bathroom inspection emphasis | Targets mold/mildew, high ROI time invested ⭐⭐ |
| Wall and Baseboard Cleaning | Medium 🔄🔄 | Basic cleaners, microfiber, ladder ⚡⚡ | Medium: Better room appearance, possible paint saved 📊 | Whole-home cleaning or staging prep | Improves aesthetics, low cost ⭐⭐ |
| Floor Deep Cleaning and Care | High 🔄🔄🔄 | Various floor-specific supplies, equipment ⚡⚡⚡ | High: Avoid repair fees, improves air quality 📊📊📊 | Move-outs, high-traffic flooring maintenance | Extends floor life, mitigates costly replacements ⭐⭐⭐ |
| Window and Glass Surface Cleaning | Low-Medium 🔄 | Basic glass cleaners, squeegee, ladder ⚡⚡ | Medium: Brighter rooms, inspection booster 📊 | Final touch-ups, visual impact before showing | Quick visual upgrade, minimal gear ⭐⭐ |
| Light Fixture and Ceiling Fan Cleaning | Low-Medium 🔄 | Ladder, microfiber cloths, gentle cleaners ⚡ | Medium: Better lighting & inspection impression 📊 | Move-out final cleaning, allergy/pest control | Significant brightness boost, pest determent ⭐ |
| Appliance Deep Clean and Maintenance | High 🔄🔄🔄 | Specialized appliance cleaners, gloves ⚡⚡⚡ | Very High: Prevent fines, odor-free, prolongs use 📊📊📊 | Move-outs, appliance upkeep for new tenants | Critical for avoiding heavy deductions, extends appliance life ⭐⭐⭐ |
Crossing the Finish Line: When to DIY vs. Call the Pros
You now possess a comprehensive, room-by-room cleaning checklist for moving that covers everything from deep cleaning kitchen appliances to sanitizing bathroom fixtures and reviving worn-out floors. This strategic approach transforms an overwhelming task into a manageable series of steps. By methodically addressing each area, you not only prepare the space for its next occupants but also significantly increase the likelihood of a full security deposit return. The key takeaways are preparation and documentation. Before starting, take detailed photos of the property's condition, and take more photos as you complete each section. This visual record is your best defense against potential disputes.
Deciding between a do-it-yourself approach and hiring professionals often comes down to a simple cost-benefit analysis of your time, energy, and stress levels. If you have the time and the right supplies, tackling this checklist can be a rewarding and cost-effective endeavor. However, if your schedule is packed or the job feels too extensive, calling in experts is a smart investment. Professional move-out cleaning services are efficient, thorough, and equipped to handle tough jobs like stubborn oven grease or hard water stains, ensuring a flawless result. While cleaning, you might also uncover minor repair needs. To help make informed decisions about repairs, particularly with faucets or drains, our guide on DIY plumbing projects versus when to call a professional can be an invaluable resource.
Ultimately, whether you roll up your sleeves or delegate the task, the goal remains the same: to leave the property in impeccable condition. A clean and respectful departure sets a positive tone for your move and honors the space you once called home. By following this detailed cleaning checklist for moving, you are not just tidying up; you are closing one chapter with care and opening the next with a clear, fresh start.
Ready to ensure a stress-free move and secure your security deposit? Let the experts at Custom Maids handle the deep cleaning for you. Visit Custom Maids to get a free quote and schedule your professional move-in or move-out cleaning today.