
The final hard hat is off, the tools are packed away, but the job isn't quite finished. A layer of fine dust coats every surface, stray materials hide in corners, and the true beauty of your new or renovated space is obscured. This is where the real transformation begins. Post-construction cleaning is far more than a simple tidy-up; it's a meticulous, multi-phase process that turns a worksite into a welcoming, safe, and move-in-ready environment. A comprehensive plan is crucial to tackle the unique challenges of construction residue, from pervasive dust to stubborn adhesives.
This guide provides the ultimate post construction cleaning checklist, breaking down the 8 essential phases required for a professional-grade finish. Whether you're a contractor aiming for a perfect handover, a homeowner eager to settle in, or a business preparing to open its doors, following these steps will ensure no detail is overlooked. We'll explore the specific techniques, tools, and safety considerations that distinguish a basic wipe-down from a truly deep clean, ensuring your new space shines from floor to ceiling. For homeowners and businesses in Michigan, tackling such an extensive cleanup can be daunting. Services like Custom Maids offer specialized one-time deep cleaning and move-in/move-out services, perfectly suited for post-renovation projects, ensuring every item on this checklist is handled with professional care.
1. Phase 1: Debris and Construction Material Removal
The initial phase of any post construction cleaning checklist is arguably the most physically demanding yet foundational step: the gross debris removal. This isn't about dusting or polishing; it's the heavy-lifting stage where the remnants of the building process are cleared out. Think of it as unearthing the new space from beneath a layer of construction chaos. This crucial first pass involves removing all large waste, leftover materials, and misplaced tools.
This stage clears the way for all subsequent, more detailed cleaning tasks. You simply cannot deep clean a surface that is covered in drywall chunks, wood scraps, or packaging. Tackling this first ensures a safer and more efficient workflow for the fine-detail cleaning that follows.
Key Tasks in Debris Removal
The scope of this phase involves gathering and disposing of all non-permanent items left behind by contractors. This includes, but is not limited to:
- Scrap Materials: Discarded lumber, pieces of drywall, metal offcuts, broken tiles, and concrete chunks.
- Packaging Waste: Cardboard boxes, plastic sheeting, foam inserts, and wrapping materials from new appliances or fixtures.
- Fasteners and Small Debris: Loose nails, screws, bolts, and other small hardware that pose a safety risk.
- Unused Materials: Leftover paint cans (ensure proper disposal methods), extra shingles, or partial bags of grout.
Pro Tip: When embarking on debris removal, always work from the top floor of the structure downwards. This systematic approach prevents you from having to re-clean lower levels as debris is moved out, saving significant time and effort.
Strategic Implementation
A successful debris removal phase requires a strategic plan. For instance, in a commercial office building cleanup, this could involve coordinating the placement of several large dumpsters around the site to minimize travel distance for workers hauling waste. In a residential home project, it might mean using a magnetic sweeper across all floors to efficiently collect stray nails and screws, preventing potential injuries or flat tires later. Documenting the site with "before" and "after" photos is also a professional best practice, providing clear proof of completion for the client and a valuable record for your portfolio.
2. Dust Removal from All Surfaces
Following the removal of large debris, the next critical phase in any post construction cleaning checklist is the systematic elimination of fine dust. This stage addresses the pervasive, almost microscopic dust generated from drywall, wood, and concrete, which settles on every conceivable surface. Unlike regular household dust, construction dust is abrasive and can damage delicate finishes, compromise indoor air quality, and infiltrate HVAC systems.

Thorough dust removal is essential because skipping this step renders all subsequent cleaning efforts ineffective. Wiping or mopping dusty surfaces simply turns the fine powder into a muddy residue that is even harder to remove. A meticulous approach here ensures the final polish and sanitization phases are successful.
Key Tasks in Dust Removal
This comprehensive task involves a top-to-bottom strategy to capture and remove dust from every horizontal and vertical surface. Key areas of focus include:
- High Surfaces: Ceilings, tops of cabinets, door frames, window casings, and light fixtures.
- Walls and Vertical Surfaces: Wiping down all walls, a task often overlooked but crucial for removing fine particulate.
- Fixtures and Fittings: Dusting outlets, switches, built-in shelving, and intricate trim work.
- HVAC System Components: Cleaning air ducts, vents, and registers to prevent dust from circulating throughout the property.
Pro Tip: Before beginning any dusting, turn off the HVAC system to prevent airborne particles from being pulled into the ductwork. Plan to replace the HVAC filter both before and after the comprehensive dusting process to ensure clean air circulation once the job is complete.
Strategic Implementation
A successful dust removal strategy requires specialized tools and a methodical approach. For example, in a medical facility post-construction, achieving a 99.97% dust-free environment might require HEPA-filter vacuums and air scrubbers to meet sterility standards. In a high-end residential project with antique fixtures, professional cleaners may use electrostatic wands and lightly dampened microfiber cloths to attract and trap dust without causing damage. Sealing off cleaned rooms with plastic sheeting can also prevent re-contamination as work progresses through the building, ensuring each section stays pristine.
3. Window and Glass Cleaning
With debris removed and dust settled, the focus shifts to creating clarity and brilliance. This phase involves the professional cleaning of all glass surfaces, including windows, doors, mirrors, and any architectural glass features. Post-construction window cleaning is far more intensive than a standard wash; it demands the meticulous removal of construction adhesives, paint splatters, silicone residue, and stubborn protective films to reveal streak-free, crystal-clear results.
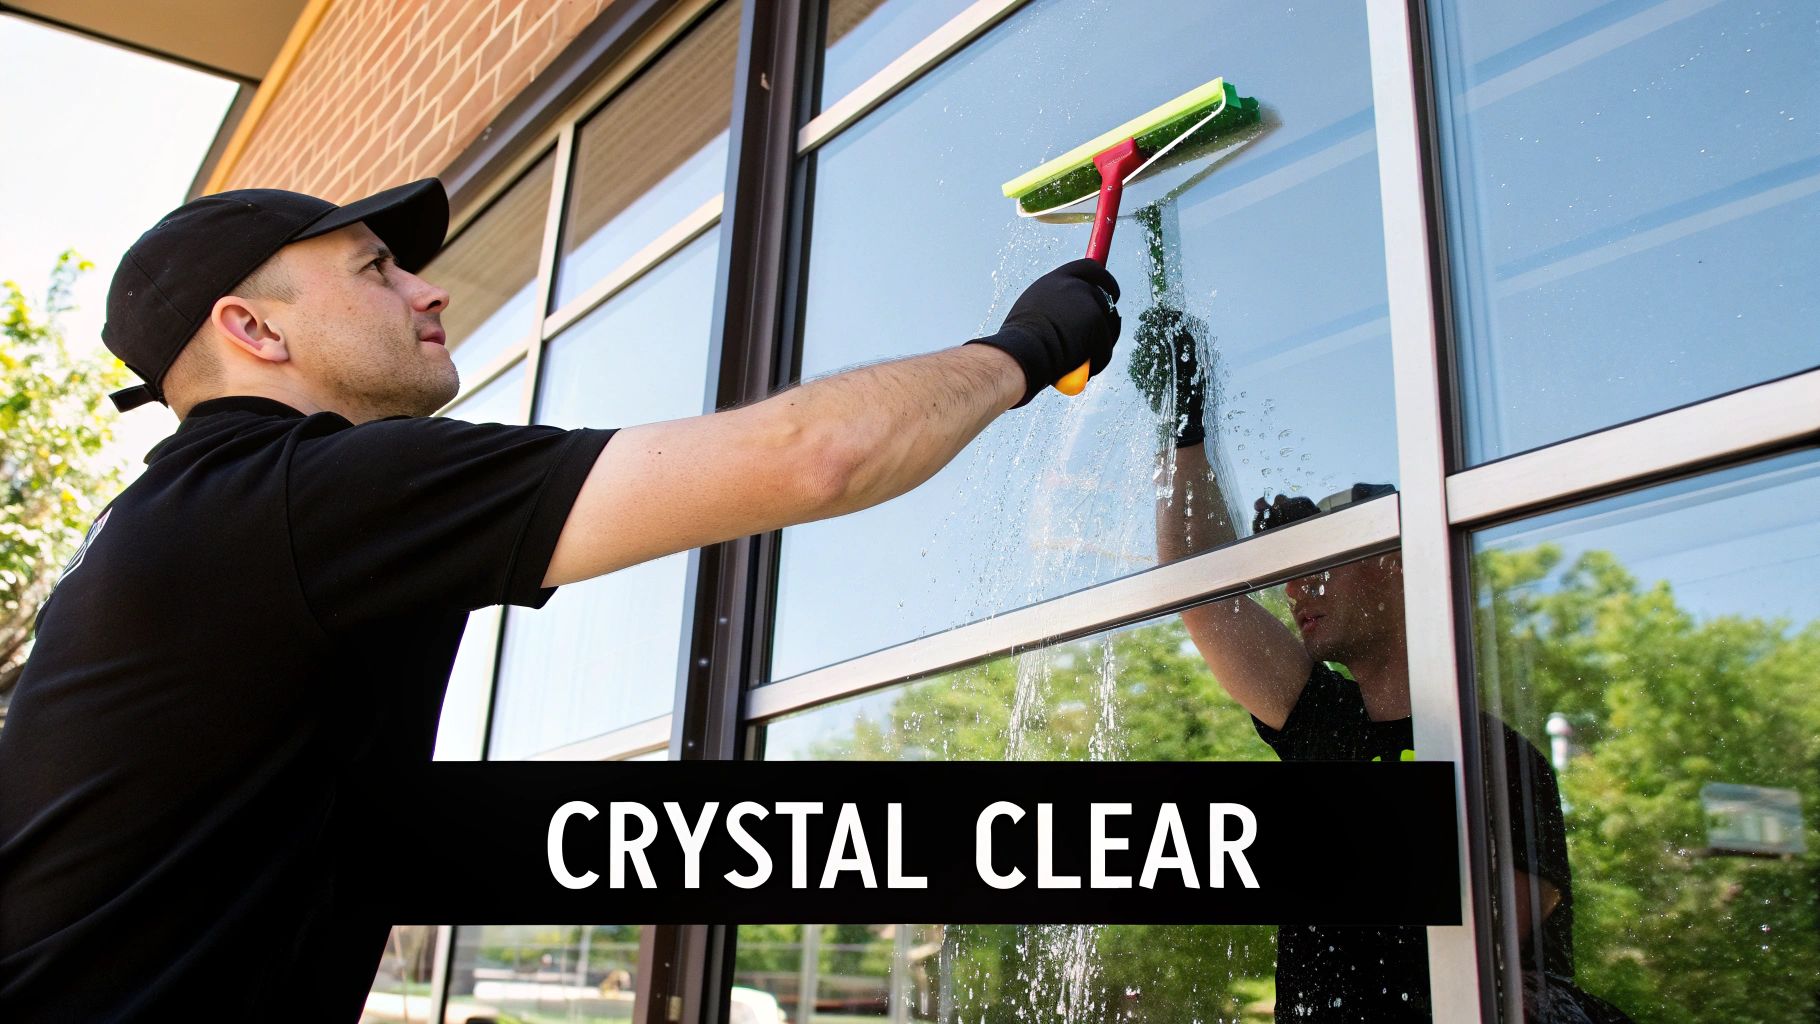
This step is critical for a project’s final presentation. Clean glass allows natural light to flood the new space, highlighting the quality of the construction and interior finishes. Dirty, smudged, or residue-covered windows can make an otherwise pristine space feel unfinished and unprofessional, which is why this task is a non-negotiable part of any high-quality post construction cleaning checklist.
Key Tasks in Window and Glass Cleaning
This specialized cleaning goes beyond simple sprays and paper towels. It requires specific tools and techniques to safely remove construction-specific grime without scratching or damaging the glass.
- Residue and Film Removal: Carefully peeling off all manufacturer's protective films and stickers, then using appropriate solvents to dissolve any remaining adhesive without harming window frames or seals.
- Contaminant Scraping: Using fine-grade steel wool (#0000) or specialty razor scrapers to gently lift off paint overspray, mortar, concrete, or caulk splatters.
- Detailed Frame and Track Cleaning: Thoroughly wiping down and vacuuming all window frames, sills, and tracks to remove accumulated dust and debris.
- Streak-Free Polishing: Applying professional-grade cleaning solutions with squeegees and microfiber cloths for a flawless, transparent finish on all glass surfaces.
Pro Tip: Always clean windows on an overcast day if possible. Direct sunlight causes cleaning solutions to evaporate too quickly, which is a primary cause of streaks and water spots. This simple timing adjustment can dramatically improve the final quality.
Strategic Implementation
Effective glass cleaning requires a tailored approach based on the project's scale and complexity. For a new high-rise office building, this may involve deploying a team with rope access or boom lifts to safely clean the exterior facade, following strict International Window Cleaning Association (IWCA) safety standards. In a luxury residential project with delicate, custom architectural glass, the strategy involves protecting adjacent high-end flooring and fixtures with drop cloths and using non-abrasive methods to preserve the integrity of the expensive installations. For a retail storefront preparing for a grand opening, the focus is on achieving a perfect, inviting finish that enhances curb appeal and draws customers inside.
4. Floor Deep Cleaning and Protection
Once the dust has settled and the debris is gone, the focus shifts to one of the most transformative parts of the post construction cleaning checklist: floor deep cleaning and protection. This stage is about more than just a simple mop and vacuum. It involves an intensive, material-specific process to remove stubborn construction residue like paint splatters, adhesive, and grout haze, bringing the final floor surface to a pristine, move-in-ready state.
This step is critical because flooring is a major investment and often a central design feature. Improper cleaning can cause permanent damage, while a professional deep clean not only enhances the floor's appearance but also prepares it for protective treatments that ensure its longevity. The specific methods used will vary drastically depending on the material, from delicate hardwood to resilient commercial vinyl. For a comprehensive guide on tackling various surfaces, explore our essential deep cleaning checklists for professional maids.
Key Tasks in Floor Cleaning and Protection
The goal is to meticulously clean and then safeguard every type of flooring installed on the property. Each material demands a unique approach to avoid damage and achieve the best results.
- Residue Removal: Carefully scraping and dissolving paint overspray, drywall mud, and excess adhesive without scratching the surface.
- Material-Specific Cleaning: Using pH-neutral cleaners for natural stone, specialized solutions for hardwood, and degreasers for industrial concrete.
- Grout and Tile Care: Deep cleaning tile surfaces and removing any grout haze, followed by sealing the grout lines to prevent future staining.
- Finishing and Protection: Applying appropriate sealants, waxes, or protective coatings to shield floors from wear and tear, especially in high-traffic areas.
Pro Tip: Always test cleaning agents on an inconspicuous area, such as inside a closet or under where an appliance will be placed. This simple test prevents costly mistakes, like discoloration or etching, on a brand-new floor.
Strategic Implementation
A successful floor cleaning strategy requires careful planning and coordination. For instance, in a hospital project, the vinyl flooring would not only be deep cleaned but also treated with an antimicrobial sealant to meet stringent health codes. In a luxury residential build, the focus might be on a multi-step process for newly installed hardwood, involving fine vacuuming, tack cloth cleaning, and the application of a high-end protective finish. It's crucial to coordinate with other trades to ensure that once the floors are cleaned and sealed, they are protected with coverings like Ram Board or plastic sheeting until the final handover, preserving the perfect finish.
5. HVAC System Cleaning and Filter Replacement
Often overlooked until it's too late, the fifth critical item on any post construction cleaning checklist is the comprehensive cleaning of the HVAC system. Construction generates an enormous volume of fine dust, drywall particles, and other airborne debris. These contaminants are inevitably pulled into the ductwork, vents, and mechanical components of the heating, ventilation, and air conditioning system.
Addressing this phase is essential for ensuring healthy indoor air quality, the long-term efficiency of the system, and preventing future mechanical issues. A contaminated HVAC system will continuously circulate construction dust throughout the newly cleaned space, defeating the purpose of all other cleaning efforts. A thorough system flush is non-negotiable for a truly clean and healthy environment.
Key Tasks in HVAC System Cleaning
This specialized process goes far beyond simply wiping down external vent covers. It requires a systematic cleaning of the entire system, adhering to standards set by organizations like the National Air Duct Cleaners Association (NADCA).
- Duct and Vent Cleaning: Professional cleaning of all supply and return air ducts and registers to remove accumulated dust and debris.
- Component Sanitization: Cleaning the blower motor, evaporator coil, and other key components where contaminants collect.
- Complete Filter Replacement: Disposing of the construction-phase filter and installing a new, high-quality filter appropriate for the building's intended use.
- System Check: Ensuring the system operates correctly after the cleaning is complete.
Pro Tip: Always schedule the HVAC system cleaning before the final round of fine dusting and polishing. Cleaning the ducts will dislodge fine particles, and performing this task first prevents re-contaminating surfaces that have already been detailed.
Strategic Implementation
The strategy for HVAC cleaning must be tailored to the specific needs of the building. For example, in a medical facility, the process must meet stringent healthcare air quality standards, often requiring HEPA-filtered vacuums and documentation for compliance. In a LEED-certified office project, technicians may need to provide evidence of improved indoor air quality post-cleaning to contribute to the building's certification points. For a restaurant, the focus might extend to the kitchen exhaust system to ensure it meets health department regulations before opening. Using high-efficiency MERV-rated filters post-cleaning is a crucial final step to capture any remaining particulates and maintain clean air moving forward.
6. Bathroom and Kitchen Deep Sanitization
Following the major structural and surface cleaning, the post construction cleaning checklist moves to the most critical areas for health and hygiene: the bathrooms and kitchens. This stage involves an intensive, detailed sanitization process that transforms these functional spaces from a work zone into a ready-to-use, pristine environment. It goes beyond simple wiping, focusing on eliminating all construction residue, disinfecting every surface, and ensuring all fixtures are immaculate.
These high-traffic areas are packed with complex fixtures, diverse materials, and strict hygiene requirements, making them a focal point of any final inspection. Proper sanitization here is non-negotiable, whether preparing for a health department inspection in a commercial kitchen or ensuring a family’s new home is safe and welcoming.
Key Tasks in Sanitization
This phase requires a meticulous approach to every component within the kitchens and bathrooms. The goal is complete cleanliness and disinfection.
- Fixture and Appliance Detailing: Cleaning and polishing all sinks, faucets, toilets, showers, and tubs. This includes removing all protective films, stickers, and adhesive residue from new appliances and fixtures.
- Surface Disinfection: Wiping down all countertops, backsplashes, cabinets (inside and out), and drawers with appropriate, residue-free disinfectants.
- Grout and Caulk Lines: Paying special attention to cleaning and whitening grout lines and ensuring caulk seals are free of dust and debris.
- Flooring and Baseboards: Thoroughly scrubbing, mopping, and sanitizing floors, including cleaning along all baseboards and in tight corners. For tips on handling stubborn buildup, particularly greasy kitchen messes, you can find helpful guidance on how to clean greasy kitchen surfaces on custom-maids.co.
Pro Tip: Always test cleaning products on a small, inconspicuous area first, especially on high-end materials like marble, quartz, or custom cabinetry. Using the wrong chemical can cause permanent damage, turning a cleaning job into a costly repair.
Strategic Implementation
A successful sanitization strategy relies on using the right tools and products for each specific material. For a luxury hotel bathroom with marble vanities and brass fixtures, this means using a pH-neutral stone cleaner and a non-abrasive brass polish to avoid etching or scratching. In a medical facility’s restroom, the focus would be on using hospital-grade disinfectants and following specific protocols to meet stringent healthcare standards. This detailed, material-specific approach is a hallmark of a professional post construction cleaning service and ensures a flawless, damage-free finish.
7. Light Fixture and Electrical Component Cleaning
Often overlooked until the final walkthrough, the detailed cleaning of light fixtures and electrical components is a critical step in any professional post construction cleaning checklist. This stage transitions from broad surface cleaning to intricate, high-value item detailing. It involves the meticulous removal of fine dust, paint overspray, and protective films from every switch, outlet, and light fixture, ensuring they are not only clean but also fully functional and safe.
This process is vital because dust and debris can severely diminish the performance and lifespan of lighting and electrical systems. For example, dust buildup on a new chandelier can dull its sparkle and even pose a fire hazard over time. Properly cleaning these elements is essential for showcasing the finished space as intended and ensuring client satisfaction with every detail.
Key Tasks in Fixture and Component Cleaning
The focus of this phase is on safely and thoroughly cleaning all electrical elements without causing damage. The work demands precision, care, and adherence to strict safety protocols.
- Fixture Detailing: Wiping down all parts of light fixtures, including bulbs, shades, covers, and decorative elements. This includes removing protective plastic films that contractors often leave behind.
- Switch and Outlet Cleaning: Carefully cleaning faceplates of all switches, outlets, and data ports to remove smudges, paint specks, and dust.
- Panel and Box Cleaning: Wiping down breaker boxes, junction boxes, and other electrical panels to remove construction residue.
- Functionality Check: Ensuring all lights turn on and off correctly and reporting any non-functional components discovered during the cleaning process.
Pro Tip: Always turn off the power at the main breaker for the specific circuit you are working on before cleaning any electrical component. Use dry or lightly dampened microfiber cloths and avoid spraying liquids directly onto fixtures or outlets to prevent electrical shorts and ensure safety.
Strategic Implementation
Successful electrical component cleaning requires a methodical approach, especially when dealing with complex or high-value installations. For instance, cleaning a crystal chandelier in a luxury hotel lobby demands a different strategy than wiping down high-bay fixtures in an industrial warehouse, which may require lift equipment. Similarly, in a hospital's surgical suite, specialized lighting requires specific cleaning agents and protocols to maintain a sterile environment. Documenting any pre-existing scratches or damage on expensive fixtures before cleaning begins is a crucial step to protect your business and manage client expectations.
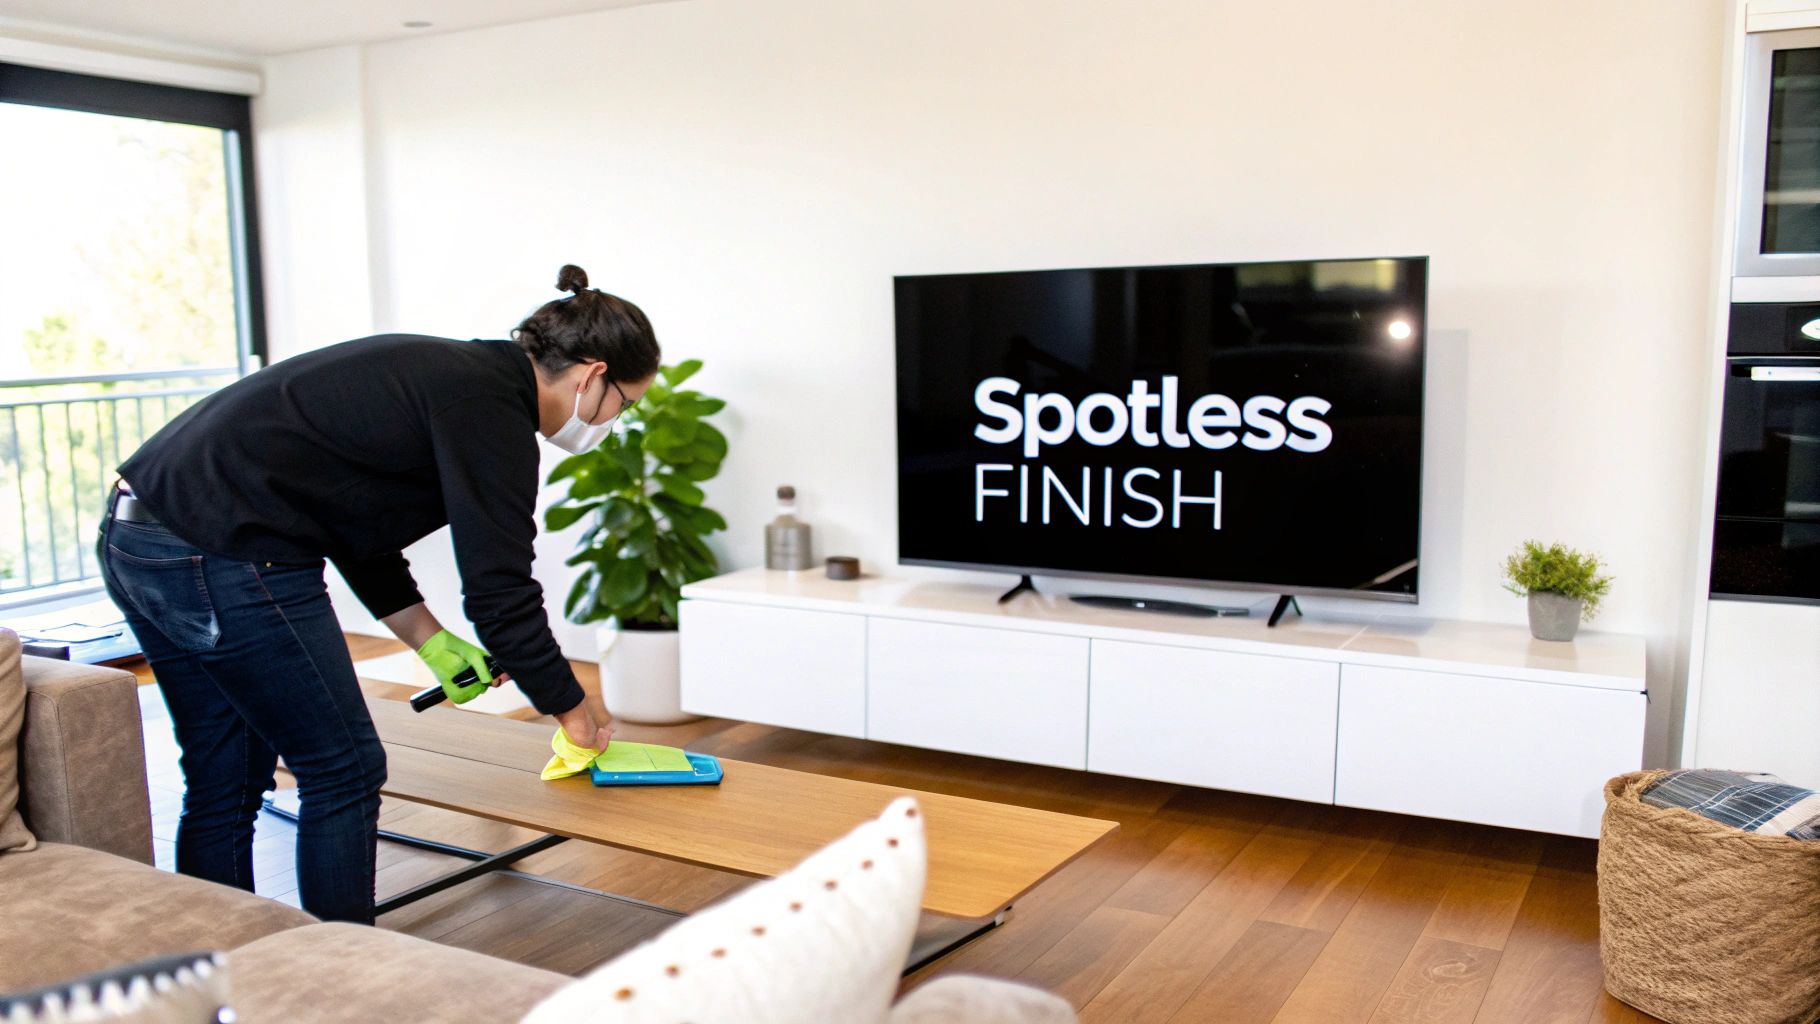
8. Final Detailing and Touch-up Cleaning
The final detailing and touch-up stage is the culmination of the entire post construction cleaning checklist, transforming a clean space into a pristine, move-in-ready environment. This is the quality control phase where every surface is meticulously inspected and perfected. It addresses any smudges, fingerprints, or overlooked dust that may have settled after the deep clean, ensuring the property meets the highest professional standards for client handover.
This last pass is what separates a good cleaning job from an exceptional one. It’s the meticulous attention to detail that ensures a flawless first impression, whether for a new homeowner, a corporate tenant, or a retail customer. Without this critical step, minor imperfections can detract from the overall quality of the construction work and the cleaning service.
Key Tasks in Final Detailing
This phase focuses on micro-cleaning and perfection, ensuring nothing is missed before the final walkthrough. It’s a comprehensive review of all previously cleaned areas.
- Spot Cleaning: Wiping away any last-minute smudges on walls, light switch plates, windows, or glass surfaces.
- Final Polishing: Polishing all metal fixtures, such as faucets, handles, and stainless steel appliances, to a brilliant shine.
- Edge and Corner Inspection: Checking all corners, edges, and crevices where fine dust might have resettled, including along baseboards and inside cabinetry.
- Floor Perfection: Performing a final light mop or vacuum to remove any footprints or dust accumulated during the final inspection process.
Pro Tip: Use consistent and bright lighting, such as powerful LED work lights, during the final inspection. Standard room lighting can create shadows that hide fine dust, streaks on windows, or smudges on reflective surfaces.
Strategic Implementation
A successful final detailing phase is methodical and checklist-driven. For a luxury condominium project, this means creating a specific checklist for each room type, noting every fixture, surface, and appliance that requires a final polish and inspection. When preparing a corporate headquarters for employee move-in, cleaners might focus on high-touch common areas like lobbies, conference rooms, and kitchenettes, ensuring they are immaculate. Using before-and-after photos for each zone provides clear documentation of the completed work, which is invaluable for client sign-off. This level of detail is essential for anyone wanting to learn how to clean a house like a pro.
Post Construction Cleaning Checklist Comparison
| Cleaning Task | Implementation Complexity 🔄 | Resource Requirements ⚡ | Expected Outcomes 📊 | Ideal Use Cases 💡 | Key Advantages ⭐ |
|---|---|---|---|---|---|
| Debris and Construction Material Removal | High: labor-intensive, specialized equipment | Heavy-duty containers, waste management services | Immediate visual improvement, hazard elimination | Initial post-construction phase, heavy debris sites | Safety hazard removal, faster project timeline |
| Dust Removal from All Surfaces | Very High: detail-oriented, multiple passes | HEPA vacuum systems, microfiber cloths, air scrubbers | Improved air quality, health compliance | Medical, educational, and high-end residential sites | Enhanced indoor air quality, professional finish |
| Window and Glass Cleaning | Moderate: requires skill, weather-dependent | Squeegees, solvents, safety equipment | Streak-free glass, enhanced natural lighting | High-rises, luxury homes, retail storefronts | Visual appeal, inspection approval |
| Floor Deep Cleaning and Protection | High: material-specific knowledge needed | Specialized cleaning equipment, protective coatings | Preserved flooring, warranty compliance | Hotels, hospitals, residential, industrial floors | Extends floor lifespan, prevents residue damage |
| HVAC System Cleaning and Filter Replacement | High: specialized expertise and equipment | Duct cleaning vacuums, brushes, filters | Clean airflows, system efficiency, air quality | Healthcare, LEED buildings, commercial kitchens | Prevents dust circulation, improves HVAC life |
| Bathroom and Kitchen Deep Sanitization | High: labor-intensive, detailed fixture work | Variety of cleaners, antimicrobial treatments | Hygiene compliance, preserved fixtures | Hotels, restaurants, medical facilities, homes | Health safety, stain prevention |
| Light Fixture and Electrical Component Cleaning | Moderate to High: requires electrical safety | Non-conductive tools, electrical safety gear | Improved lighting performance, fixture longevity | Luxury hotels, warehouses, retail, hospitals | Enhances aesthetics, prevents fixture failure |
| Final Detailing and Touch-up Cleaning | Moderate: requires experienced quality control | Inspection checklists, polishing tools | Uniform quality, client satisfaction | All post-cleaning projects, final walkthrough phase | Ensures consistent quality, client approval |
Bringing It All Together: Your Path to a Pristine Property
Completing a major construction or renovation project is a monumental achievement, a moment where blueprints and hard work finally materialize into a tangible space. However, the journey isn't truly over until the last layer of fine dust is wiped away and every surface gleams. The final, detailed cleaning is the crucial step that transforms a chaotic construction site into a pristine, move-in-ready property. This comprehensive post construction cleaning checklist serves as your strategic roadmap, guiding you from the initial rough sweep to the final, meticulous polish.
The value of this methodical approach cannot be overstated. By tackling tasks in a specific, logical sequence, from large-scale debris removal and top-down dusting to deep floor sanitization and HVAC system purification, you prevent redundant work and ensure no detail is missed. Imagine meticulously cleaning the floors only to have fine dust from uncleaned light fixtures and ceiling fans settle all over them again. This checklist helps you avoid such frustrating and time-consuming setbacks, protecting both your investment and your sanity.
Key Takeaways for a Flawless Finish
To ensure your project concludes successfully, remember these critical principles drawn from our checklist:
- Top-Down, Inside-Out: Always begin cleaning from the highest point in a room (ceilings, light fixtures) and work your way down to the floors. Similarly, clean the interiors of cabinets and closets before tackling exterior surfaces. This systematic flow ensures dust and debris are consistently moved downward and out, preventing re-contamination of already cleaned areas.
- HVAC is Non-Negotiable: Neglecting the HVAC system is a common but critical mistake. An uncleaned system will immediately circulate construction dust throughout your newly cleaned space, compromising air quality and covering every surface in a fresh layer of grime. Replacing filters and cleaning vents is essential for a healthy living environment.
- Detailing Makes the Difference: The final 10% of the cleaning process delivers 90% of the "wow" factor. Polishing fixtures, cleaning switch plates, wiping down baseboards, and ensuring window tracks are free of debris are the small tasks that elevate the result from simply "clean" to professionally finished and truly impressive.
While a DIY approach using this post construction cleaning checklist is certainly achievable for smaller projects, the sheer scale and specialized nature of post-construction cleaning can be overwhelming. The fine, pervasive dust requires specific equipment, and the sanitization of kitchens and bathrooms demands a professional touch to ensure they are safe and hygienic.
For homeowners and businesses throughout Michigan, particularly in communities like Bay City, Midland, and Saginaw, delegating this final, intensive phase is often the most efficient and effective choice. It allows you to focus on settling into your new space rather than wrestling with sawdust and drywall dust. Investing in a professional service ensures every corner is handled with expertise, transforming your construction zone into the beautiful, welcoming property you envisioned from the start.
Ready to enjoy your newly renovated space without the stress of the final, intensive cleanup? Custom Maids has been providing expert post-construction cleaning services to Mid-Michigan residents and businesses since 1982. Let our experienced team handle the dust, debris, and detailing for you by visiting Custom Maids to schedule a consultation today.