
Moving out of an apartment can feel like a high-stakes puzzle with a hundred moving pieces. From legal notices and deep cleaning to securing your deposit, one missed step can lead to stress and unexpected costs. This comprehensive moving out apartment checklist is your strategic guide, breaking down the entire process into manageable, chronological steps. We're not just listing tasks; we're providing a detailed roadmap to navigate the complexities of your departure, ensuring nothing falls through the cracks.
This guide goes beyond simple reminders. We'll provide actionable advice and insider tips to ensure your transition is not just successful, but seamless. Our goal is to empower you to handle every detail with confidence, from documenting the apartment's condition to finalizing utility transfers and updating your address. Following these steps methodically will protect your finances and your peace of mind.
Beyond just a comprehensive checklist, mastering the emotional and logistical aspects can significantly ease your transition. For more insights on this, you might find useful tips on how to make moving less stressful. By systematically tackling each stage, you can leave your old apartment on good terms, ready to embrace your next chapter with your full security deposit in hand.
1. Two Months Out: Master the Official Notice
The very first task on your moving out apartment checklist is to provide a formal, written notice to vacate to your landlord or property management company. This isn't a mere suggestion; it's a legally binding step dictated by your lease agreement. Getting this wrong can lead to financial penalties, such as being charged for an extra month's rent, or even jeopardize your security deposit return.
Why It's The First Step
Your lease agreement contains a specific clause detailing the required notice period, which is typically 30, 60, or even 90 days. Submitting your notice officially starts the move-out timeline and fulfills your contractual obligation. Failing to provide adequate notice is a breach of your lease, and your landlord would be within their rights to penalize you. Think of this as the official starting gun for a smooth and penalty-free departure.
How to Do It Right
- Review Your Lease: Before you write anything, locate the "Notice to Vacate" or a similar clause in your lease. Note the exact number of days required.
- Write a Formal Letter: Even if your landlord is friendly, a formal, written notice is crucial for documentation. State your name, current address (including unit number), the date you will be vacating, and the date you are submitting the notice.
- Deliver and Document: Hand-deliver the notice and ask for a signed receipt, or send it via certified mail. Certified mail provides a tracking number and delivery confirmation, creating an undeniable paper trail that proves you met the deadline.
Pro Tip: Keep a digital and a physical copy of your signed notice and the certified mail receipt. This documentation is your best defense against any potential disputes about when you provided notice.
2. Schedule Move-Out Inspection
After submitting your notice, the next critical task on your moving out apartment checklist is to schedule a pre-move-out inspection. This is a walk-through with your landlord or property manager conducted before your final day. It’s an opportunity to proactively identify potential deductions from your security deposit, giving you time to make necessary repairs or clean specific areas yourself.

Why It's The Next Step
This inspection transforms the move-out process from a guessing game into a clear-cut task list. Instead of worrying about what your landlord might charge you for, you get a definitive set of expectations directly from the source. This step prevents surprise fees and disputes over the condition of the apartment, maximizing the chances of getting your full security deposit back. It's your best tool for financial transparency and a smooth exit.
How to Do It Right
- Request Early: Contact your landlord about two to three weeks before your move-out date to schedule the inspection. This gives you plenty of time to address any issues they point out.
- Come Prepared: Bring your own move-in checklist and photos to compare the apartment's current condition to when you first moved in. During your initial walk-through, be vigilant for any signs of pests; understanding common household bugs can help in early identification. For instance, you might want to know What Is This Brown Bug That Looks Like a Roach? if you spot unfamiliar critters.
- Document Everything: Use your phone to take photos or videos of any areas discussed. Ask for a written list of required repairs or specific cleaning standards. Some property management companies may even use digital inspection tools for this.
Pro Tip: Ask your landlord for their specific cleaning requirements or a copy of their apartment turnover checklist. This removes all ambiguity and shows you're serious about leaving the unit in excellent condition. Having this guide is essential for a successful final inspection.
3. Deep Clean the Entire Apartment
A thorough, top-to-bottom deep clean is one of the most critical tasks on your moving out apartment checklist. This isn't your average weekly tidying; it’s a meticulous cleaning process designed to return the apartment to its original, move-in condition. Failing to meet your landlord’s cleanliness standards is one of the most common reasons for partial or full security deposit deductions.

Why It's A Non-Negotiable Step
Your lease agreement almost certainly includes a clause requiring you to leave the unit in a "broom-swept" or professionally cleaned condition. This step directly impacts your finances, as a landlord can legally use your deposit to hire professional cleaners if you leave a mess. Documenting your cleaning efforts with photos provides proof that you upheld your end of the agreement, protecting your deposit.
How to Do It Right
- Follow a Checklist: Don't just clean randomly. Use a detailed move-out cleaning checklist to ensure you don’t miss common problem areas. For a comprehensive guide, review these essential deep cleaning checklists to cover all your bases.
- Go Beyond the Surface: This means cleaning inside the oven, microwave, and refrigerator. Scrub bathroom grout, descale fixtures, wipe down all baseboards, and clean inside cabinets and drawers.
- Work Top to Bottom: Start by dusting ceiling fans and light fixtures, then move to walls and windows, and finish with the floors. This method ensures you aren't knocking dust onto already cleaned surfaces.
Pro Tip: Take detailed "after" photos of every room, closet, and appliance once you’re finished cleaning. These timestamped pictures are invaluable evidence if a dispute over the cleanliness of the apartment arises with your landlord.
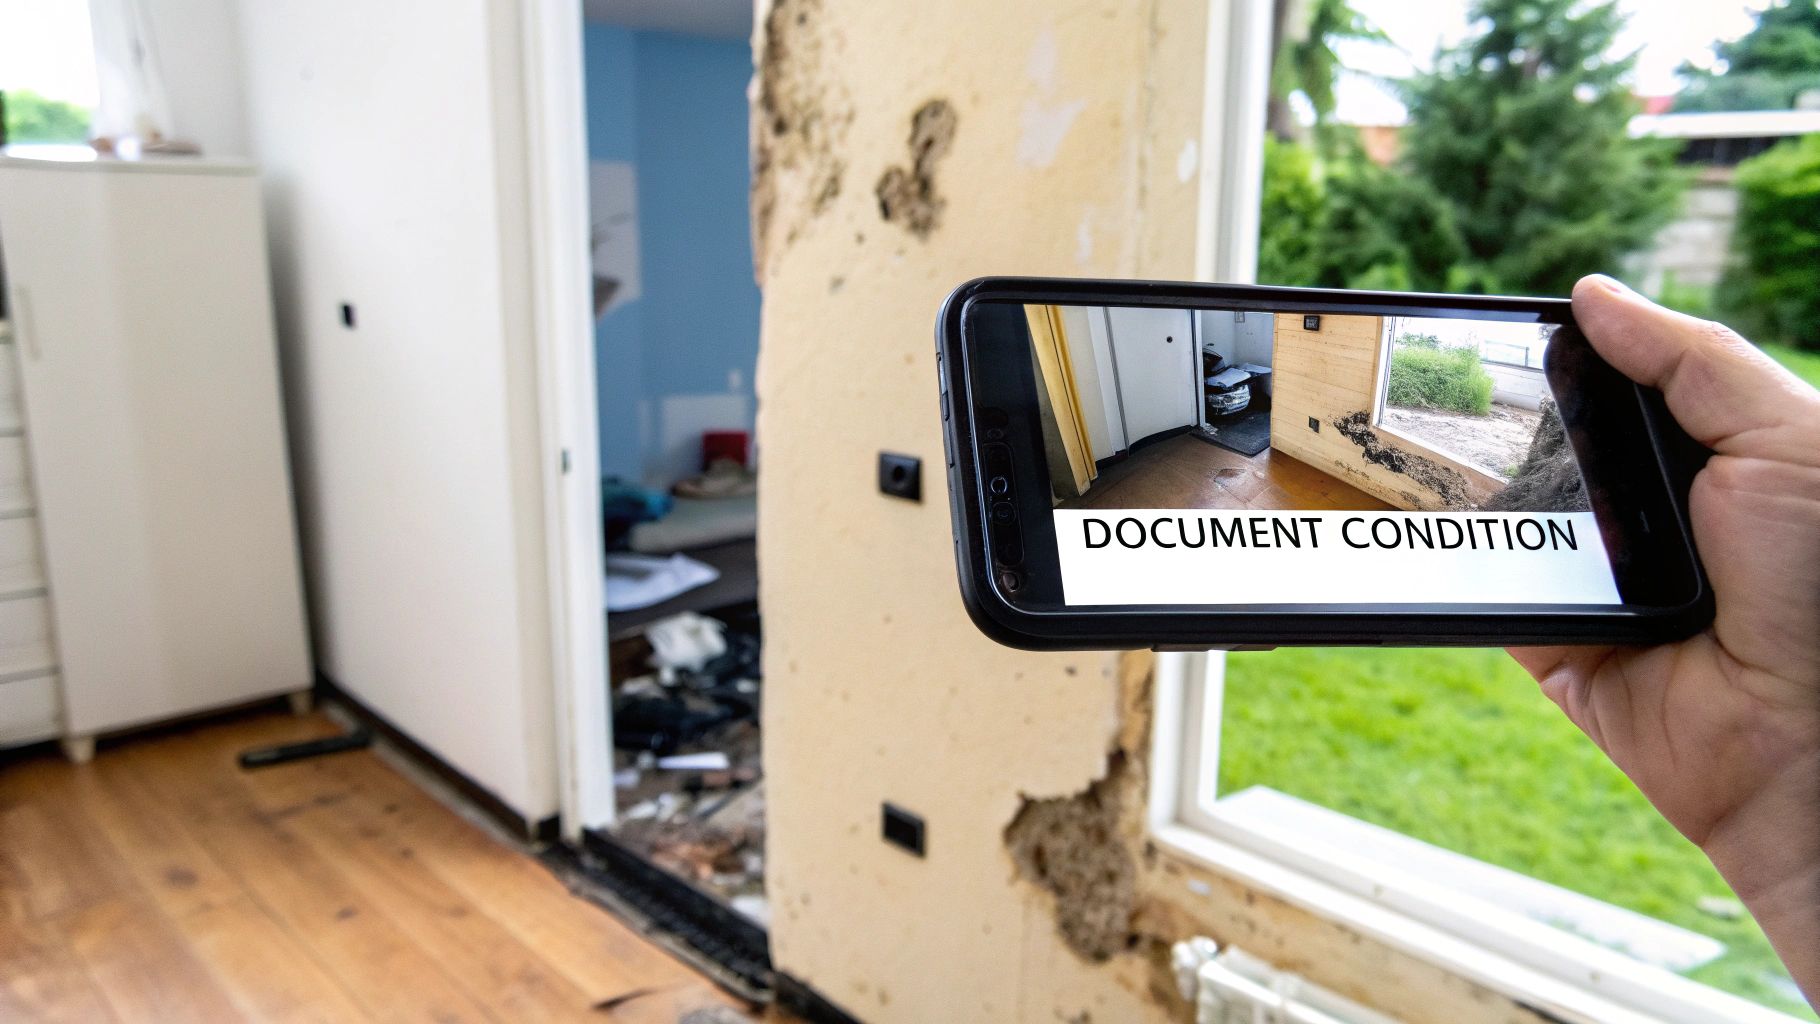
4. Document Apartment Condition with Photos/Video
Before you move a single box, your most important task is to create a detailed visual record of the apartment's condition. This is your primary defense against unfair security deposit deductions. By thoroughly documenting every room with photos and video, you create undeniable evidence of the state in which you left the property, protecting yourself from being charged for pre-existing wear and tear or damage that occurs after you vacate.
Why It's A Critical Step
Landlords compare the apartment's condition at move-out to its state at move-in, minus normal wear and tear. Without your own proof, any dispute becomes your word against theirs. This visual log is objective evidence that can resolve disagreements quickly and in your favor. It’s an essential part of a comprehensive moving out apartment checklist because it directly impacts the return of your security deposit, which can often be a significant amount of money.
How to Do It Right
- Conduct a Video Walkthrough: Record a slow, continuous video of the entire apartment. Narrate what you see, opening cabinets, showing inside appliances, and pointing out the clean condition of floors and walls.
- Take Extensive Photos: Capture both wide-angle shots of each room and close-ups of areas prone to disputes: carpets, walls, countertops, and inside the oven and refrigerator.
- Use Timestamps: Use an app like "TimeStamp Camera" to embed the date and time directly onto your photos and videos. This validates when the documentation was created.
- Organize and Back Up: Create a dedicated folder in a cloud service like Google Drive or Dropbox. Organize photos into subfolders by room (e.g., "Kitchen," "Bathroom") and ensure you have at least one backup.
Pro Tip: Email a link to the photo and video gallery to your landlord on your move-out day. This creates a digital paper trail confirming that you provided them with evidence of the apartment's condition upon your departure.
5. Return All Keys and Access Items
The final, official act of your tenancy is returning every key, fob, and access device issued to you. This is a critical step in your moving out apartment checklist because it formally signals you have vacated the property and relinquished control. Failing to return all items, or returning them late, can lead to costly deductions from your security deposit for lock changes or replacement fees.
Why It's The Final Step
Handing over the keys is the symbolic and legal conclusion to your lease. It confirms that you have completely moved out and that the property manager can now take possession of the unit to prepare it for the next tenant. Until every key is returned, your landlord may consider you still in possession of the apartment, potentially leading to disputes or prorated rent charges. This action finalizes your departure and is essential for a full security deposit refund.
How to Do It Right
- Gather Everything: Collect all keys associated with your tenancy. This includes unit keys, mailbox keys, laundry room keys, storage unit keys, and any keys for amenities like a pool or gym. Also gather all electronic fobs, garage door openers, and parking access cards.
- Schedule the Handover: Coordinate directly with your landlord or property manager for the key return. Ask them about their specific procedure; some may want to collect them during the final walkthrough, while others have a designated drop-off location.
- Get a Receipt: Never leave keys in the apartment or a mailbox. Always hand them directly to a representative and request a signed and dated receipt confirming the return of all items. This written proof protects you from any claims that items were missing.
Pro Tip: Before the handover, lay out all your keys and access devices and take a clear, dated photo. This visual record, along with your signed receipt, creates an indisputable record of what you returned, protecting your security deposit.
6. Transfer or Cancel Utilities
A critical step on your moving out apartment checklist is to properly manage your utility accounts. This involves either transferring services to your new address or canceling them entirely. Neglecting this task can result in you paying for electricity, gas, water, or internet that the next tenant is using, leading to unnecessary expenses and billing complications.
Why It's A Critical Step
Utility companies bill the account holder, not the resident. If your name remains on the account after you've moved, you are legally responsible for any usage charges incurred. Properly scheduling a service disconnection or transfer creates a clear cutoff date, protecting you from financial liability and ensuring a smooth transition for the incoming resident. This step is essential for finalizing your financial obligations to the property.
How to Do It Right
- Compile a List: Identify all utilities registered in your name. This includes electricity, gas, water, sewer, trash, internet, and cable.
- Contact Providers: About two weeks before your move, contact each provider. Most companies now offer convenient online portals for scheduling a service transfer or disconnection.
- Schedule Strategically: Arrange for services to be shut off the day after your move-out date. This ensures you have power and water for final cleaning tasks and the final walkthrough.
- Confirm Everything: After scheduling, request a confirmation number or email for each cancellation or transfer. Note any final meter reading dates and details about your final bill or security deposit refund.
Pro Tip: Keep all confirmation numbers and final statements in your moving folder. If a billing dispute arises later, this documentation will be invaluable proof that you closed your account correctly.
7. Update Address with Important Institutions
Forwarding your mail is a great temporary fix, but the real task is to permanently change your address with every important institution and service provider in your life. This crucial step on your moving out apartment checklist ensures that sensitive documents, financial statements, and important notices are sent directly to your new home without interruption or risk of being lost. Neglecting this can lead to missed bills, security vulnerabilities, and major administrative headaches down the line.
Why It's A Critical Step
Failing to update your address isn't just an inconvenience; it can have serious consequences. A missed credit card bill can impact your credit score, an unreceived tax document can cause issues with the IRS, and a lapsed insurance policy could be disastrous. Proactively managing this process ensures a seamless transition for your financial, legal, and personal affairs, preventing your move from causing a cascade of problems.
How to Do It Right
- Create a Master List: Before you begin, list every entity that has your address. This includes banks, employers (HR department), insurance providers (auto, health, renters), the IRS, your state's DMV, and voter registration.
- Tackle Digital and Physical Subscriptions: Don't forget magazine subscriptions, streaming services with location-based content, and any monthly delivery boxes. Many of these can be updated quickly through online portals.
- Prioritize and Document: Start with the most critical institutions like your bank and employer 3-4 weeks before your move. For every change you make, save the confirmation email or a screenshot of the confirmation page.
Pro Tip: For government agencies like the IRS, use their official online change-of-address forms. This creates an official record and ensures that critical documents, like future tax refunds or economic impact payments, are sent to the correct location.
8. Set Up Mail Forwarding
An easily overlooked but critical task on your moving out apartment checklist is to officially set up mail forwarding with the United States Postal Service (USPS). This service acts as a crucial safety net, automatically redirecting mail sent to your old apartment to your new address. Forgetting this step can mean missing important documents like bills, tax forms, or personal correspondence long after you've moved.
Why It's A Crucial Step
Even if you diligently update your address with banks and subscription services, some mail will inevitably slip through the cracks. Mail forwarding ensures that nothing important is lost during the transition period. It buys you time to update your address with every single entity without the stress of missing a critical delivery. Think of it as your personal mail safety net for the first year after you move.
How to Do It Right
- Act in Advance: The USPS recommends setting up mail forwarding at least one to two weeks before your move-out date. You can do this easily online at USPS.com or by filling out a Mover’s Guide packet at your local post office.
- Set the Start Date: When you fill out the form, specify the exact date you want the forwarding service to begin. Align this with your official move-out date to ensure a seamless transition.
- Choose the Right Service: The standard service forwards most first-class mail for 12 months and magazines for 60 days. For more comprehensive coverage, consider the premium forwarding service, which can handle packages.
Pro Tip: Once you submit your request, you will receive a confirmation letter from the USPS. Keep this confirmation number in a safe place. It’s essential if you need to modify or track your forwarding service later on.
9. Collect Security Deposit Information
As you approach the end of your lease, a crucial part of your moving out apartment checklist is to gather all necessary information regarding your security deposit. This isn't just about hoping for the best; it's about actively managing the process to ensure you receive the maximum refund you're entitled to. Understanding your rights and the specific procedures required by state and local laws is your best tool for a successful financial recovery.
Why It's A Key Step
Your security deposit is a significant amount of your money, and landlords are bound by specific legal timelines and rules for its return. Different states have vastly different laws; for example, California requires a landlord to return a deposit within 21 days, while New York mandates an itemized list of any deductions. Ignoring these details can lead to delays, unfair deductions, or even the complete loss of your deposit. Proactively collecting this information puts you in control.
How to Do It Right
- Research Local Laws: Start by searching for your state’s or city’s "tenant rights" or "security deposit law." These regulations will outline the maximum allowable deductions and the exact deadline by which your landlord must return your deposit.
- Provide a Forwarding Address: Your landlord legally needs a place to send the check. Provide your new address in a formal, written notice (the same letter for your notice to vacate is perfect) and keep a copy for your records.
- Document Everything: Keep a file with your lease, all written communication with your landlord, and your move-in/move-out condition reports. This paperwork is essential if you need to dispute any charges.
Pro Tip: When you provide your forwarding address, explicitly state that it is for the return of your security deposit. Sending this via certified mail creates a documented, time-stamped record that your landlord received the information, preventing any claims that they didn't know where to send it.
10. Plan and Execute the Physical Move
With the administrative tasks handled, the next critical phase in your moving out apartment checklist is coordinating the logistics of the actual physical move. This step is all about translating your plans into action, ensuring your belongings are transported safely and efficiently from your old apartment to your new home. Proper planning here prevents chaotic, stressful, and expensive moving days.
Why It's The First Step
Executing the physical move is the culmination of all your prior efforts. Whether you're hiring professionals or doing it yourself, booking services and gathering supplies well in advance is essential. Popular moving companies like Allied Van Lines or truck rentals such as U-Haul can be fully booked weeks, or even months, out. Securing your resources early guarantees availability and often results in better pricing, preventing last-minute scrambles and unforeseen costs.
How to Do It Right
- Book Your Muscle: Decide if you're hiring full-service movers, renting a truck, or using on-demand labor like TaskRabbit for heavy lifting. Book your chosen service at least 4-6 weeks before your move date.
- Declutter and Pack Strategically: Before packing a single box, declutter ruthlessly. Less stuff means less to move. When you do pack, label every box with its contents and destination room.
- Prepare a Moving Day Kit: Pack a separate bag or box with essentials you'll need immediately upon arrival: toiletries, medications, a change of clothes, phone chargers, basic tools, and snacks.
This process flow infographic outlines the critical sequence for a smooth relocation.
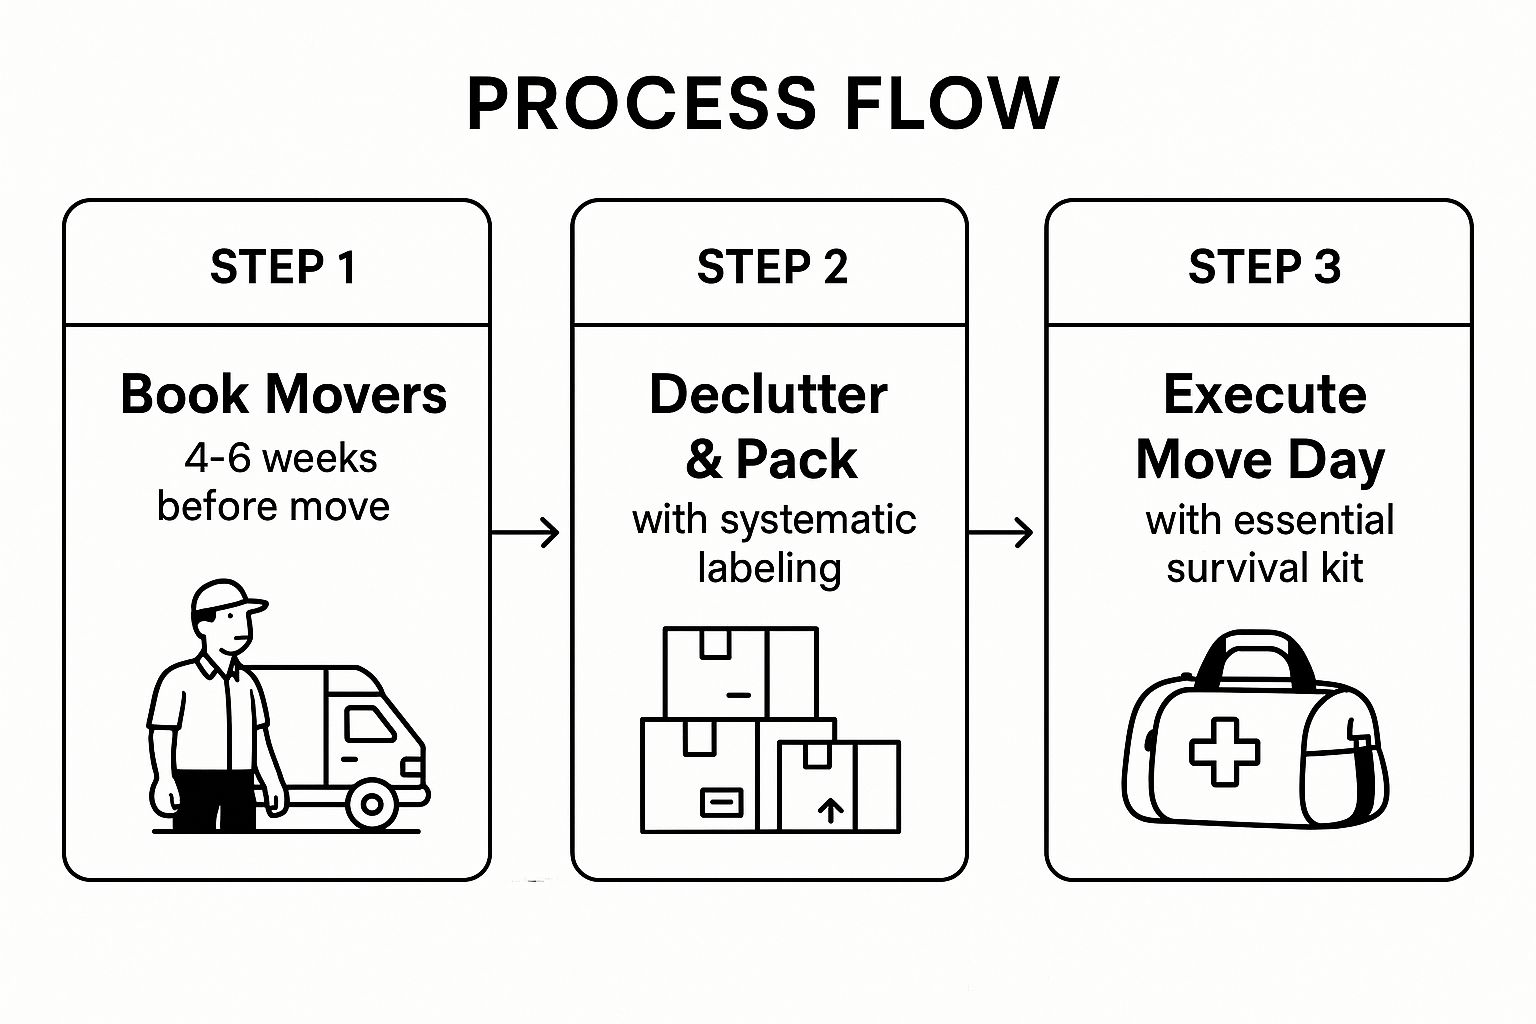
Following this simple timeline ensures that you manage your time effectively, reducing stress and setting up an organized moving day.
Pro Tip: Create a simple inventory of your high-value items, taking photos or videos before they are packed. This documentation is invaluable if you need to file an insurance claim for any damages that occur during the move.
Apartment Move-Out Checklist Comparison
| Item | Implementation Complexity 🔄 | Resource Requirements ⚡ | Expected Outcomes 📊 | Ideal Use Cases 💡 | Key Advantages ⭐ |
|---|---|---|---|---|---|
| Give Proper Notice to Landlord | Low - Simple written notice, timing critical | Minimal - Requires documentation and mail | Legal protection, avoids extra rent charges | Lease termination, avoiding penalties | Protects legal rights, maintains landlord relationship |
| Schedule Move-Out Inspection | Medium - Coordination and scheduling needed | Moderate - Time for walkthrough and docs | Fewer disputes, better deposit return | Pre-move-out preparations | Early issue identification, improves deposit outcomes |
| Deep Clean the Entire Apartment | High - Time and effort intensive | High - Cleaning supplies or professional help | Maximizes security deposit return | Final cleaning before move-out | Prevents fees, leaves property in excellent condition |
| Document Apartment Condition | Medium - Time-consuming but tech-assisted | Moderate - Smartphone or camera use | Legal evidence for disputes | Move-out day documentation | Protects against false claims, clear condition records |
| Return All Keys and Access Items | Low - Organizing and returning items required | Minimal - Just physical items | Avoids lock change fees, ends tenancy cleanly | Move-out completion | Prevents additional costs, secures liability end |
| Transfer or Cancel Utilities | Medium - Coordination with multiple providers | Moderate - Time and phone/email contacts | Stops billing, ensures utility continuity | Utility management during move | Avoids continued charges, maintains credit |
| Update Address with Important Institutions | Medium - Time-intensive, multiple contacts | Moderate - Requires tracking and online forms | Continued service delivery, avoids mail loss | Administrative address update | Prevents missed communications, reduces forwarding need |
| Set Up Mail Forwarding | Low - Simple USPS service setup | Minimal - Small fee and online/in-person | Catches missed mail, transition support | Backup for address changes | Easy setup, inexpensive safety net |
| Collect Security Deposit Information | Medium - Legal knowledge and document tracking | Low - Research and paperwork | Maximizes deposit refund, legal recourse | Understanding tenant rights | Financial protection, procedural compliance |
| Plan and Execute the Physical Move | High - Complex coordination and logistics | High - Moving services, packing supplies | Efficient move, less stress | Moving day execution | Organized, stress-reducing, minimizes loss/damage |
Securing Your Deposit and Moving Forward
Navigating the complexities of an apartment move-out can feel like a monumental task, but by breaking it down into manageable steps, you transform chaos into a streamlined process. This comprehensive moving out apartment checklist was designed not just to guide you, but to empower you. From giving your landlord proper notice weeks in advance to the final sweep of the broom, each step builds upon the last, creating a solid foundation for a stress-free transition. You've learned the critical importance of scheduling your move-out inspection, meticulously deep cleaning every corner, and, most importantly, documenting the apartment's condition with photographic and video evidence. These actions are your most powerful tools in ensuring a fair and transparent end to your lease.
From Checklist to Check in Hand
The ultimate goal of this diligence is securing the full return of your security deposit. Think of your efforts not as chores, but as an investment in your own financial well-being. By following the checklist, you’ve systematically addressed every potential reason a landlord might make a deduction.
- Proactive Communication: Giving proper notice and scheduling the inspection sets a professional and cooperative tone.
- Irrefutable Evidence: Your detailed photos and videos serve as a powerful counter-narrative to any potential disputes over pre-existing wear and tear.
- Finalizing Obligations: Returning all keys, transferring utilities, and setting up mail forwarding are not just logistical necessities; they are the final actions that officially close out your tenancy, leaving no loose ends.
Remember, landlords in Michigan and elsewhere have a legal timeframe to return your deposit or provide an itemized list of deductions. Your thorough preparation and documentation put you in the strongest possible position to contest any charges you believe are unfair. You are no longer just a tenant moving out; you are a prepared, informed individual protecting your assets.
The True Value of a Smooth Move
Beyond the financial implications, a well-executed move-out sets the stage for a positive start in your new home. The peace of mind that comes from knowing you’ve handled your responsibilities correctly is invaluable. You can unpack boxes and settle into your new space without the lingering anxiety of a disputed deposit or an unexpected bill. This checklist provides more than just a series of tasks; it offers a repeatable framework for every future move, turning you into a seasoned and confident renter. Congratulations on completing this significant chapter and moving forward to the next.
Ready to guarantee your apartment is spotless and maximize your security deposit return? Let the professionals handle the most demanding part of your moving out apartment checklist. The expert team at Custom Maids specializes in deep move-out cleanings that meet the strictest landlord standards. Visit Custom Maids today to get a free quote and turn your move-out clean into a guaranteed success.