
A truly clean kitchen goes far beyond just wiping down the counters. It’s about methodically tackling the grease, grime, and clutter that inevitably build up in hidden corners, inside your appliances, and on surfaces we often overlook during daily tidying. This is where a detailed kitchen deep clean checklist becomes essential, transforming a daunting task into a manageable project.
This comprehensive guide is your room-by-room, task-by-task roadmap to restoring your kitchen to its sparkling best. We will break down each major zone, from the inside of your oven to the tops of your cabinets, providing actionable steps, realistic time estimates, and professional tips to make the process efficient and effective. Forget generic advice; we’ll cover everything from descaling your coffee maker to properly sanitizing your sink and garbage disposal.
Whether you're preparing your Michigan home for guests, tackling a major seasonal clean, or simply want that "brand new" feeling back in the heart of your home, this checklist ensures no detail is missed. It's designed to empower you with the knowledge to achieve professional-level results. Let's get started on transforming your kitchen from just "clean" to meticulously pristine, ensuring every nook and cranny is addressed.
1. Zone 1: The Cabinet and Pantry Purge
The first and most transformative step in any comprehensive kitchen deep clean checklist is the cabinet and pantry purge. This isn't just about wiping shelves; it's a strategic decluttering and reorganization process that sets the stage for a truly functional kitchen. By systematically emptying every cabinet, drawer, and pantry shelf, you confront everything you store, from long-lost spices to mismatched containers.

Starting here is crucial because it immediately clears your countertops, giving you the physical and mental space needed for the rest of the deep clean. According to professional cleaning estimates, a standard kitchen cabinet purge can take three to four hours, but the payoff is enormous. Proponents of organizational systems like the KonMari Method often see a significant reduction in kitchen clutter, leading to a more streamlined and less stressful cooking environment.
How to Execute the Purge
To avoid being overwhelmed, tackle this task in small, manageable sections. Focus on one cabinet or a single drawer at a time before moving to the next.
- Empty and Sort: Remove every single item. As you do, create three piles: Keep, Discard (expired, broken, or unusable), and Donate (good-condition items you no longer need).
- Clean the Interior: Before returning any items, thoroughly clean the empty space. Use a vacuum with a brush attachment to easily remove crumbs and dust from corners. Then, wipe down all interior surfaces with a multi-purpose cleaner and a microfiber cloth.
- Install Liners: For easier maintenance, consider adding non-adhesive shelf liners. They protect the surfaces and make future cleanups as simple as lifting and wiping.
Smart Reorganization Tips
Once your cabinets are clean, it's time to restock them with intention. This is your chance to create a system that works for you, not against you.
- Group Like Items: Store all baking supplies together, all breakfast items in one area, and all oils and vinegars near the stove. This logical grouping, championed by organizers like The Home Edit, saves you time and frustration daily.
- Check Expiration Dates: Be ruthless with expiration dates, especially on spices. Most ground spices lose their potency after one to two years and whole spices after three to four. If you can't remember when you bought it, it's probably time to toss it.
- Utilize Clear Storage: Invest in clear, modular containers for pantry staples like flour, sugar, and pasta. This not only looks tidy but also allows you to see inventory at a glance, preventing you from buying duplicates.
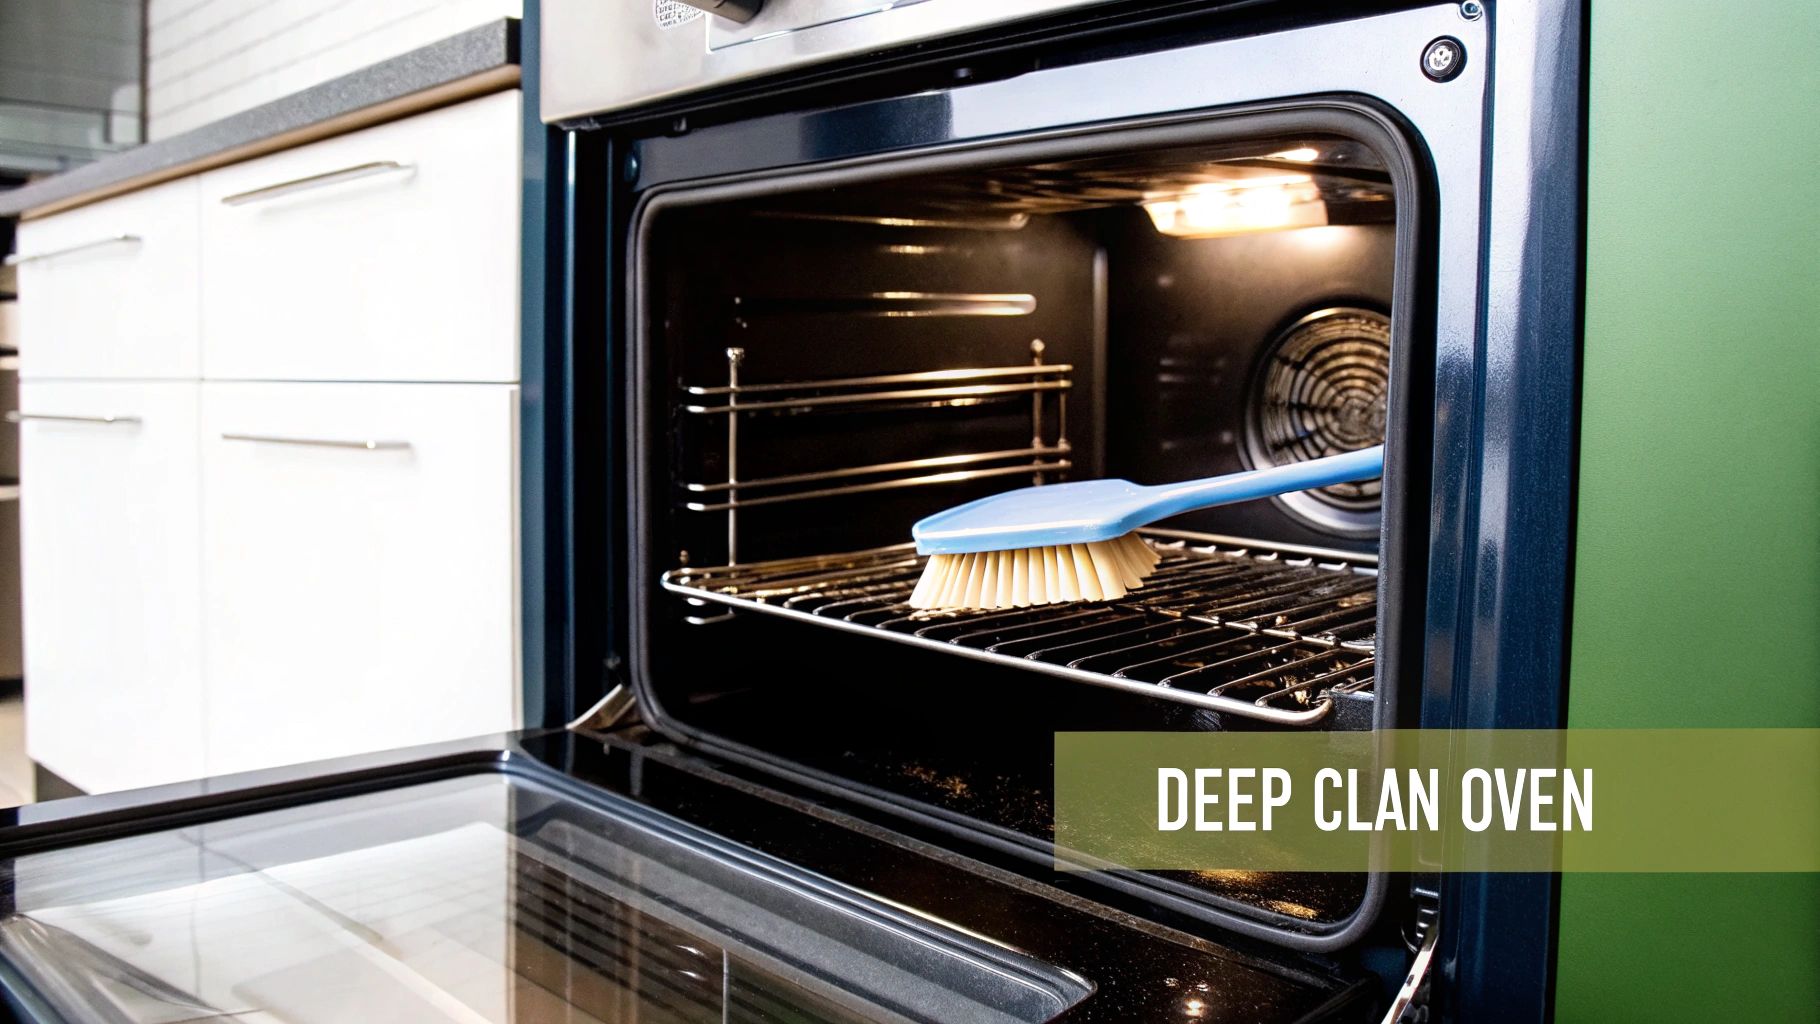
2. Deep Clean Oven Interior and Exterior
Tackling the oven is a cornerstone of any kitchen deep clean checklist, as it often harbors the most stubborn, baked-on grime. This process involves thoroughly cleaning the interior surfaces, racks, and glass door, as well as the exterior control panel and handle. It requires targeted techniques to dissolve carbonized food and grease without damaging the oven's protective coatings or heating elements.
Neglecting this task not only leads to unpleasant smoke and odors during cooking but can also become a fire hazard. While a self-cleaning cycle, which heats the oven to over 800°F to incinerate residue, is an option for some models, manual cleaning is often more thorough. Brands like Easy-Off report up to 95% effectiveness in grease removal, while professional services often charge between $75 and $150 for a comprehensive oven deep clean.
How to Execute the Clean
A systematic approach ensures no spot is missed and protects your appliance from damage. Always begin by ensuring the oven is completely cool and turned off.
- Disassemble and Soak: Remove the oven racks and any other removable parts. Soak them in a bathtub or large sink with hot water, dish soap, and a cup of baking soda for several hours or overnight to loosen caked-on residue.
- Create a Cleaning Paste: For a natural approach, mix baking soda with a small amount of water to form a thick, spreadable paste. Apply it generously to all interior surfaces, avoiding the heating elements. Let it sit for at least 12 hours.
- Scrape and Wipe: After the paste has worked its magic, use a plastic scraper or spatula to gently remove the loosened grime. Wipe away the residue with a damp microfiber cloth, rinsing the cloth frequently.
Smart Cleaning Tips
Cleaning your oven doesn't have to be an all-day chore. These tips, often shared by cleaning experts like Mrs. Hinch, can simplify the process.
- Work with Warmth: For tough grease on the oven door or exterior, cleaning while the oven is slightly warm can make removal easier. Be cautious and wear protective gloves.
- Prioritize Ventilation: When using commercial oven cleaners, ensure the kitchen is well-ventilated. Open windows and turn on an exhaust fan to dissipate the strong fumes.
- Protect Your Floors: Place old newspapers or towels on the floor in front of the oven to catch any drips or debris, making the final cleanup much quicker.
3. Descale and Deep Clean All Appliances
Often overlooked in a standard wipe-down, descaling and deep cleaning your appliances is a critical part of any kitchen deep clean checklist. This process goes beyond surface-level cleaning to remove internal mineral deposits, bacteria, and hidden residue from equipment like your coffee maker, dishwasher, and microwave. Using specialized cleaners or acidic solutions breaks down this buildup, restoring performance and improving hygiene.
This step is vital because mineral scale from hard water can drastically reduce efficiency and shorten the lifespan of your appliances. For example, Nespresso machines have shown up to a 50% performance improvement after a proper descaling cycle. Similarly, brands like Keurig and Bosch build maintenance reminders and descaling programs directly into their products, signaling the importance of this task for optimal function.
How to Execute the Deep Clean
Each appliance has unique needs, so always consult the manufacturer's manual first. However, a general approach can be applied to most common kitchen equipment.
- Coffee Makers: For brands like Keurig, use their branded solution or a 50/50 mix of white vinegar and water. Run a full brew cycle with the solution, let it sit for 30 minutes, and then run several rinse cycles with fresh water.
- Dishwashers: Clear the filter of any food debris at the bottom of the tub. Place a cup of white vinegar on the top rack of the empty dishwasher and run a hot water cycle. For heavy buildup, follow up with a cycle using a commercial cleaner like CLR.
- Microwaves: Combine one cup of water and a few tablespoons of vinegar in a microwave-safe bowl. Heat for several minutes until the liquid boils and the window is steamy. Let it sit for 5-10 minutes before opening, then easily wipe the softened grime from all interior surfaces.
Smart Maintenance Tips
Consistent maintenance prevents major buildup and keeps your appliances running smoothly. A little proactive care goes a long way.
- Schedule It: Your water hardness dictates frequency. Homes with hard water may need to descale coffee makers monthly, while those with softer water can do it every three to six months.
- Use Natural Agents: White vinegar is a cost-effective and powerful descaling agent for many appliances. However, always check your manual, as some materials can be damaged by strong acids.
- Rinse Thoroughly: After using any descaling solution, commercial or natural, run at least two full rinse cycles with plain water to completely flush out any residual cleaner and prevent a chemical taste.
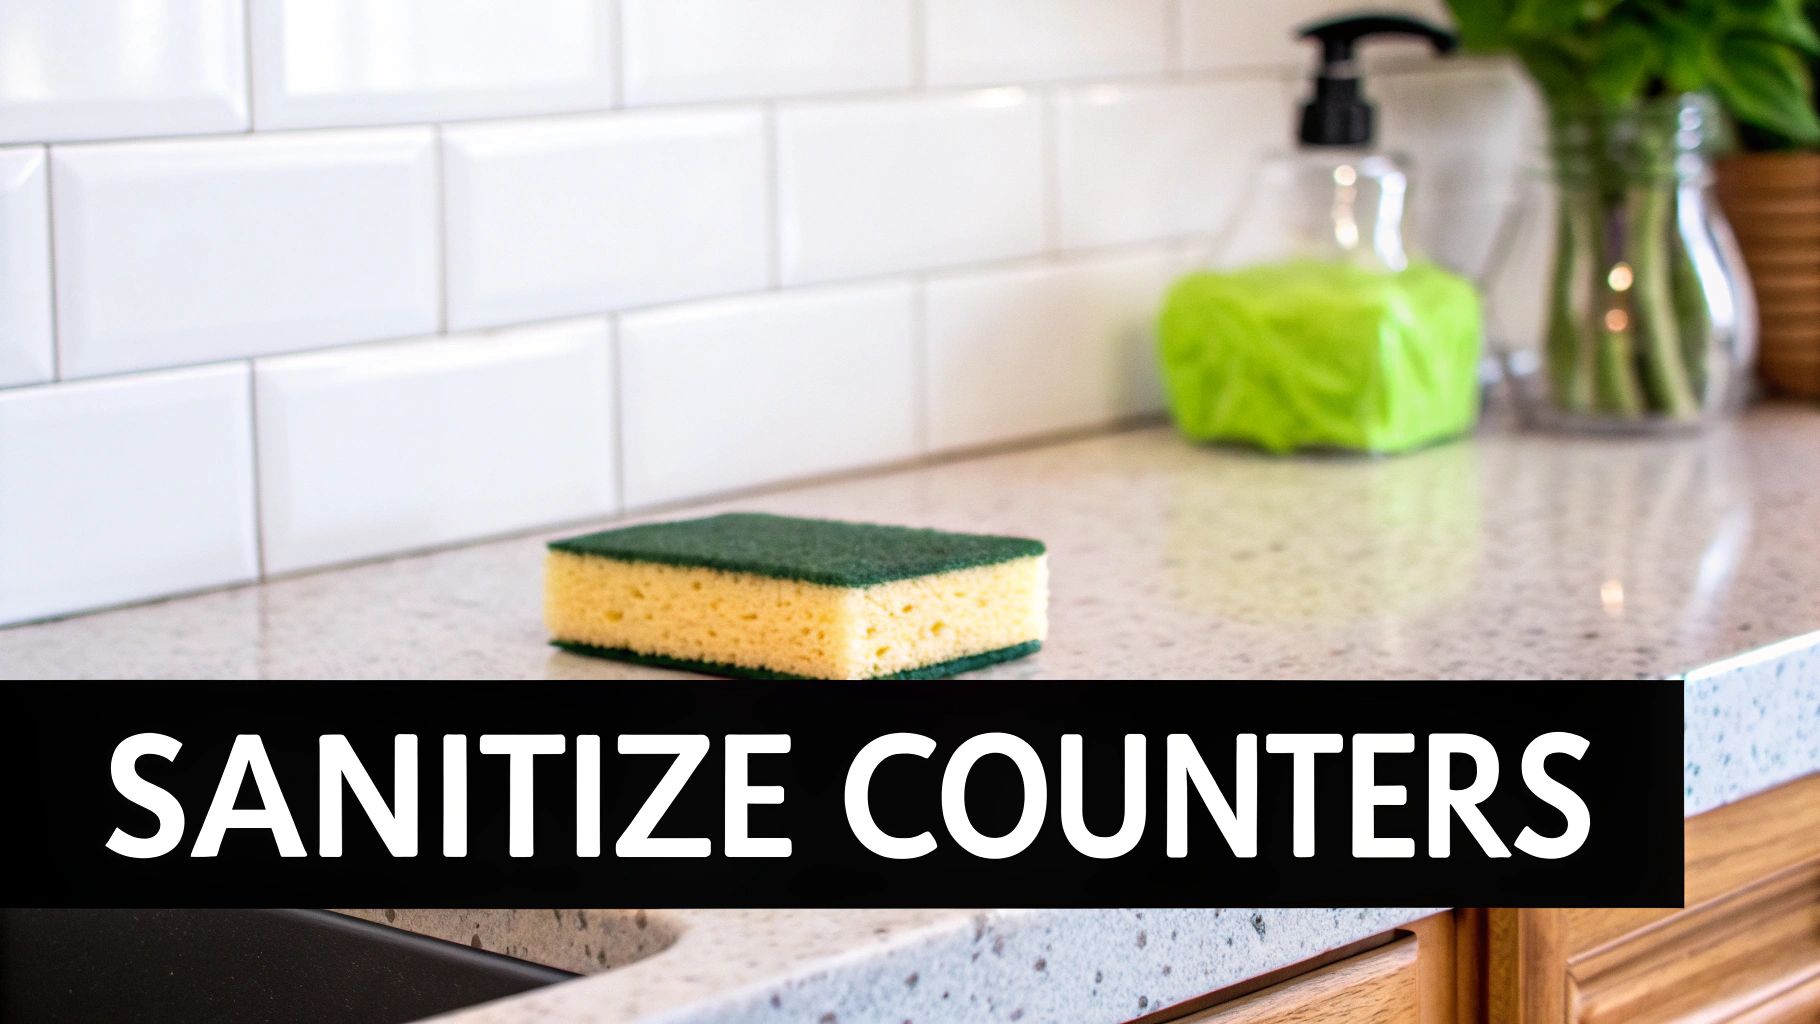
4. Scrub and Sanitize Countertops and Backsplash
With the cabinets and appliances handled, the next focus in your kitchen deep clean checklist is the high-traffic work surfaces: your countertops and backsplash. These areas are magnets for daily splatters, crumbs, and bacteria. A proper deep clean goes beyond a simple wipe-down, targeting set-in stains, disinfecting surfaces, and reviving tired grout to restore the heart of your kitchen.
This step is critical for both aesthetics and hygiene, as these surfaces come into direct contact with your food. The cleaning method must be tailored to the material. For instance, natural stone care brands like Granite Gold report high customer satisfaction by providing products that clean without causing damage, while quartz manufacturers like Caesarstone offer specific guidelines to maintain the integrity of their non-porous surfaces. This targeted approach ensures a safe and effective clean.
How to Execute the Deep Scrub
The key is to use the right cleaner for the right material. Always start by clearing all items off the surfaces to ensure you can reach every inch.
- Select Your Cleaner: Choose a pH-neutral cleaner for natural stone like granite or marble. For quartz, laminate, or tile, a gentle all-purpose cleaner or a solution of vinegar and water often works well.
- Target Grout and Stains: For tile backsplashes, apply a specialized grout cleaner with a small brush to lift discoloration. Address stubborn countertop stains with a paste made from baking soda and water, letting it sit before gently scrubbing.
- Scrub and Rinse: Work in small, manageable sections to prevent your cleaning solution from drying on the surface. Use a non-abrasive sponge or microfiber cloth to scrub, then rinse thoroughly with a clean, damp cloth and dry completely to prevent water spots. Dealing with greasy buildup can be particularly challenging; you can find more guidance on how to clean greasy kitchen surfaces.
Smart Maintenance Tips
After a deep clean, a few simple habits can keep your surfaces looking pristine and reduce the effort needed next time.
- Test New Products: Before using a new cleaner, always test it on a small, inconspicuous spot (like behind an appliance) to ensure it doesn't cause discoloration or damage.
- Seal When Necessary: If you have natural stone counters or a tile backsplash, consider applying a sealant after cleaning. This creates a protective barrier that repels stains and makes daily wipe-downs more effective.
- Wipe Spills Immediately: Address spills, especially acidic ones like wine, coffee, or lemon juice, as soon as they happen to prevent them from staining or etching the surface.
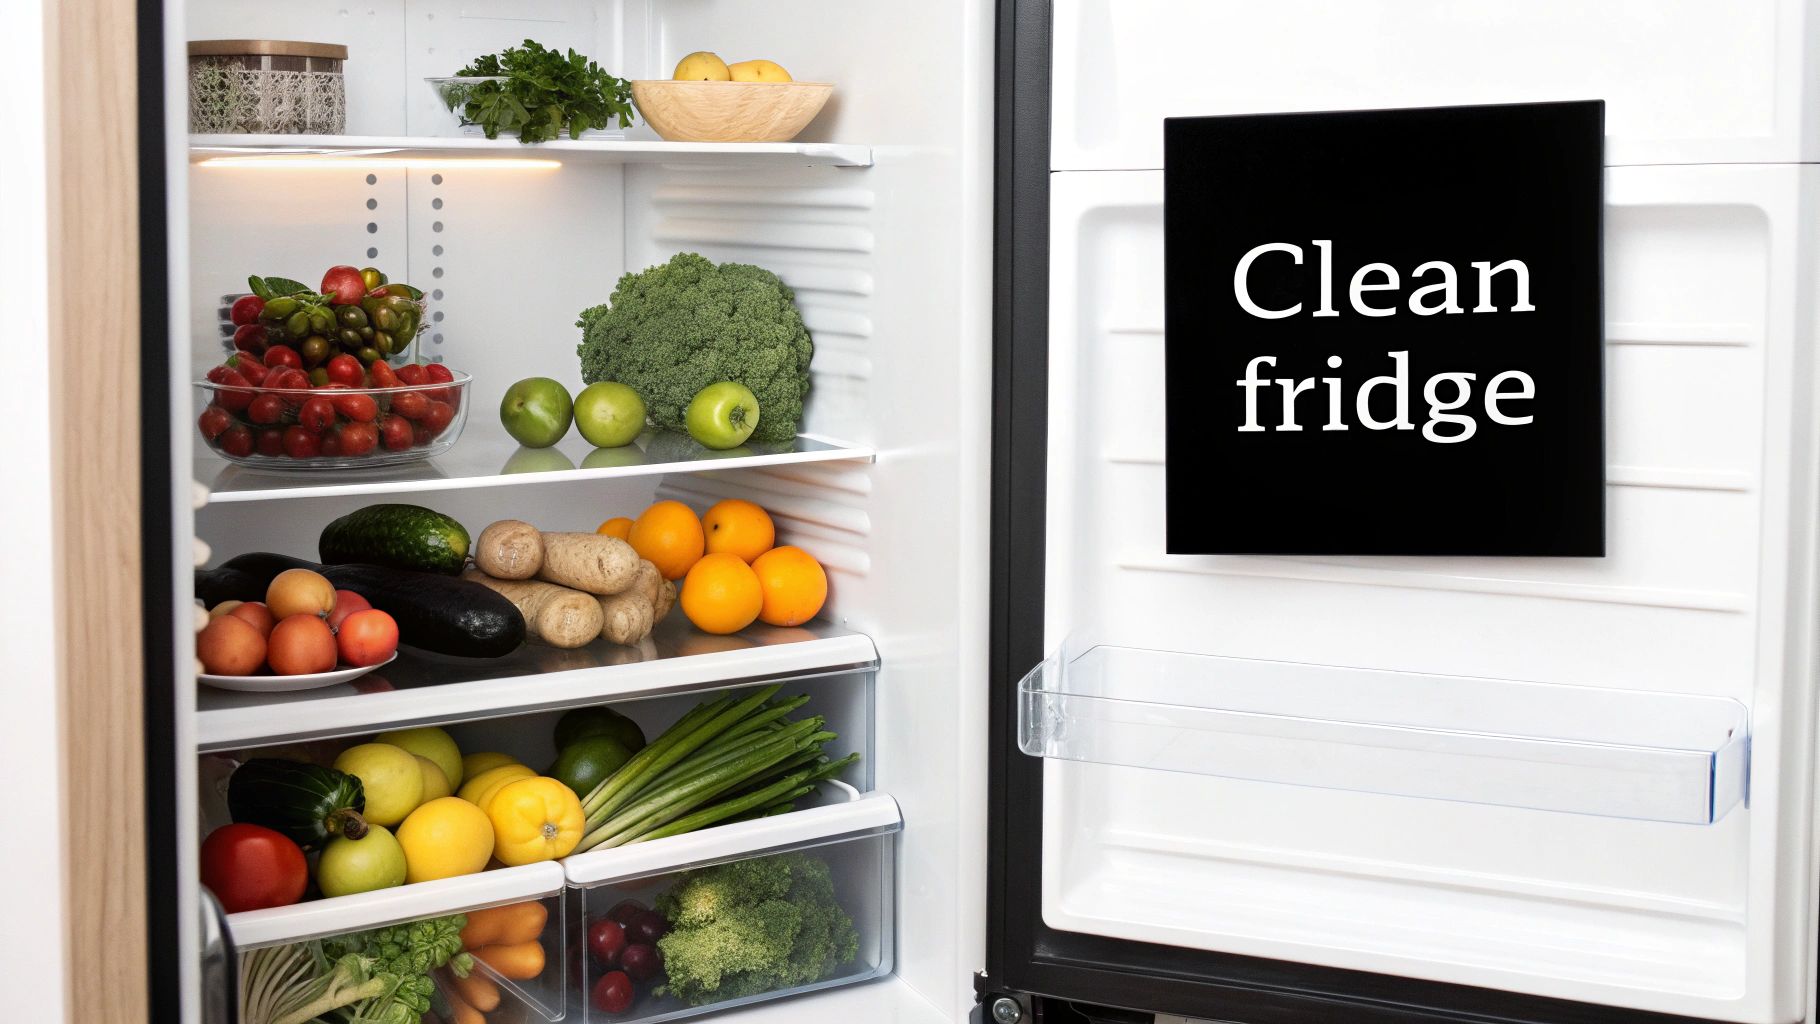
5. Thoroughly Clean Refrigerator Inside and Out
The refrigerator is the heart of the kitchen, yet it often becomes an out-of-sight, out-of-mind zone for spills and expired food. A thorough refrigerator deep clean is a non-negotiable part of any kitchen deep clean checklist, as it directly impacts food safety and appliance efficiency. This process involves more than a quick wipe-down; it means emptying the entire unit, sanitizing every component, and cleaning critical mechanical parts like the coils.
This step is essential for eliminating bacteria and lingering odors. Food safety experts have documented that regular, deep sanitation can significantly reduce the risk of foodborne illness. Furthermore, Energy Star studies show that cleaning refrigerator coils can improve energy efficiency by 5-10%, saving you money on your utility bills and extending the life of your appliance.
How to Execute the Refrigerator Deep Clean
For an efficient clean, have a cooler with ice packs ready to store perishable items. Plan for about one to two hours to complete the task without rushing.
- Empty and Sanitize Components: Turn off the refrigerator or set it to its warmest setting. Remove all food, shelves, and drawers. Wash the removable parts with warm, soapy water and allow them to air dry completely.
- Clean the Interior: While the components are drying, spray the interior with a food-safe cleaner or a mixture of warm water and a splash of white vinegar. Wipe down every surface, including the door seals, with a microfiber cloth. Use a paste of baking soda and water to scrub any stubborn, stuck-on residue.
- Clean the Coils and Vents: Carefully pull the refrigerator away from the wall and unplug it. Use a vacuum with a brush attachment and a specialized coil brush to remove all dust and debris from the condenser coils. This is crucial for performance and should be done every six months.
Smart Maintenance and Organization Tips
A clean refrigerator is easier to maintain with smart organizational habits. This approach keeps your food fresh longer and makes future cleanings much simpler.
- Implement Clear Storage: As recommended by sources like America's Test Kitchen, use clear bins to group similar items like yogurts, cheeses, or condiments. This allows you to see everything at a glance, preventing items from getting lost and expiring in the back.
- Create Designated Zones: Assign specific areas for different food types. For example, keep raw meat on the bottom shelf to prevent cross-contamination, store leftovers in a dedicated "eat-me-first" bin, and use door shelves for less perishable items.
- Check Filters and Dates: Mark your calendar to replace the water filter according to the manufacturer's schedule, typically every six months. While restocking, do a quick check for any items approaching their expiration dates.
6. Deep Clean Sink, Faucet, and Garbage Disposal
As the workhorse of the kitchen, the sink area demands a prominent spot on any kitchen deep clean checklist. This task goes beyond a simple daily rinse; it involves methodically scrubbing away soap scum, stubborn food stains, and hard water mineral deposits from the basin, faucet, and drain. It also includes the crucial step of sanitizing the often-neglected garbage disposal to eliminate odors and prevent buildup.
Giving this area a thorough deep clean is essential for both hygiene and aesthetics. According to maintenance guides from brands like InSinkErator, regular disposal cleaning prevents food particle buildup that can lead to clogs, foul odors, and decreased performance. Similarly, tackling mineral deposits on faucets, as often demonstrated by home improvement experts at This Old House, ensures proper water flow and extends the life of your fixtures.
How to Execute the Clean
Break down the sink area into its three core components: the basin, the faucet, and the disposal. This focused approach ensures no part is overlooked.
- Scrub the Basin: For stainless steel, make a paste with Bar Keepers Friend and a little water. Scrub with a non-abrasive sponge in the direction of the grain to remove stains and restore shine. For porcelain or ceramic sinks, a paste of baking soda and water works well.
- De-Scale the Faucet: Unscrew the aerator (the small screen at the tip of the faucet). Soak it in a bowl of white vinegar overnight to dissolve calcium and mineral buildup. Use an old toothbrush to gently scrub any remaining deposits before rinsing and reattaching.
- Sanitize the Garbage Disposal: First, turn off the power to the disposal at the circuit breaker for safety. Use a long-handled brush to scrub the inside of the grinding chamber and the underside of the rubber splash guard.
Smart Maintenance Tips
Once the deep clean is done, a few simple habits can keep the area pristine for longer. This proactive approach prevents the grime and buildup that make deep cleaning a chore.
- Sharpen and Deodorize: Run a handful of ice cubes and some coarse rock salt or citrus peels through the disposal while running cold water. The ice helps sharpen the blades and knock off debris, while the citrus leaves a fresh scent.
- Polish for Protection: After cleaning your faucet, apply a small amount of baby oil to a soft cloth and polish the surface. This creates a barrier that repels water spots and fingerprints, keeping it shinier for longer.
- Handle Clogs Safely: For minor blockages, it's often best to avoid harsh chemicals. For a comprehensive guide on non-chemical solutions, you can learn more about how to unclog a sink on custom-maids.co.
7. Clean Light Fixtures and Replace Bulbs
Often overlooked in a standard kitchen deep clean checklist, addressing your light fixtures is a task that delivers a surprisingly significant impact. Kitchen lighting is a magnet for a sticky combination of grease, dust, and cooking residue, which can dramatically dim its output. This step involves a detailed cleaning of all fixtures and a strategic replacement of bulbs to enhance both ambiance and functionality.
Neglecting this area means you're working in a duller, less inviting space. Professional kitchen cleaners often report a brightness improvement of up to 60% after a thorough fixture cleaning. Moreover, updating your lighting choices, as recommended by Energy Star, can drastically improve visibility for tasks like chopping and reading recipes while lowering your energy bills.
How to Execute the Cleaning
Safety is the absolute priority when working with electrical fixtures. Always begin by shutting off the power at the breaker box to eliminate any risk of electric shock.
- Disassemble and Clean: Carefully remove any glass or plastic covers, globes, or shades. Wash these components in warm, soapy water, rinse thoroughly, and let them dry completely. For the fixture base, use a microfiber cloth lightly dampened with a degreasing cleaner.
- Wipe Down Bulbs: Once the power is off, you can gently wipe down the existing bulbs with a dry microfiber cloth to remove any dust that has settled on them.
- Reassemble Carefully: Once all parts are clean and completely dry, reassemble the fixture. This is also the perfect time to replace any burnt-out or flickering bulbs.
Smart Lighting Upgrade Tips
Beyond just cleaning, this is an opportunity to optimize your kitchen's illumination. The right lighting can make the space feel larger, cleaner, and more welcoming.
- Switch to LED: If you still use incandescent bulbs, switch to modern LED equivalents. Brands like Philips offer LED bulbs that use up to 80% less energy and last significantly longer, saving you money and replacement effort.
- Mind the Color Temperature: For a warm and inviting kitchen atmosphere, choose bulbs with a color temperature between 2700K and 3000K. This range mimics the cozy glow of traditional incandescent light.
- Boost Task Lighting: Consider adding under-cabinet LED strips for focused light on your countertops. This provides up to 50% better task lighting, making food prep safer and easier on the eyes.
8. Mop and Deep Clean Floors Including Baseboards
The final, grounding step in our kitchen deep clean checklist is a thorough floor and baseboard treatment. This goes far beyond a quick sweep; it's about systematically removing the stubborn grime, grease, and food particles that accumulate in high-traffic areas, corners, and along baseboards. A properly deep-cleaned floor not only looks pristine but also improves the overall hygiene of your kitchen, eliminating hidden bacteria.
Saving this task for last is strategic. All the dust and debris from cleaning countertops, appliances, and cabinets will have settled on the floor. Tackling it now ensures you capture every last bit of dirt. Cleaning guides from sources like Better Homes & Gardens emphasize this "top-to-bottom" approach for maximum efficiency. While professional floor restoration can cost $2 to $4 per square foot, you can achieve remarkable results yourself with the right technique.
How to Execute the Floor Clean
A meticulous approach ensures no spot is missed. Begin by removing any movable furniture or rugs from the kitchen to expose the entire floor surface.
- Prep the Surface: Start by thoroughly sweeping and then vacuuming the entire floor. Use a crevice tool to get into corners and along the baseboards where dust bunnies love to hide.
- Target the Baseboards: Before mopping, focus on the baseboards. Use a detail brush or a microfiber cloth with a degreasing cleaner to scrub away scuffs, drips, and built-up grime. This small detail makes a huge visual impact.
- Mop Strategically: Begin mopping at the farthest corner from the exit and work your way backward. This prevents you from walking on the freshly cleaned, wet floor and leaving behind footprints.
Smart Floor Care Tips
Using the right tools and products for your specific floor type is essential to avoid damage and achieve the best results.
- Choose the Right Cleaner: Always use a pH-neutral cleaner for flooring like hardwood or natural stone to prevent etching or stripping the finish. Brands like Bona offer specialized hardwood floor cleaners that maintain the integrity of the surface.
- Utilize a Microfiber Mop: A high-quality microfiber mop is more effective than a traditional string mop at picking up and trapping dirt and bacteria, rather than just pushing it around.
- Consider Steam Cleaning: For tile, vinyl, or sealed floors, a steam mop like those from Shark can be a powerful tool. The high heat effectively sanitizes surfaces, eliminating up to 99.9% of bacteria without harsh chemicals.
Kitchen Deep Clean Tasks Comparison
| Task | Implementation Complexity 🔄 | Resource Requirements ⚡ | Expected Outcomes 📊 | Ideal Use Cases 💡 | Key Advantages ⭐ |
|---|---|---|---|---|---|
| Clean and Organize All Cabinets and Drawers | High – detailed multi-step process | Moderate – cleaning supplies, storage bins | Highly organized, reduced clutter, hygiene | Kitchens with heavy clutter or food storage | Maximizes storage, reduces waste |
| Deep Clean Oven Interior and Exterior | Medium to High – scrubbing and chemical use | Specialized cleaners or self-cleaning cycle | Improved cooking efficiency and safety | Ovens with heavy grease buildup or odors | Extends oven life, prevents fire hazards |
| Descale and Deep Clean All Appliances | Medium – varies by appliance and method | Acidic or specialized descaling agents | Restored appliance performance and hygiene | Water-using appliances regularly maintained | Saves energy, extends lifespan |
| Scrub and Sanitize Countertops and Backsplash | Medium – material-specific care needed | Specialized cleaners per surface type | Hygienic, stain-free, and restored surfaces | Regular kitchen surfaces prone to stains | Prevents damage, restores appearance |
| Thoroughly Clean Refrigerator Inside and Out | High – multi-step with heavy lifting | Cleaning tools, storage containers | Odor-free, efficient cooling, less waste | Refrigerators with odors, expired food, or inefficiency | Improves energy use and food freshness |
| Deep Clean Sink, Faucet, and Garbage Disposal | Medium – multiple specialized tasks | Various cleaners and safety precautions | Odor elimination, restored water flow | Kitchens needing plumbing maintenance | Prevents repairs, improves hygiene |
| Clean Light Fixtures and Replace Bulbs | Low to Medium – electrical safety required | Cleaning supplies, replacement bulbs | Brighter kitchen, safer lighting | Kitchens with dim or greasy lighting | Energy savings, fire hazard reduction |
| Mop and Deep Clean Floors Including Baseboards | Medium to High – floor-specific techniques | Floor cleaners, mops, possibly special tools | Bacteria-free, slip hazard elimination | Kitchens with high foot traffic or visible stains | Prolongs floor life, improves safety |
Bringing It All Together: Your Sparkling Kitchen Awaits
Congratulations on making it through this exhaustive guide! By systematically working your way through our comprehensive kitchen deep clean checklist, you have transformed the heart of your home. You've tackled the hidden grime in cabinets, vanquished the baked-on residue in your oven, and brought a brilliant shine back to every appliance, surface, and fixture. This wasn't just about wiping things down; it was a complete reset for your kitchen's hygiene, functionality, and atmosphere.
The true value of this endeavor extends far beyond a visually pleasing space. A deeply cleaned kitchen is a healthier environment for you and your family, minimizing the presence of bacteria, allergens, and pests. It also improves the efficiency and lifespan of your appliances, from a refrigerator that runs better with clean coils to a garbage disposal that operates smoothly. You have not just cleaned; you have invested in your home and your well-being.
Maintaining Your Meticulous Work
Now that the heavy lifting is complete, the key is maintenance. The goal is to prevent the kind of buildup that necessitated this deep clean in the first place. You can keep your kitchen in pristine condition with a simple, sustainable routine.
- Weekly Tasks: Dedicate 15-20 minutes each week to wipe down appliance exteriors, spot-clean cabinet fronts, sanitize countertops, and give the sink a quick scrub. This small, consistent effort prevents grease and grime from taking hold.
- Monthly Tasks: Set aside a bit more time once a month to address tasks like cleaning the microwave interior, running a cleaning cycle on your dishwasher, and checking your refrigerator for expired items and spills.
- Bi-Annual Deep Clean: A full-scale project following this entire kitchen deep clean checklist is best performed at least twice a year, typically in the spring and fall. This ensures that even the less-obvious areas, like light fixtures and behind the fridge, are properly addressed.
When Life Gets in the Way
We understand that for many homeowners and renters in Michigan, from busy families in Saginaw to elderly residents in Bay City, dedicating a full weekend to this process isn't always feasible. Life is demanding, and your free time is precious. If the scope of this checklist feels overwhelming, or if you'd simply prefer a professional touch to guarantee exceptional results, seeking expert help is a smart and practical solution.
Embracing this checklist, whether as a DIY project or a guide for professionals, empowers you to create a more organized, sanitary, and inviting kitchen. Enjoy the peace of mind that comes from a job well done and the pure satisfaction of cooking, gathering, and living in a space that is truly, deeply clean.
Ready to experience a professionally cleaned kitchen without lifting a finger? The experts at Custom Maids are equipped to handle every item on this kitchen deep clean checklist and more, serving homeowners and businesses throughout the Bay City, Midland, and Saginaw areas. Visit Custom Maids to get your free estimate and reclaim your weekend