
Struggling with how to organize your cleaning supplies? I get it. The fastest way to conquer the mess is to categorize everything, lighten your load by decluttering, set up dedicated cleaning zones, and arrange items so you can grab what you need in seconds. This isn't just about tidying up; it's about creating a system that works for you.
Your First Steps to a Tidy Supply Closet
Feeling overwhelmed by a jumble of bottles, sponges, and brushes is completely normal. But creating order is simpler than you might think. The real goal isn't just to hide the clutter—it’s to build a system that saves you time and cuts down on frustration.
A well-organized supply station means no more digging for the right spray or accidentally buying a fourth bottle of window cleaner you didn't know you had.
This infographic breaks down the essential first phase into three simple, actionable steps. It’s all about getting a handle on what you have before you even think about buying storage bins.
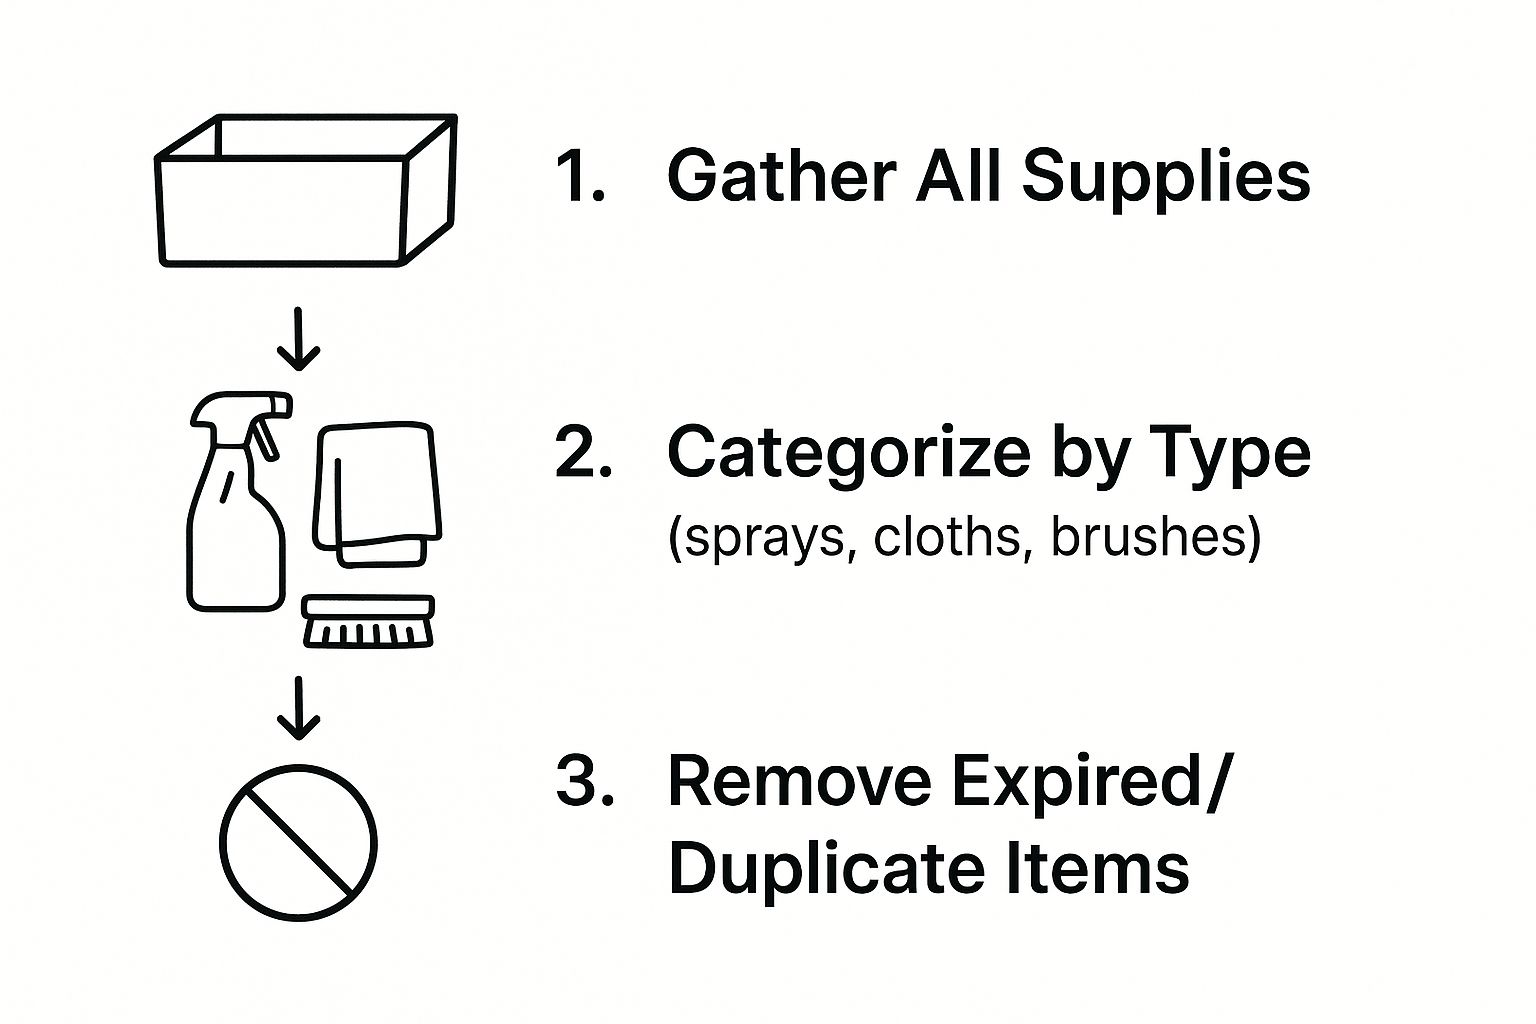
Think of it as the foundation for any successful organizing project. You have to know what you're working with first. A thorough inventory and purge are non-negotiable.
To make this process even smoother, I've put together a simple framework called the C.L.E.A.N. method. It breaks down the entire process into five memorable principles that will help you not only get organized but stay that way for good.
The C.L.E.A.N. Method for Supply Organization
| Step | Action | Why It Matters |
|---|---|---|
| Categorize | Group similar items together (e.g., all-purpose cleaners, glass cleaners, sponges). | Makes it easy to see what you have and find what you need quickly. |
| Lighten | Get rid of duplicates, expired products, and items you never use. | Frees up valuable space and prevents you from holding onto useless clutter. |
| Establish | Assign a specific home for each category (e.g., under the sink, in a caddy). | Creates a predictable system so you always know where things belong. |
| Arrange | Place frequently used items at the front for easy access. | Saves time and frustration by keeping your go-to supplies within reach. |
| Name | Label containers, shelves, and bins clearly. | Eliminates guesswork and helps everyone in the house maintain the system. |
By following these five steps, you’re creating a logical, functional system that’s easy to stick with.
And if you get to the decluttering stage and aren't sure what to keep, our basic cleaning supplies checklist is a huge help. It guides you through building a streamlined, effective toolkit with just the essentials.
Declutter and Categorize Your Cleaning Arsenal
Before you buy a single bin or caddy, the first move is always to purge. I mean it—pull everything out. Gather every cleaning product from under the kitchen sink, the back of the linen closet, and that forgotten corner of the garage.
Seeing it all in one spot is a reality check. You can’t ignore the five half-empty bottles of the same glass cleaner or that fancy grout brush you used exactly once. Now’s the time to get real about what you actually use.
Create Your Keep, Toss, and Combine Piles
Check the expiration dates; yes, cleaning products lose their punch over time. If something is expired, dried up, or just never gets used, it’s time for it to go.
As you sort, make three piles: keep, toss, and combine. If you have several bottles of the same cleaner with just a little left in each, pour them all into one. This simple trick instantly frees up space.
For anything you're on the fence about, ask yourself: "Have I reached for this in the last six months?" If the answer is a hard no, it probably doesn't need to take up valuable real estate in your cabinet. Getting into this mindset makes a huge difference. For more tips on this, check out our guide on how to declutter your home.
The goal here isn't just about tidying up. It's about creating a curated, functional toolkit that makes cleaning easier. A lean inventory stops you from buying duplicates and ensures everything you own serves a purpose.
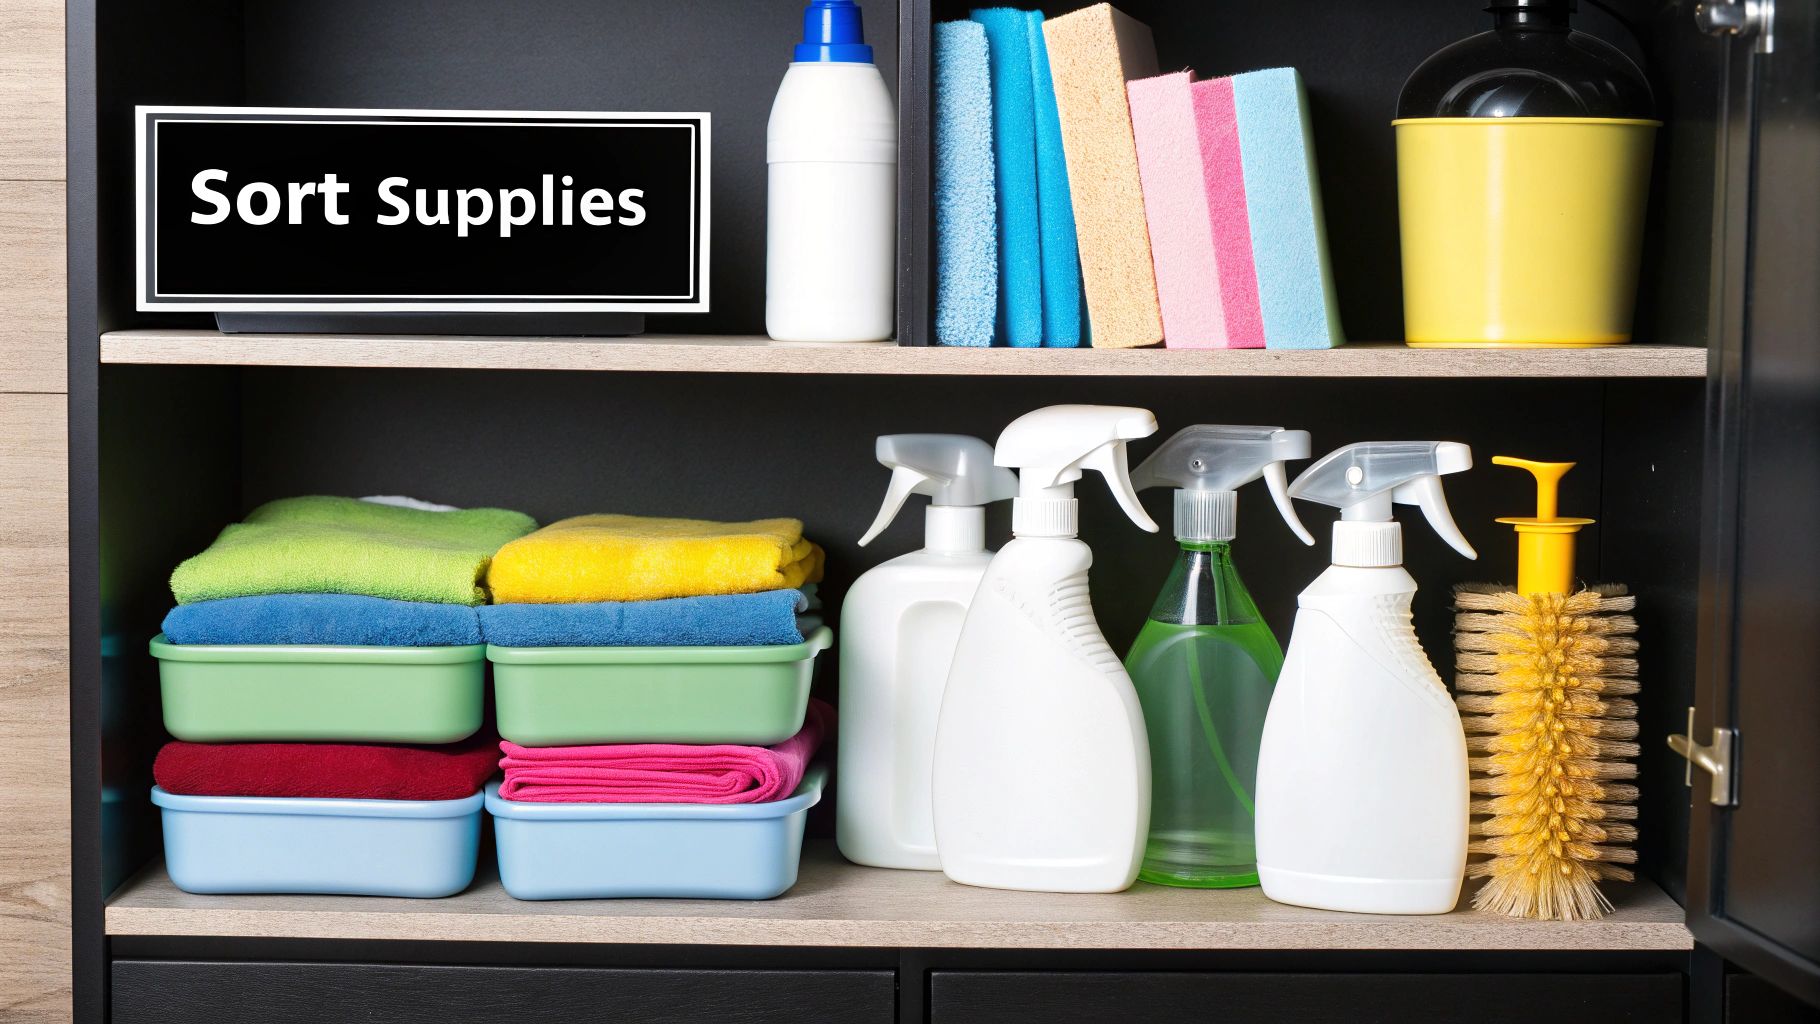
Group Your Keepers into Logical Categories
Once you’re left with only the essentials, start grouping them into categories that make sense for your routine. Don't overcomplicate it. This is the foundation for a storage system that actually works.
I find these categories work for most homes:
- Surface Cleaners: Think all-purpose sprays, glass cleaners, and wood polish.
- Heavy-Duty Scrubbers: This is for the tough stuff like bathroom tile cleaner, oven cleaner, and abrasive powders.
- Floor Care: Mop solutions, carpet spot treatments, and any vacuum attachments.
- Cleaning Tools: All your sponges, microfiber cloths, scrub brushes, and gloves.
With the cleaning products market expected to hit USD 254.54 billion by 2032, new gadgets and formulas are always popping up. Categorizing helps you spot where you have overlap—like three different products that all do the same thing. It’s the perfect opportunity to streamline and maybe find one multi-functional cleaner to replace them all. This step turns a messy pile into a smart, organized arsenal.
Create Smart Cleaning Zones Throughout Your Home
Storing every single cleaning product under one sink is a classic organizing mistake. We've all been there. It turns a simple cleanup into a frustrating search mission every single time. A much better approach is to create dedicated cleaning zones, keeping your supplies exactly where you’ll actually use them.

Think about it this way: when you spill something on the kitchen counter, you want to grab a spray and a cloth immediately, not wander off to a closet down the hall. This simple grab-and-go system makes you far more likely to tackle messes right when they happen.
Set Up Your Primary Zones
The goal is pretty straightforward—equip each high-traffic area with its own mini cleaning kit. This doesn't need to be complicated at all. A simple, portable caddy or a small bin works perfectly for this.
Here are a couple of examples of cleaning zones that just make sense:
- The Kitchen Zone: Keep your all-purpose surface spray, dish soap, sponges, and microfiber cloths right under the kitchen sink. This becomes your first line of defense against daily grease and grime.
- The Bathroom Zone: A caddy with toilet bowl cleaner, shower spray, glass cleaner, and a scrub brush should live under the bathroom sink or in a vanity. This stops you from hauling bathroom-specific chemicals all over the house.
This zoned strategy also helps manage the sheer variety of products most of us own now. With the boom in green cleaning products—a market expected to shoot past USD 11 billion by 2025—proper storage is more important than ever. Natural cleaners often need to be kept separate from synthetic chemicals to maintain their punch, making these dedicated zones a really smart solution. You can find more cleaning industry trends and stats over at bizplanr.ai.
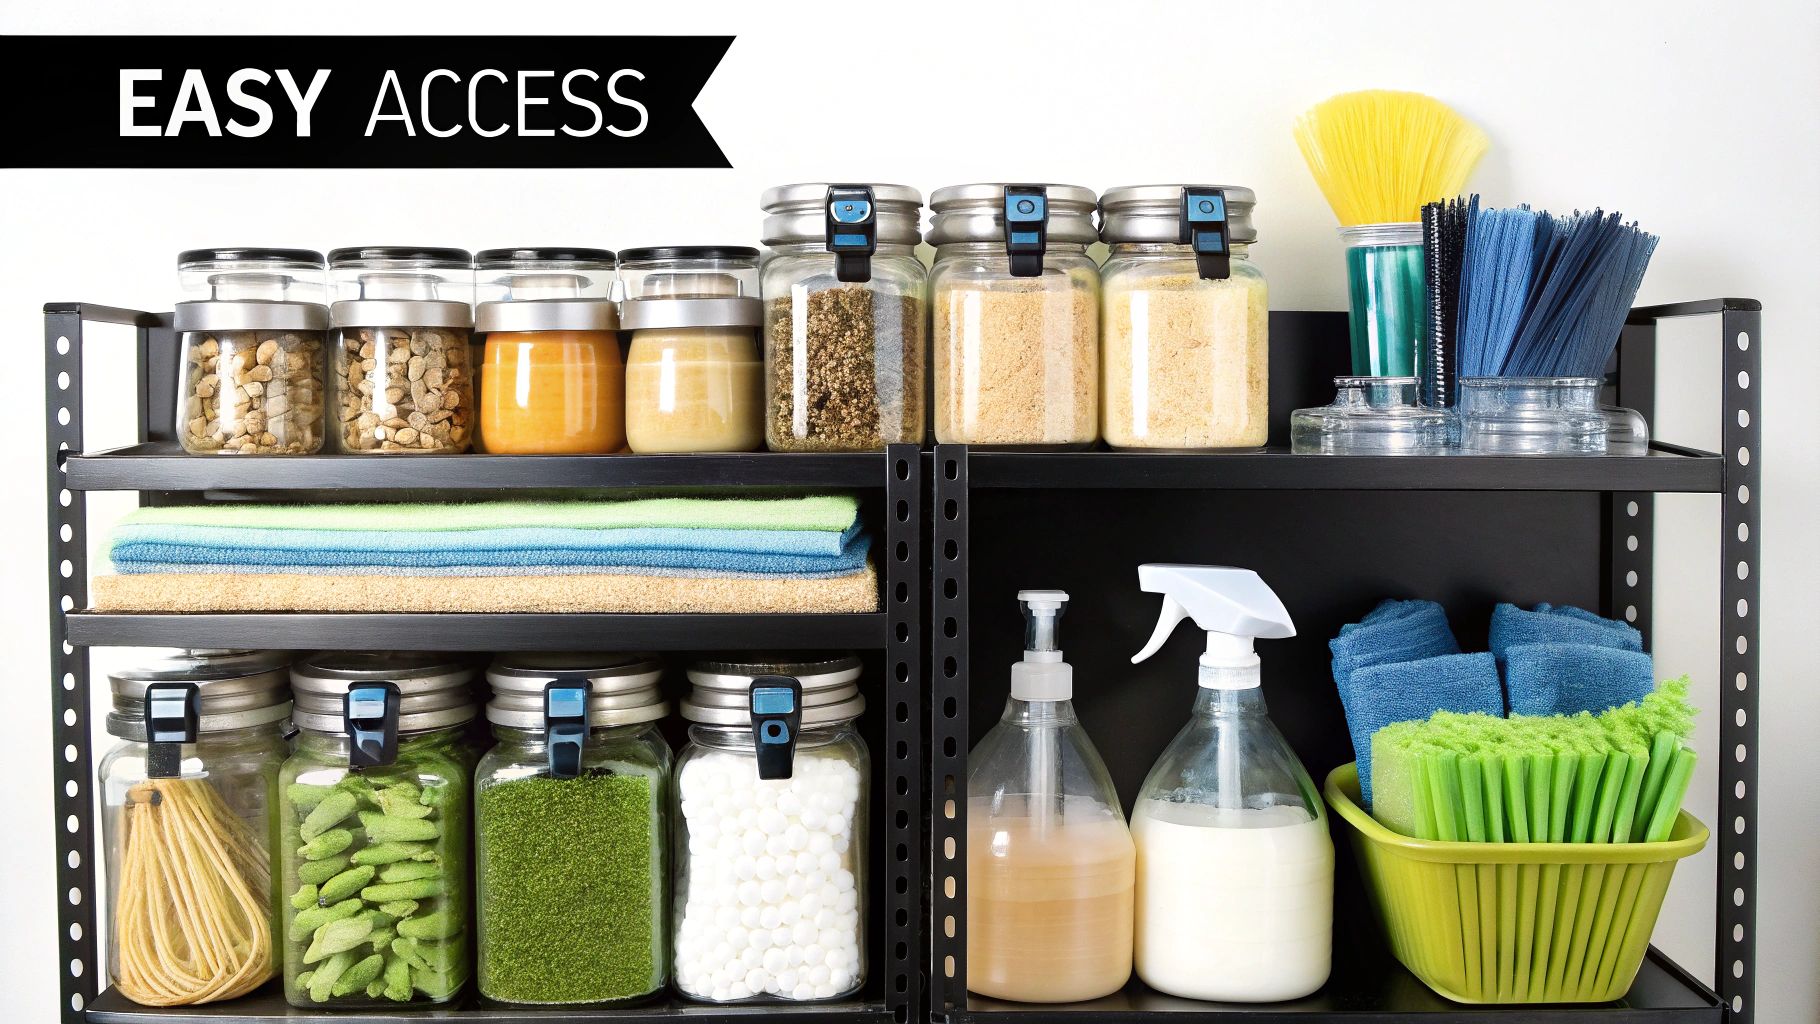
Establish a Central Supply Hub
While these zones handle your daily needs, you still need a home base for everything else. This central hub is the secret to keeping your primary zones from becoming cluttered messes themselves.
Designate a space like a utility closet, a shelf in the garage, or a section of your laundry room as your main supply station. This is where you'll store bulk refills, less-frequently used equipment, and surplus stock.
Your central hub should hold items like:
- Large refill jugs of your go-to all-purpose cleaner
- Extra boxes of trash bags or sponges
- Specialty tools like a carpet cleaner or a steam mop
- Seasonal cleaning supplies
By refilling your smaller, zone-specific bottles from these bulk containers, you save money and keep your prime under-sink real estate free for the essentials you reach for every day. This simple two-part system—local zones and a central hub—is really the secret to organizing cleaning supplies for maximum efficiency.
Choosing the Right Organizers and Tools
The right container can absolutely make or break your new system. I’m not talking about running out to buy expensive, matching bins that look great on social media; I’m talking about functional tools that solve real-world problems. The goal is to make your supplies easier to grab and use, not just prettier to look at.
Before you buy a single thing, grab a tape measure. There's nothing more frustrating than bringing home the "perfect" organizer only to discover it's half an inch too wide for your cabinet. Measure the height, width, and depth of your under-sink areas, closets, and shelves. Knowing your exact dimensions saves you from wasted money and a second trip to the store.
Match the Container to the Contents
Once you have your measurements, think about what you’re storing. Different supplies have different needs. A jumble of spray bottles, for instance, is the perfect candidate for a turntable (or Lazy Susan). It lets you spin to find what you need without knocking everything over.
On the other hand, smaller items like sponges, microfiber cloths, and extra scrub brushes are ideal for clear, stackable bins. The transparency is key—you can see your inventory at a glance, so you know exactly when you're running low on dishwasher pods. For those awkward, tall items like brooms and mops, a simple wall-mounted gripper rack is a total game-changer.
Remember, the best organizer is one that removes friction from your cleaning routine. If it makes grabbing a sponge easier or finding the right spray faster, it’s a worthwhile investment.
Smart Storage Solutions for Every Space
Don’t forget to use that overlooked real estate. Vertical space is your best friend when you're figuring out how to organize cleaning supplies without taking over a whole closet.
- Over-the-Door Racks: These instantly add multiple shelves to a pantry or closet door, perfect for holding bottles and paper towels without eating up floor space.
- Tension Rods: An inexpensive tension rod placed high up under a sink creates a perfect perch to hang spray bottles by their triggers. This simple trick frees up the entire cabinet floor below.
- Portable Caddies: A simple caddy for each main cleaning zone (like the bathroom or kitchen) makes it easy to carry everything you need in one trip. It turns a multi-step task into a single motion.
To help you visualize which solution might work best for you, I've put together a quick comparison of some of the most popular and effective organizers out there.
Comparing Popular Cleaning Supply Organizers
Choosing the right storage solution can feel overwhelming, but breaking it down by function makes it much easier. This table compares some common organizers to help you pick the best options for your space and needs.
| Organizer Type | Best For | Pros | Cons |
|---|---|---|---|
| Turntable (Lazy Susan) | Under-sink cabinets with lots of bottles | Makes items in the back easily accessible with a simple spin. | Not ideal for square or bulky items. |
| Clear Stackable Bins | Sponges, cloths, pods, and smaller tools | Maximizes vertical space and lets you see contents instantly. | Can become heavy if overfilled. |
| Over-the-Door Rack | Pantry or closet doors in small spaces | Adds significant storage without drilling or floor space. | May prevent the door from closing fully if items are bulky. |
Ultimately, the best choice depends on what you're storing and where. A turntable might be perfect under the kitchen sink, while an over-the-door rack could solve your linen closet chaos. Don't be afraid to mix and match to create a system that truly works for you.
Keep Your System Tidy With Labels and Routines
You’ve done the hard part and created a perfectly organized system for your cleaning supplies. Now, how do you keep it that way? The real challenge isn't the initial setup; it's the day-to-day upkeep.
Long-term success boils down to two things: clear labels and consistent routines. Without them, even the most beautifully arranged cleaning closet will slowly slide back into chaos.
Labeling isn't just for people who love organization—it's a practical communication tool for your entire household. When a bin is clearly marked "Microfiber Cloths," there's no excuse for anyone to toss a random sponge inside. It removes all the guesswork and makes it second nature for everyone to put things back where they belong.
Choose Your Labeling Method
Your labeling strategy doesn't need to be complicated or expensive. The most important things are clarity and durability, so pick a method that works for you.
- Simple & Fast: A permanent marker on a strip of painter's tape is super effective and easy to change if you move things around.
- Clean & Uniform: A handheld label maker creates crisp, professional-looking labels that are easy to read from a distance.
- Visual Cues: For those who think in color, try color-coding your supplies. Assigning a specific color to each cleaning zone—like blue for bathrooms and green for the kitchen—is a trick professionals use to boost efficiency.
This mirrors the approach used in the professional cleaning industry, a massive global market valued at approximately USD 415.93 billion in 2024. Pros rely on systems like color-coding to improve speed and safety, a principle that works just as well in your own home. You can learn more about how pros stay efficient on GetJobber.com.
An organized system only works if it's easy to maintain. A five-minute weekly reset is far more sustainable than a three-hour overhaul every few months.
Finally, the secret to lasting organization is building small habits that stop clutter before it starts. Get into the rhythm of a "one-minute reset" where you put all your supplies back right after you finish cleaning. Making this part of a regular house cleaning schedule ensures your system stays functional.
We also recommend scheduling a quick quarterly check-in to toss any expired products and restock what you're running low on. These small, consistent actions are what make all the difference.
Common Questions About Organizing Cleaning Supplies
Even with the best system, a few questions always seem to pop up when you're in the middle of organizing your cleaning supplies. Let's tackle the most common ones I hear with some straightforward, practical answers. Think of this as your go-to guide for troubleshooting any organizing hiccup.
How Can I Organize Supplies Safely Around Kids or Pets?
When little ones or furry friends are in the house, safety is everything. Any harsh chemicals need to go on high shelves where they can't be reached, period. If that’s not an option, put them behind cabinet doors secured with childproof locks.
I always tell my clients to keep products in their original containers. That way, you always have the warning labels and ingredient lists right there if you need them. For small but potent items like dishwasher pods, consider another layer of security like a clear, locked container. And it should go without saying, but never, ever store cleaning products near food—the risk of cross-contamination is just too high.
What Is the Best Way to Handle Bulk Cleaning Products?
Buying in bulk is a fantastic money-saver, but wrestling with those giant, clumsy containers is a real pain. The secret here is decanting. Pour what you need from that huge jug of all-purpose cleaner or vinegar into a smaller, clearly labeled spray bottle you can use daily.
This simple trick frees up that valuable real estate under your kitchen and bathroom sinks for the items you grab every day. The big, original containers can then be tucked away in your central supply closet, like on a garage shelf or in the basement.
Where Is the Best Place to Store Cleaning Supplies?
The most effective strategy isn't to cram everything into one closet. Instead, create a few different "storage zones" by keeping supplies exactly where you use them most. It makes cleaning so much faster.
- Daily-Use Items: Under the kitchen sink is perfect for your everyday surface sprays and dish soap.
- Bathroom Cleaners: Keep a dedicated caddy or bin right in the bathroom vanity. No more running back and forth.
- Central Hub: A laundry room or hall closet works great for your bulk refills, extra stock, and the tools you don't use as often, like a carpet cleaner.
This approach means everything you need is always within arm's reach. It turns cleanup from a frustrating hunt for the right bottle into a simple, grab-and-go task.
Ready to reclaim your time and enjoy a spotless home without the hassle? The team at Custom Maids has been providing trusted, professional cleaning services to Mid-Michigan since 1982. Let us handle the deep cleaning so you can focus on what matters most. Learn more about our customized cleaning plans today!