
Getting pet odors out of your furniture is about more than just a surface clean. You have to go deeper and neutralize the source of the smell hiding in the fibers. The real secret weapon here is a good enzymatic cleaner, which is designed to break down the uric acid crystals that pets leave behind.
This is especially true for urine, which is the real cause of those stubborn, lingering smells. Your standard soaps just can’t get the job done because they aren't equipped to eliminate these tough odor molecules that love to reactivate.
Why Pet Odors Are So Hard to Remove
If you've ever cleaned up a pet accident only to have that smell reappear on a humid day, you know exactly how frustrating pet odors can be. The problem isn’t just on the surface of your couch cushion; it’s a much deeper issue that requires a specific strategy. Masking the scent with air fresheners is a temporary fix that will always let you down in the long run.
The real challenge is that these odors soak deep into porous materials, making a simple surface wipe-down pretty much useless. This is a huge issue with pet urine, which can seep right through the fabric, into the foam padding, and sometimes even into the wooden frame of your furniture. Home care experts at Angi.com often highlight just how tricky deep odor penetration can be.
The Uric Acid Crystal Problem
When your pet has an accident, they leave behind more than just a wet spot. Urine has several components, but the one that causes all the trouble is uric acid. While you can clean up the other parts with soap and water, uric acid forms non-soluble salt crystals that are incredibly persistent.
These crystals are the villains behind that recurring smell. They embed themselves deep into fabric fibers and padding, lying dormant until moisture hits them. Even a bit of humidity in the air can reactivate them, releasing that all-too-familiar, unpleasant odor once again.
This is exactly why a spot can seem perfectly clean for weeks or even months, only for the smell to mysteriously return. It’s not a new accident—it’s the old one coming back to haunt you.
Why Your Pet Returns to the Scene
That lingering smell isn't just for human noses; those uric acid crystals send a powerful message to your pet. They act like a potent beacon, signaling, "This is the right place to go." It’s a biological trigger that encourages them to mark the same spot over and over, creating a frustrating cycle of accidents and cleaning.
To break this cycle, you have to completely destroy those uric acid crystals. If even a tiny trace is left behind, your pet’s powerful sense of smell will find it. For a closer look at breaking this cycle, check out our guide on how to effectively remove pet odors and stains, which covers various methods in detail. This ensures you’re not just cleaning for your own comfort, but also removing the scent cues that keep attracting your pet back to the furniture.
How to Prep Your Furniture for Deep Cleaning
I get it—you want to jump right in and start scrubbing. But trust me, taking a few minutes to prep your furniture is the secret to actually getting those stubborn pet odors out for good.
Skipping these steps is like trying to paint a dirty wall. The paint might cover the grime for a little while, but it won't stick, and the mess will eventually show through. A little prep work ensures your cleaning solution can get deep into the fibers and neutralize the odor at its source.
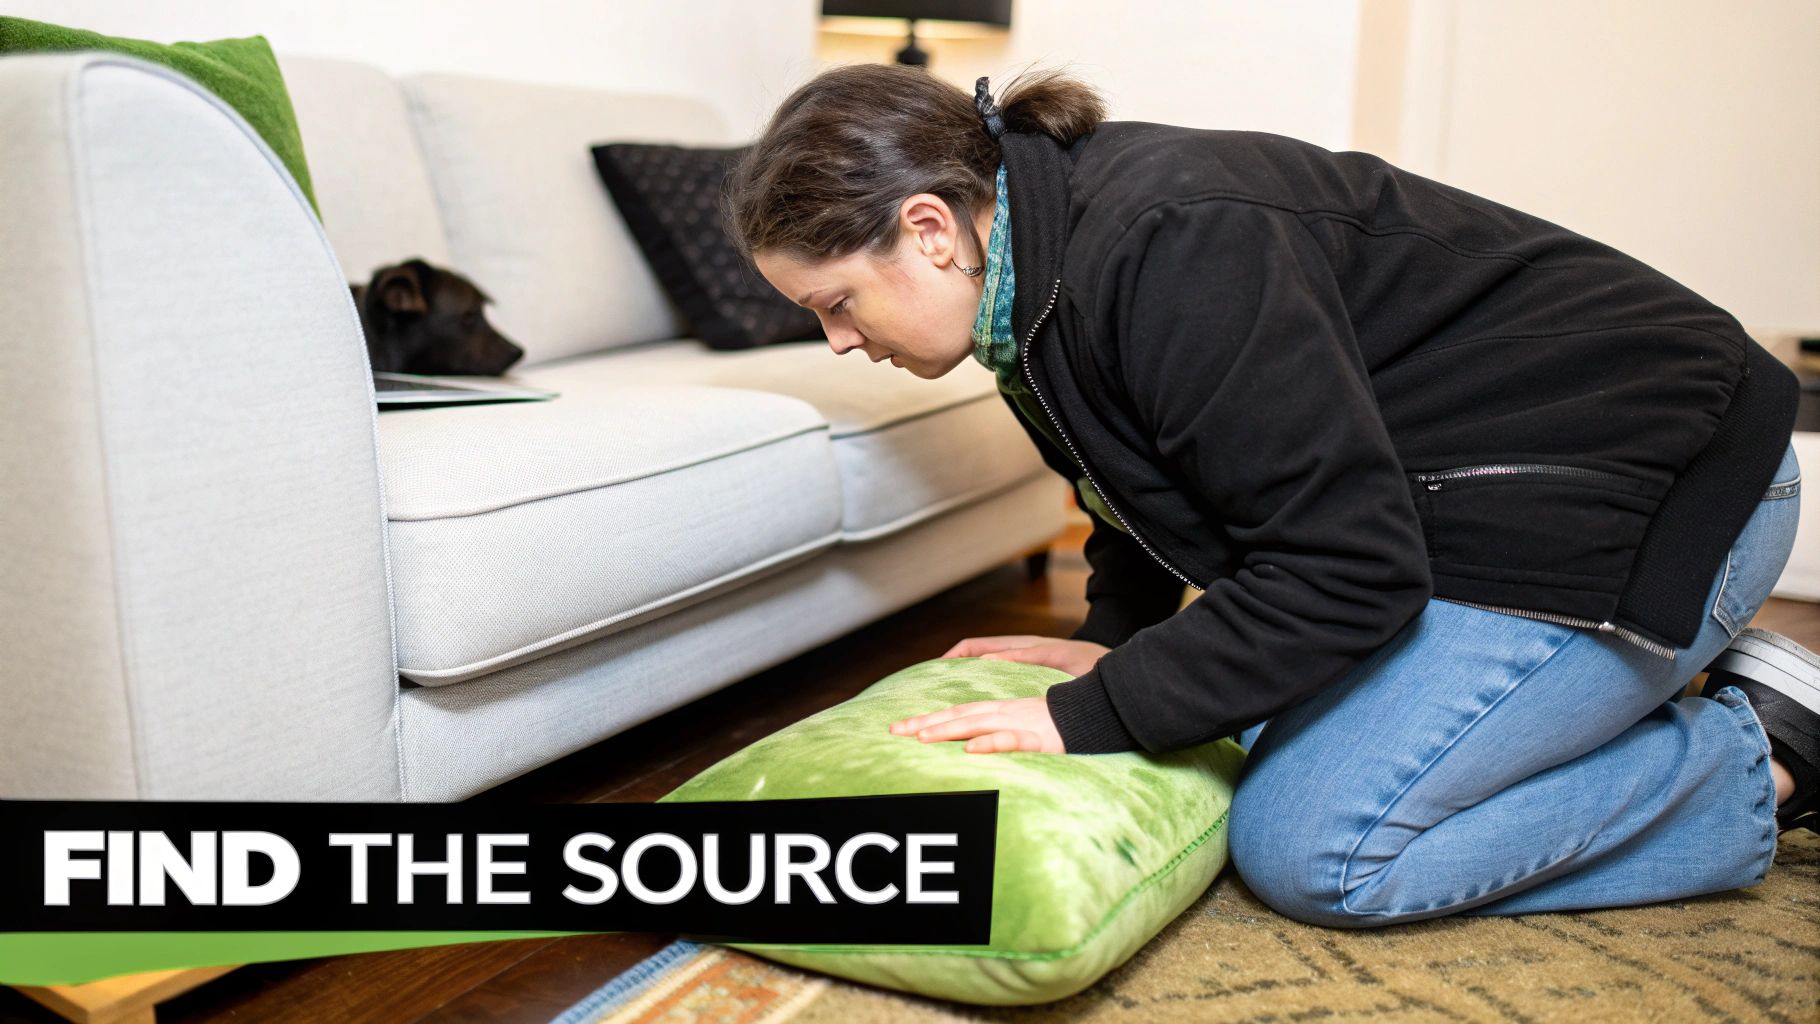
Find the Hidden Stains with a UV Blacklight
The biggest challenge with old pet accidents is that you often can't see them. Urine stains fade, but the odor-causing crystals remain, creating a lingering smell you can't quite place. This is where a little detective work saves the day.
A UV blacklight is an absolute game-changer for this. Pet urine contains phosphorus that glows under ultraviolet light, revealing every single spot, new or old.
To use it, just turn off the lights and make the room as dark as possible. Slowly scan the blacklight over your furniture, holding it just a few inches from the fabric. Old urine stains will light up in a distinct yellowish-green color. I like to use a bit of chalk or some small sticky notes to mark the outline of each stain. That way, when the lights are back on, you know exactly where to focus your cleaning efforts.
What you're seeing is a chemical reaction that makes targeting the root of the problem possible. No more guessing, just effective, targeted cleaning.
Give It a Thorough Vacuum
Once you've marked your targets, the next step is to get rid of all the surface-level gunk. Pet hair, dander, and everyday dirt create a barrier that stops your cleaning solution from penetrating the fabric. A thorough vacuuming is non-negotiable.
Grab your vacuum's upholstery and crevice tools and get into every single nook and cranny. Don't just skim the surface; really focus on:
- Seams and piping: These areas are magnets for collecting pet hair.
- Underneath the cushions: Pull every cushion off and vacuum both the cushion and the furniture frame below it. You'd be amazed at what hides in there.
- The back and sides: Odors don't just stick to the seats, so make sure you vacuum the entire piece.
Pro Tip: If you're dealing with stubborn, woven-in pet hair, put on a pair of rubber cleaning gloves. Run your gloved hands over the fabric. The friction will pull the hair up into little clumps that you can easily pick off or vacuum away.
Always, Always Do a Spot Test
Okay, this is the one step you absolutely cannot skip. Before you douse a big, visible area of your couch in any cleaning product, you have to do a spot test. This quick check will tell you if the cleaner is going to cause any discoloration, fading, or damage to the upholstery.
Find a small, hidden spot on your furniture—the underside of a cushion or the back panel that faces the wall are perfect.
Apply a tiny amount of your cleaner to that spot, let it sit for the recommended time, then blot it and let it dry completely. I recommend waiting a full 24 hours to be sure. If there's no color change or texture damage, you're clear to proceed. This simple step has saved me from ruining more than one piece of furniture over the years.
Choosing the Right Odor Removal Method
When you're trying to figure out how to get pet odors out of your furniture, grabbing just any cleaner won't cut it. Not all odor-fighting solutions are created equal, and the product you choose is just as important as how you use it. Your best bet depends on the furniture's material and, honestly, just how bad that smell has become.
For a fresh, minor surface odor, you might get away with a simple DIY approach. But for those deep, set-in smells—especially from urine—you'll need something with more scientific muscle. Knowing the difference is the key to finally reclaiming your furniture.
The Power of Enzymatic Cleaners
When you’re dealing with organic messes like urine, vomit, or feces, your absolute best defense is an enzymatic cleaner. These aren't just scented sprays that temporarily cover up a smell; they are scientifically designed to destroy it at the molecular level. Think of them as microscopic odor assassins.
These cleaners are packed with specific enzymes and beneficial bacteria that act as catalysts. Once you spray them on, they get to work breaking down the complex organic molecules in the pet waste. They effectively "eat" the source of the odor until there’s nothing left to smell.
An enzymatic cleaner doesn't just mask the smell—it eliminates the uric acid crystals that cause it. This is crucial for preventing your pet from returning to the same spot to mark again.
Enzymatic cleaners are widely recognized as the most effective way to truly get pet odors out of furniture. Their active enzymes specifically target and break down the gunk causing the smell, unlike standard sprays. Even tough, old odors can be dramatically reduced with the right application. For more on this, it's worth debunking some common pet odor removal myths on AngryOrange.com.
When DIY Solutions Are Enough
While enzymatic cleaners are the gold standard for serious pet accidents, common household items can work for less severe situations. Solutions made with white vinegar and baking soda are popular for a reason—they can be pretty effective for fresh accidents or that general "dog" smell.
- White Vinegar: Its acidic nature helps neutralize the alkaline salts in fresh urine. A quick mix of one part vinegar to one part water can be a great first response.
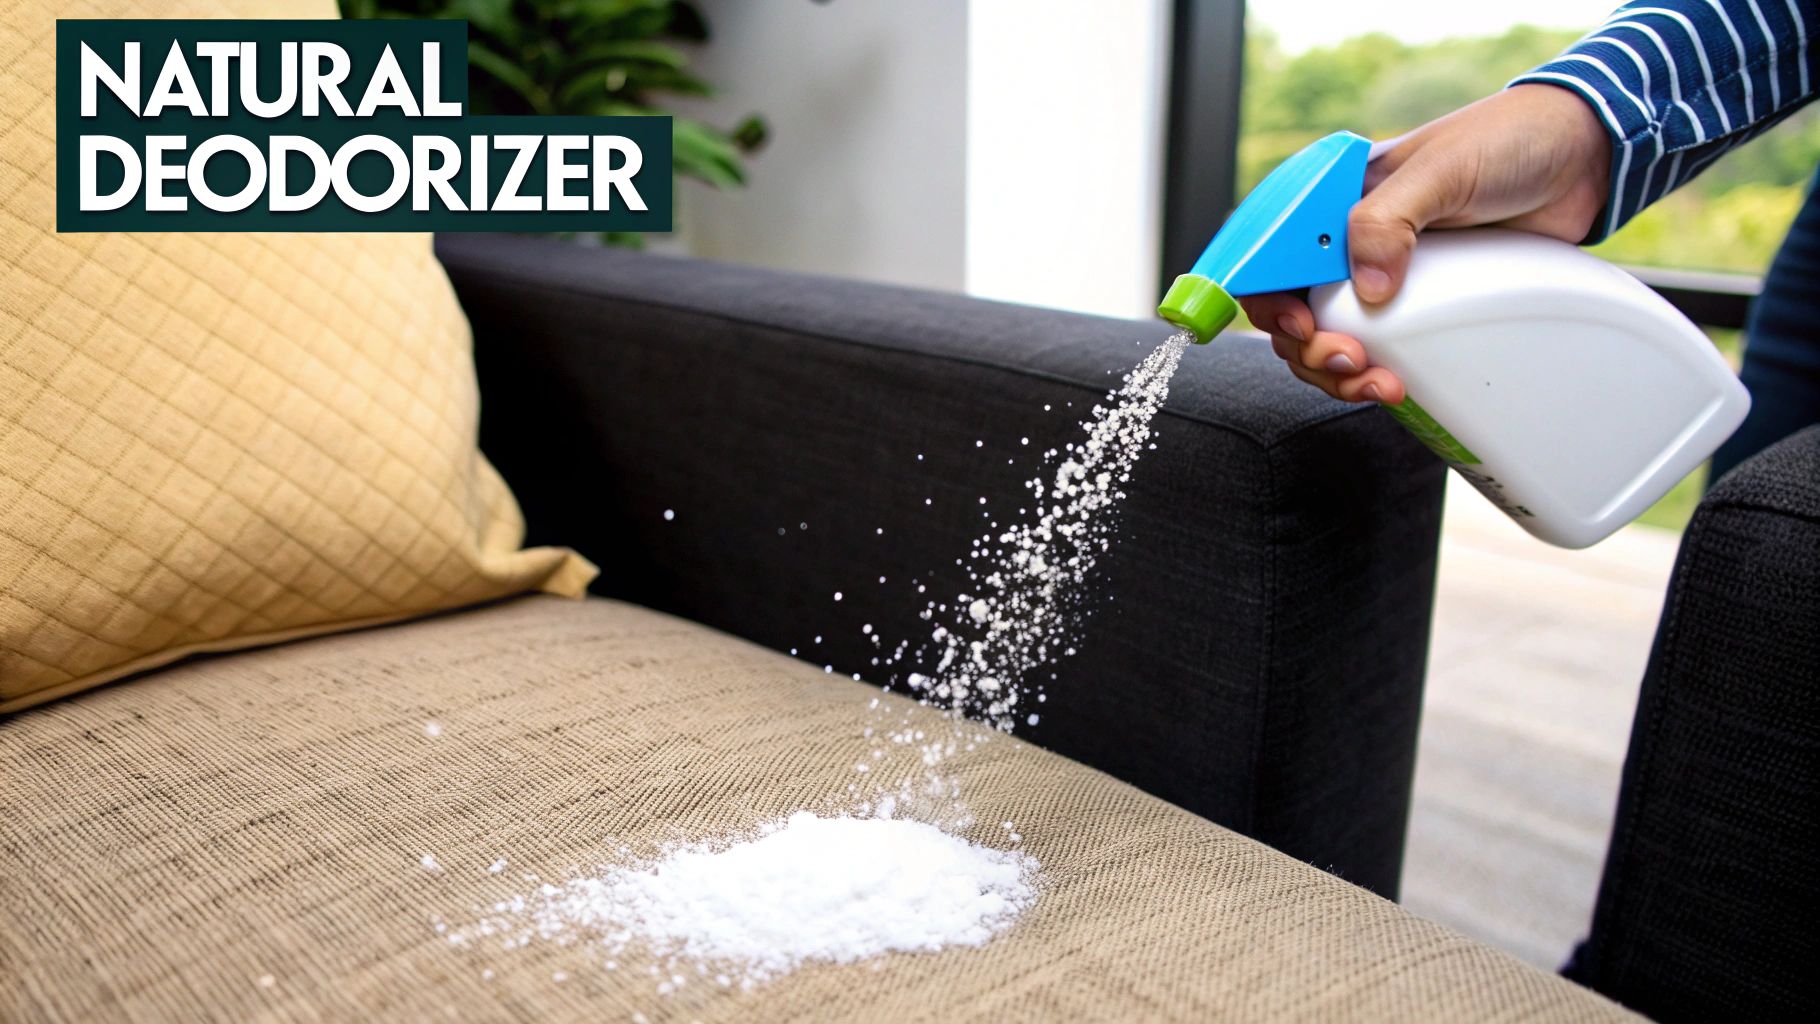
- Baking Soda: This is a fantastic natural deodorizer. After cleaning a spot, sprinkle baking soda liberally over the damp area and let it sit overnight. Vacuum it up the next day, and it should absorb a lot of the lingering smell.
Keep in mind, these DIY methods are best for surface-level issues. They often lack the deep-penetrating power needed to break down the uric acid crystals from older, more saturated stains. They’re a good first step, but not always the final one.
To help you decide what's best for your situation, here's a quick comparison of the most common methods.
Odor Removal Method Comparison
| Method | Best For | Pros | Cons |
|---|---|---|---|
| Enzymatic Cleaner | Old, set-in urine stains and stubborn organic odors. | Permanently eliminates the source of the odor, discourages re-marking. | Can be more expensive, may require multiple applications for severe stains. |
| White Vinegar | Fresh, surface-level urine spots and general odors. | Inexpensive, readily available, and a natural neutralizer. | May not fully eliminate deep-set uric acid crystals, strong initial vinegar smell. |
| Baking Soda | Lingering surface odors on fabric and upholstery. | Excellent at absorbing smells, non-toxic, and very affordable. | Can be messy to clean up, not effective for deep stains on its own. |
| Steam Cleaning | General freshening up and removing surface dirt. | Sanitizes and deep cleans fabric fibers effectively. | Heat can permanently set protein-based stains like urine, making them worse. |
Ultimately, the best method often involves a combination—perhaps a vinegar solution for a fresh spill, followed by an enzymatic cleaner for any remaining odor.
How to Select the Right Product
Whether you choose a powerful enzymatic cleaner or a DIY solution, you have to make sure it’s safe for your specific furniture. The first thing you should always do is check the cleaning code tag on your upholstery. It’s usually hiding under a cushion or on the bottom of the furniture.
Here’s what those letters mean:
- W: Go for it. You can use water-based cleaners.
- S: Stop! This requires solvent-based, water-free cleaners only.
- W/S: You have options. You can use either water-based or solvent-based cleaners.
- X: Hands off. Use a vacuum only; no liquid cleaners of any kind.
Ignoring this code can lead to water rings, discoloration, or permanent damage to the fabric. And no matter what the tag says, always perform a spot test on a hidden area before going all-in on the main stain. This simple precaution will save you from a much bigger headache down the road.
A Practical Guide to Applying Odor Removers
You’ve found the trouble spots and have your odor-fighting solution ready to go. Now comes the make-or-break moment. Your application technique is everything, and it’s not just about a quick spray-and-pray. You have to ensure the cleaner gets to the root of the problem.
Here’s the golden rule: the cleaner must go as deep as the original mess. If urine soaked an inch into a couch cushion, your cleaner needs to follow suit. Skimp on this, and you’re just masking the smell while the source festers deep inside the fabric.
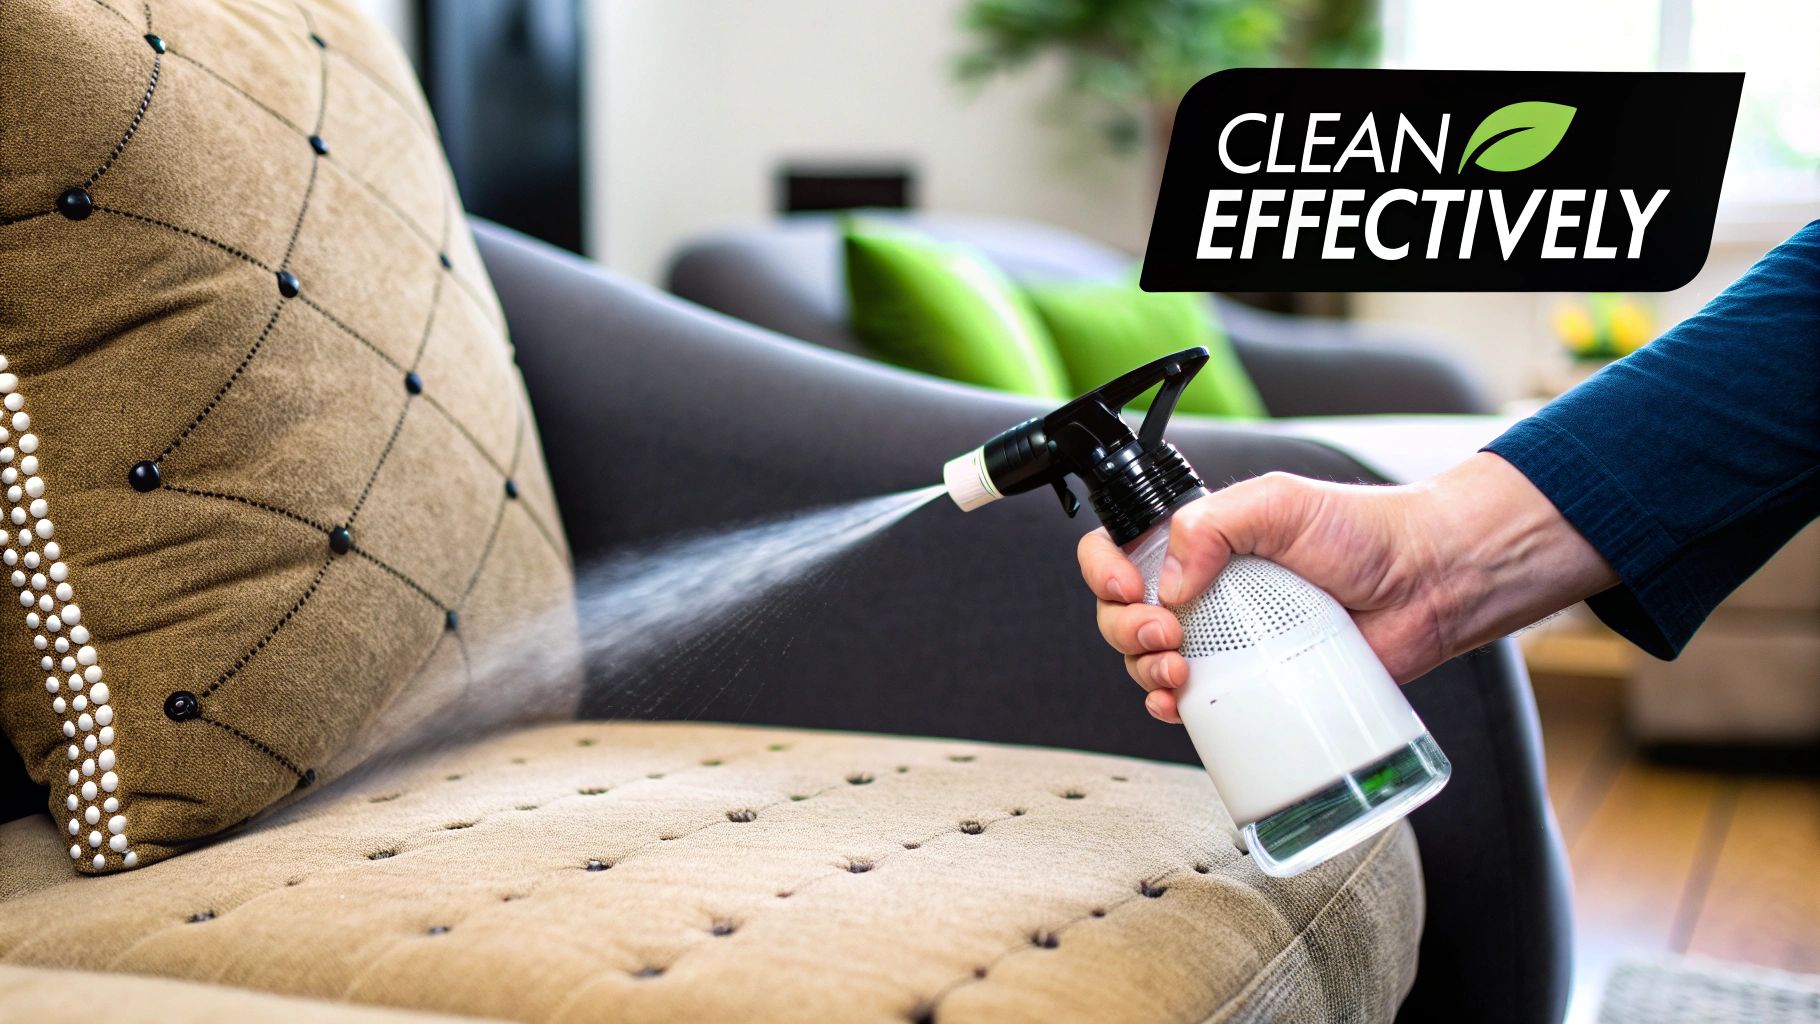
The Importance of Saturation and Dwell Time
To really get pet odors out of furniture, you have to be generous with your enzymatic cleaner. A light mist just won’t cut it. You need to saturate the area thoroughly, letting the liquid soak deep down into the padding and fibers where the odor lives.
Once you’ve applied the cleaner, give it time to work its magic. This is the dwell time—the crucial period where the enzymes are actively breaking down and literally eating the organic waste. Rushing this step is a common mistake that almost guarantees the smell will return. Most enzymatic cleaners need at least 15-20 minutes, but for old, stubborn odors, you might need to let it sit for several hours.
To get the most out of this process, you need to keep the area damp.
- Cover the Spot: A damp towel laid over the treated area works perfectly.
- Use Plastic Wrap: For smaller spots, a piece of plastic wrap will keep the cleaner from evaporating, giving those enzymes a much longer window to do their job.
Don’t be afraid to lightly re-mist the area with water if it starts drying out too quickly. You want to create the perfect environment for the odor-eating enzymes to finish their work completely.
The Correct Blotting and Drying Technique
After the cleaner has had enough time to work, your job is to lift it—and all the broken-down odor particles—out of the fabric. The key is to blot, not scrub. Scrubbing aggressively can damage fabric fibers, push the mess even deeper, and leave a permanent mark on your upholstery.
Grab a clean, dry towel and press it firmly into the treated spot. You'll literally see the moisture transfer from the furniture to the towel. Keep doing this with fresh, dry sections of the towel until you can't pull much more liquid out. For a more comprehensive look at various techniques, our guide on how to clean upholstery couches is packed with detailed tips.
Finally, just let the area air-dry. This can take anywhere from 24 to 48 hours. You can speed things along by pointing a fan at the spot or opening a window for better circulation. Just avoid using heat, like from a hairdryer, because it can sometimes cause any remaining odor-causing proteins to bond with the fabric fibers for good.
While tackling accidents is important, a little proactive maintenance goes a long way. The infographic below shows a simple routine to keep your furniture smelling fresh.
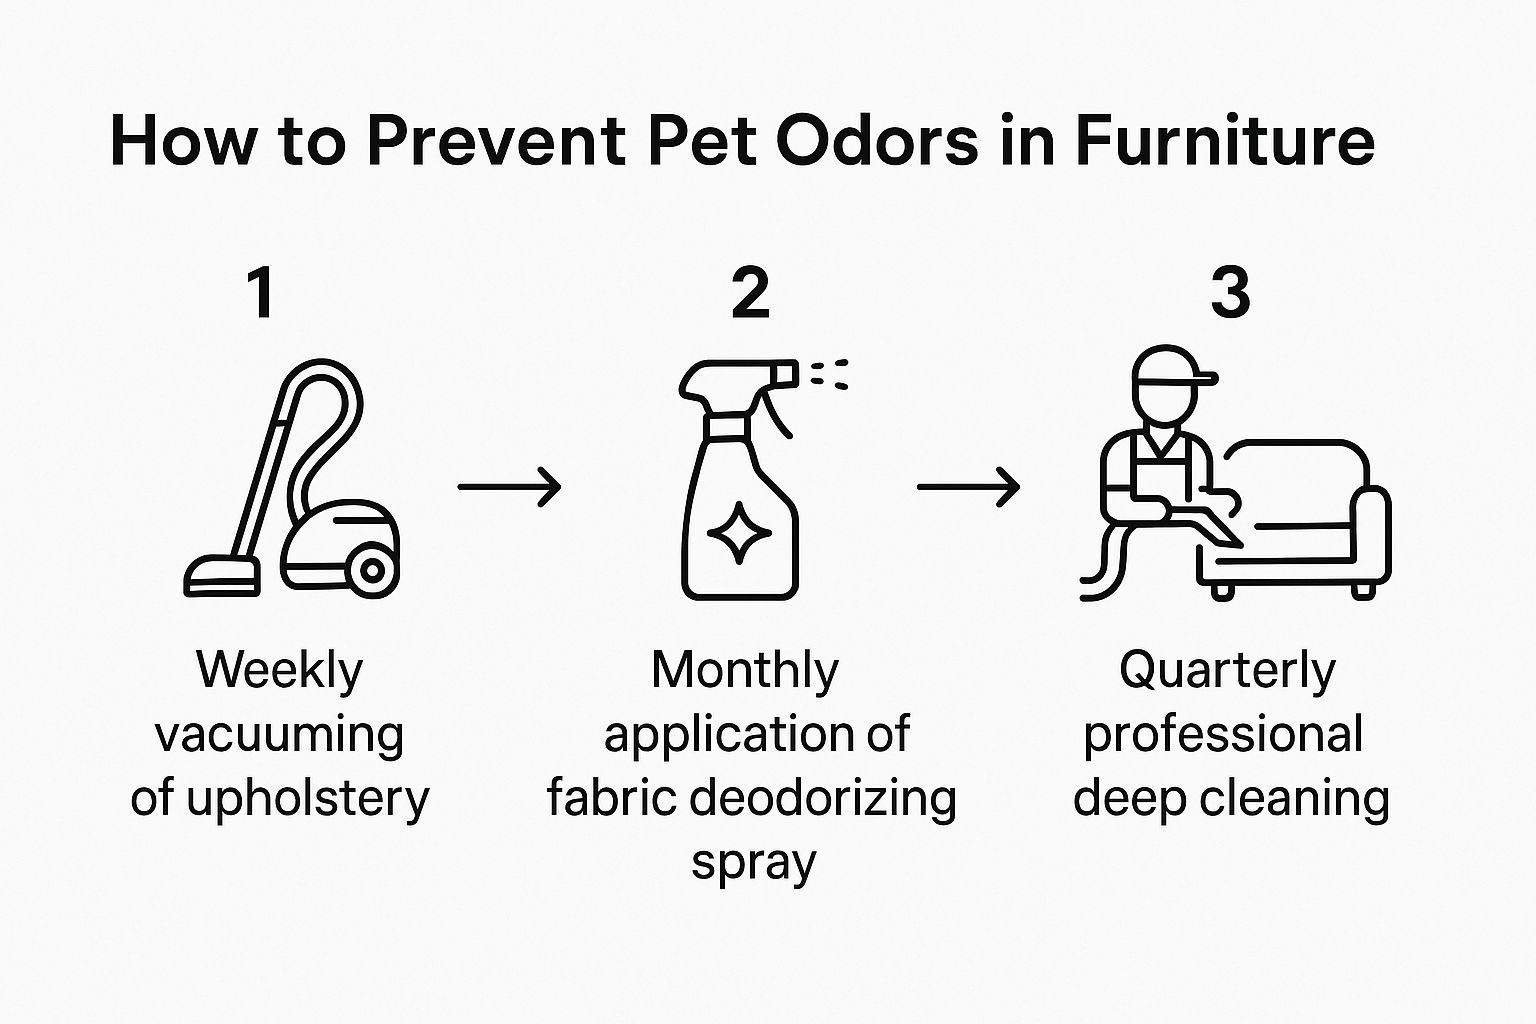
This process really shows how a few consistent actions are the secret to preventing odors in the long run. If a smell lingers after the furniture is totally dry, don't panic. Deep, set-in stains often need a second round. Just repeat the saturation, dwell time, and blotting process to knock out any remaining uric acid crystals.
Keeping Your Furniture Fresh and Odor-Free
Getting a tough pet odor out of your furniture feels like a huge win. But the real victory? Keeping those smells from coming back in the first place. It’s all about being proactive rather than just reacting when an accident happens. Trust me, a little prevention goes a long, long way in keeping your home smelling consistently fresh.
The single most important habit is to tackle accidents the second they happen. The longer urine or other messes sit, the deeper they soak into your upholstery and padding. Once that happens, getting the smell out completely becomes a much bigger battle. Quick action stops the problem before it truly starts.
Create Protective Barriers
One of the easiest things you can do is use physical barriers on your pet's favorite spots to lounge. And no, this doesn't mean you have to wrap your beautiful sofa in plastic. Modern furniture protection can be both stylish and incredibly effective.
Consider a few of these options:
- Machine-Washable Covers: A good slipcover can completely change the look of your furniture while giving you a washable layer of defense.
- Cozy Throws and Blankets: Simply draping a durable, chic throw blanket over the spot where your dog or cat loves to nap catches the vast majority of hair, dander, and small messes.
- Waterproof Pads: For older pets or those still in training, you can place a discreet waterproof pad under their favorite blanket. It’s an invisible shield for the cushion below.
The trick is to make the protective layer the most inviting spot for your pet. A soft, cozy blanket doesn't just protect your sofa—it encourages your pet to snuggle there instead of directly on the upholstery.
Establish a Consistent Cleaning Routine
Beyond just cleaning up accidents, a regular maintenance schedule is absolutely vital. This is especially true now, with pet ownership on the rise—about 66% of U.S. households now have at least one furry family member. This trend has pushed the U.S. pet odor control market to an estimated $6.47 billion in 2023, which just shows how many of us are looking for ways to keep our homes fresh.
A simple routine prevents that gradual buildup of dander, oils, and fur that creates that general "pet smell." This means a weekly vacuum of all upholstery and a monthly wash for any covers or blankets. For a deeper dive, check out our guide on how to make your home smell fresh for more tips. If you want to stay ahead of odors for good, you might also consider the benefits of recurring cleaning services.
And don't forget to think beyond the furniture itself. Sometimes the problem isn't the couch but a related behavior. For cat owners, making sure the litter box is impeccably clean can stop them from looking for other places to go, like your favorite armchair. When you combine physical barriers with a consistent cleaning habit, you can stop odors before they even have a chance to become a problem.
Common Questions About Pet Odor Removal
Even after following the best advice, you probably still have a few questions about getting those stubborn pet smells out of your furniture. It's completely normal. Let's walk through some of the most common issues people run into so you can get the job done right.
Are DIY Vinegar And Baking Soda Solutions Really Effective?
For a fresh, minor accident, a simple mix of white vinegar and water can be a great first response. Vinegar’s acidity does a decent job of neutralizing the alkaline salts in new urine. If you follow that up by sprinkling baking soda on the damp spot, it will help absorb any surface smells as it dries overnight.
But let's be realistic—this DIY combo often comes up short against old, set-in odors. The real problem is the uric acid crystals left behind, and they require a specialized enzymatic cleaner to be fully broken down. Think of vinegar and baking soda as first aid, but for deep, lingering smells, an enzyme-based product is the only thing that truly works.
How Do I Remove Pet Smells From Wood Furniture?
Wood is porous, so it can trap odors just as easily as fabric. Your first move should be to clean the surface with a wood-safe cleaner, something like Murphy’s Oil Soap. If the smell has soaked into unfinished wood, you might have to lightly sand the area and then reseal it with varnish or shellac. This physically locks in any remaining odor molecules for good.
Always test any cleaner on a small, hidden area first to make sure it won’t damage the wood's finish. For smells trapped inside drawers or cabinets, try placing a small container of activated charcoal inside to absorb the odor over time.
What If I Can't Find The Exact Source Of The Smell?
This is one of the most frustrating parts of the job, especially when you're dealing with old, invisible stains. The absolute best tool for this is a UV blacklight. Pet urine contains elements that glow under ultraviolet light, making those hidden spots pop right out in a dark room.
Just turn off all the lights and methodically scan your furniture and the floor around it. The glowing spots are your targets. I always recommend marking them with a small piece of chalk or a sticky note so you know exactly where to treat once you turn the lights back on. This little trick saves an incredible amount of time and cleaning product.
Are Enzymatic Cleaners Safe For All Types Of Furniture Fabric?
While most enzymatic cleaners are made for water-safe fabrics, you should never assume it's safe. The very first thing you should do is find your furniture’s cleaning code, which is usually on a tag under a cushion or on the frame.
Here’s a quick rundown of what those codes mean:
- W: Go ahead and use water-based cleaners.
- S: You'll need a solvent-based, water-free cleaner.
- W/S: You can safely use either water-based or solvent-based options.
- X: Vacuum only. Do not use any liquid cleaners on this fabric.
No matter what the tag says, always do a spot test on a hidden area of the fabric before you treat a large, visible stain. It’s a simple step that can save you from accidentally discoloring or damaging your furniture.
Sometimes, the only way to truly get rid of persistent odors is to call in the professionals for a deep clean that resets your entire home. For a spotless space that smells fresh again, trust the experts at Custom Maids. Learn more about our customized cleaning services by visiting https://custom-maids.co.