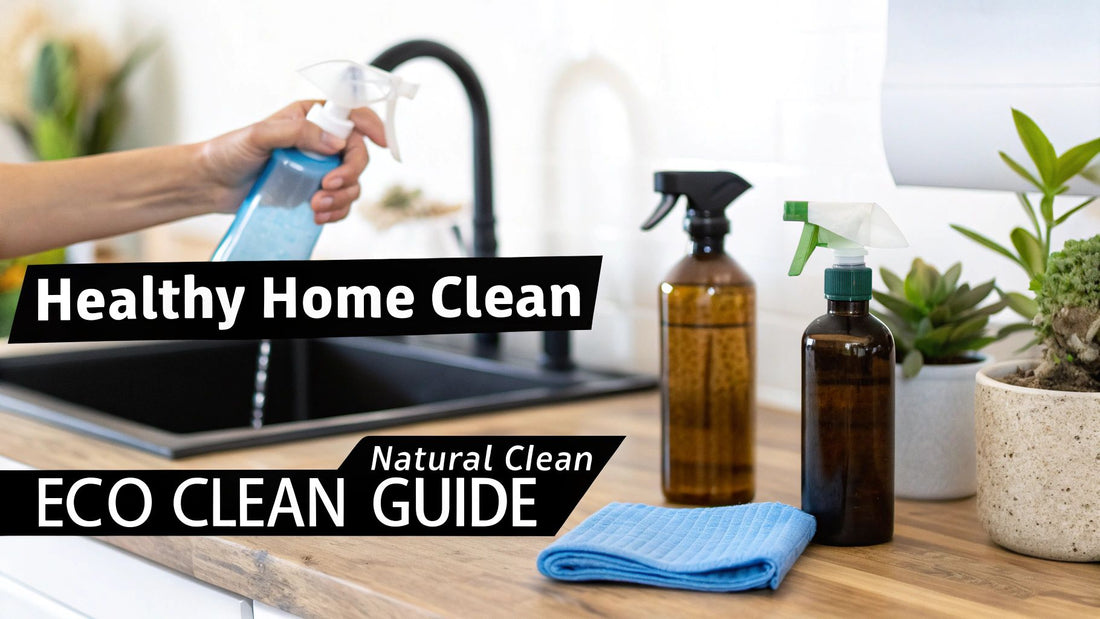
Healthy home cleaning is all about creating a genuinely safe living space—not just one that looks tidy. It’s a shift in focus from the harsh chemicals in most conventional cleaners to non-toxic, eco-friendly products that protect your family and improve your indoor air quality.
Beyond Spotless: The Real Meaning of a Healthy Home
Many of us grew up thinking that the sharp, sterile scent of bleach or ammonia meant a house was truly clean. We were conditioned to believe that if it doesn't smell like a hospital, it isn't properly disinfected. But that mindset completely misses a critical piece of the puzzle: the air we breathe inside our own homes. Adopting a healthy home cleaning routine is all about breaking free from that old way of thinking.
A truly healthy home is a sanctuary. It’s a place where the air feels fresh and is free from the invisible irritants that so many of us have just gotten used to. It's about creating a space that actively supports your family's health instead of silently working against it with volatile organic compounds (VOCs). These chemicals, released by traditional cleaning products, can linger long after you’ve put the sponges away, often contributing to everything from allergies and headaches to more serious respiratory issues.
Redefining a Clean Environment
Making the switch to healthy cleaning really just means being more intentional about the products you bring into your house. It’s about finally connecting the dots and realizing that what you use to wipe down your counters or scrub your floors has a direct impact on your kids, your pets, and yourself.
A healthy home isn't defined by the absence of dirt, but by the absence of toxins. It’s a proactive approach to creating a space that nurtures well-being from the inside out.
The roadmap to get there is simpler than you might think. The core principles are straightforward:
- Reduce Chemical Exposure: Make a conscious effort to choose products without harmful, mystery ingredients.
- Improve Indoor Air Quality: Prioritize cleaning methods that don't pollute the air you breathe every day.
- Embrace Simplicity: You’ll be surprised to find that a few basic, natural ingredients can effectively clean your entire home.
To make the difference crystal clear, let's break down how these two approaches stack up against each other.
Conventional vs Healthy Cleaning At a Glance
This table offers a quick comparison, showing the fundamental differences between traditional cleaning methods and the healthy, non-toxic approach this guide champions.
| Aspect | Conventional Cleaning | Healthy Home Cleaning |
|---|---|---|
| Primary Goal | Visual cleanliness, surface disinfection | Holistic well-being, safe environment |
| Key Ingredients | Harsh chemicals (bleach, ammonia, phthalates) | Natural ingredients (vinegar, baking soda, essential oils) |
| Impact on Air | Releases VOCs, pollutes indoor air | Improves indoor air quality, no harmful fumes |
| Health Risks | Can trigger allergies, asthma, skin irritation | Hypoallergenic, safe for kids and pets |
| Scent | Artificial fragrances used to mask odors | Natural scents or no scent at all |
| Environmental Impact | Non-biodegradable ingredients, plastic waste | Eco-friendly, biodegradable, less waste |
As you can see, the shift is less about just swapping products and more about adopting a healthier philosophy for your entire home.
Understanding the Broader Impact
This isn't just some niche trend; it's a global movement toward healthier living. The demand for safer cleaning solutions is growing fast because more and more people are connecting the dots between their environment and their health. The global household cleaning products market is set to jump from roughly USD 247.73 billion in 2025 to around USD 384.31 billion by 2034. That huge increase is fueled by a clear consumer preference for organic, eco-friendly options.
Of course, a truly healthy home goes beyond just the cleaning products you use. You can’t have a healthy home if the air itself is stagnant and compromised. After you’ve tackled your cleaning routine, learning about the benefits of proper ventilation for a truly healthy home is the perfect next step. When you combine mindful cleaning with good airflow, you create a powerful system that supports your family’s well-being on every level.
How to Read Labels and Avoid Harmful Chemicals
Walking down the cleaning aisle can be an absolute sensory overload. Brightly colored bottles scream promises like "all-natural," "green," and "eco-friendly," but here's the thing: those terms are mostly unregulated and often misleading.
This marketing trick is called greenwashing, and its whole purpose is to make a product seem healthier or more environmentally friendly than it really is. The secret to a genuinely healthy cleaning routine is learning to see past the flashy claims and understand what’s actually in the bottle.
Decoding the Ingredient List
Your best defense is the ingredient list itself. It might look intimidating, almost like a page from a chemistry textbook, but you don't need to be a scientist to make smart choices. You just need to know how to spot a few of the worst offenders.
Think of it like reading a food label. You don’t need to understand the molecular structure of high-fructose corn syrup; you just need to know it's something to avoid. The same logic applies here. This knowledge turns you from a confused shopper into a confident one.
Key Chemicals to Avoid
Here are some of the most common—and problematic—ingredients you’ll find in everyday cleaning products. Making a conscious effort to avoid these is a huge step toward creating a safer home environment.
- Phthalates: These are often hidden under the vague term "fragrance." Phthalates are chemicals that make scents linger, but they're also known endocrine disruptors linked to a variety of health issues. If a label just says "fragrance" without specifying the source, it's best to be skeptical.
- Ammonia: A staple in glass cleaners and all-purpose sprays, ammonia is a powerful irritant that can trigger respiratory issues like asthma. It’s particularly nasty if mixed with bleach, as it creates toxic chloramine gas.
- Triclosan: This aggressive antibacterial agent was once everywhere, from hand soaps to toothpaste. It has since been linked to creating antibiotic-resistant bacteria and disrupting hormones. While it's been banned in some products, it still pops up.
- 2-Butoxyethanol: This is a potent solvent found in many window and multipurpose cleaners. When inhaled, it can cause sore throats, and high exposure has been linked to liver and kidney damage. Always check the label on your "all-purpose" cleaners for this one.
Remember: The absence of these chemicals is far more important than the presence of buzzwords like "natural." True safety is about what isn't in the bottle.
This same principle applies to everything you clean in your home. You can learn more about the benefits of going natural in your laundry routine, and apply that same healthy-home logic to your other cleaning choices.
Using Trusted Resources
You don’t have to go it alone in your quest for safer products. Thankfully, some organizations have done the heavy lifting for us. The Environmental Working Group (EWG), for example, has an amazing database that grades cleaning products based on their safety.
Resources like the EWG's Guide to Healthy Cleaning are invaluable. They do the deep research for you and provide a simple, letter-grade score to guide your shopping. You can look up the products you're already using or find safer alternatives before you even set foot in a store.
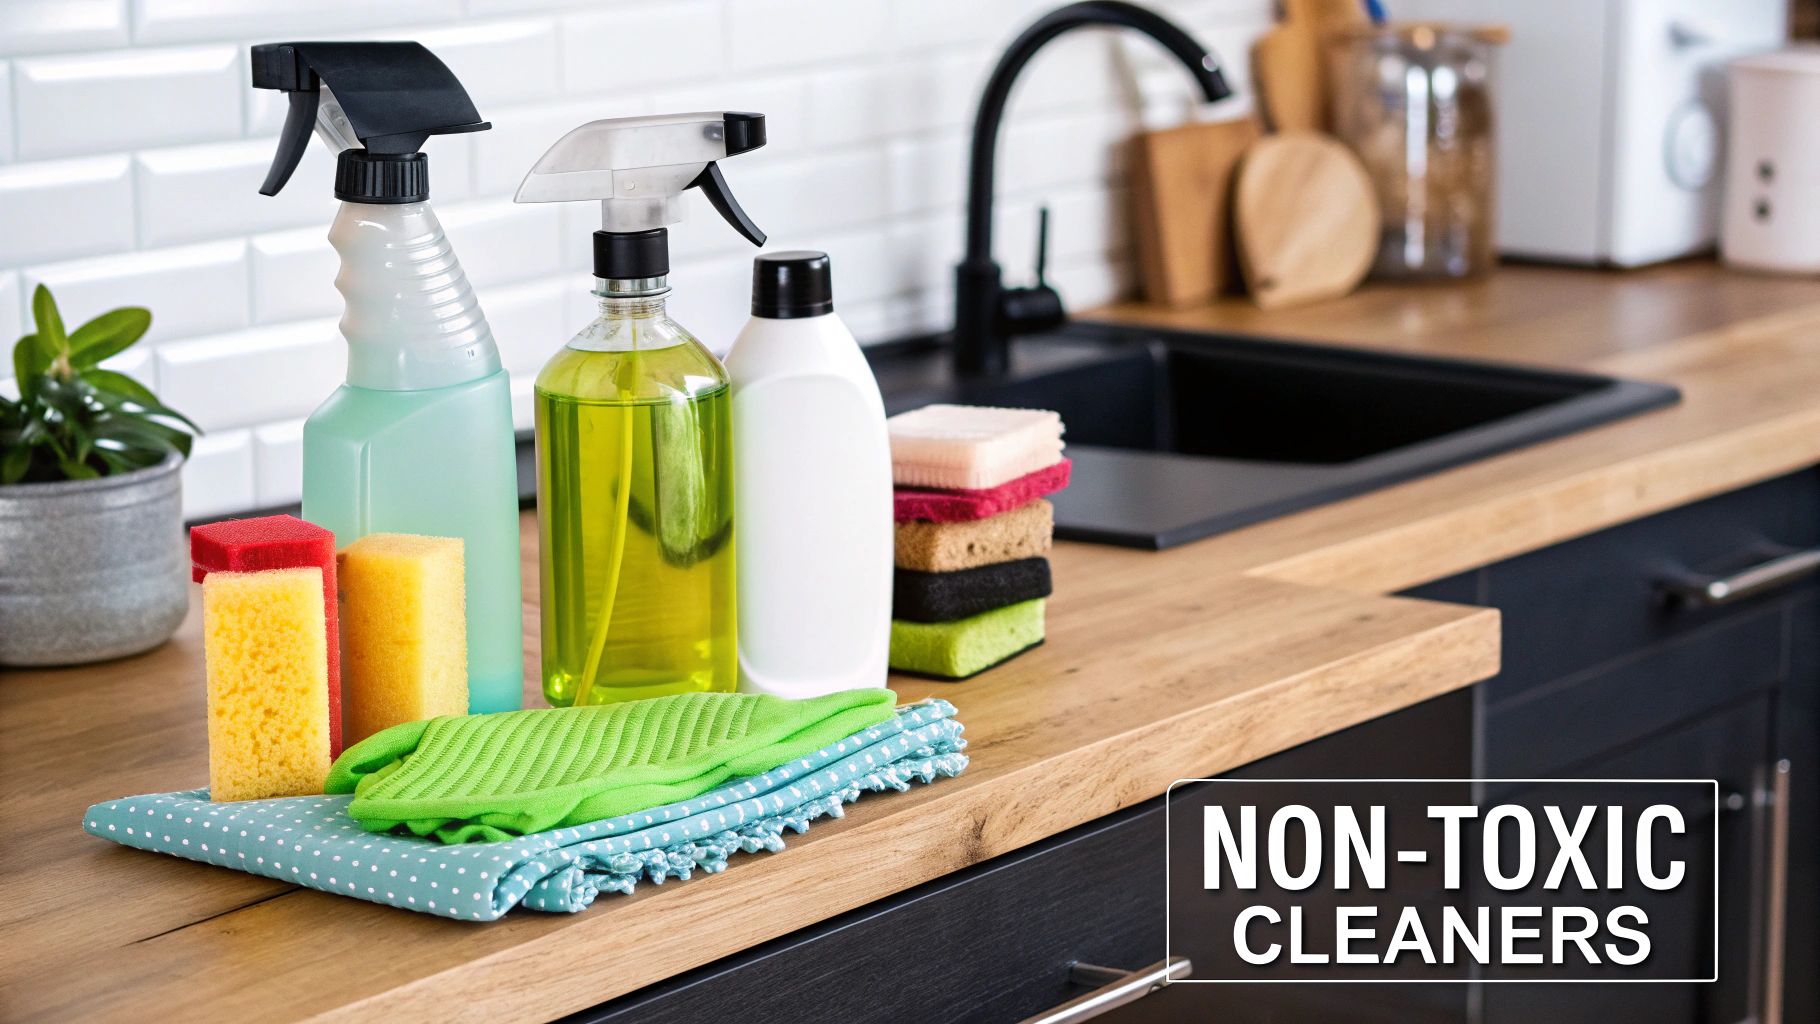
Building Your Natural Cleaning Arsenal
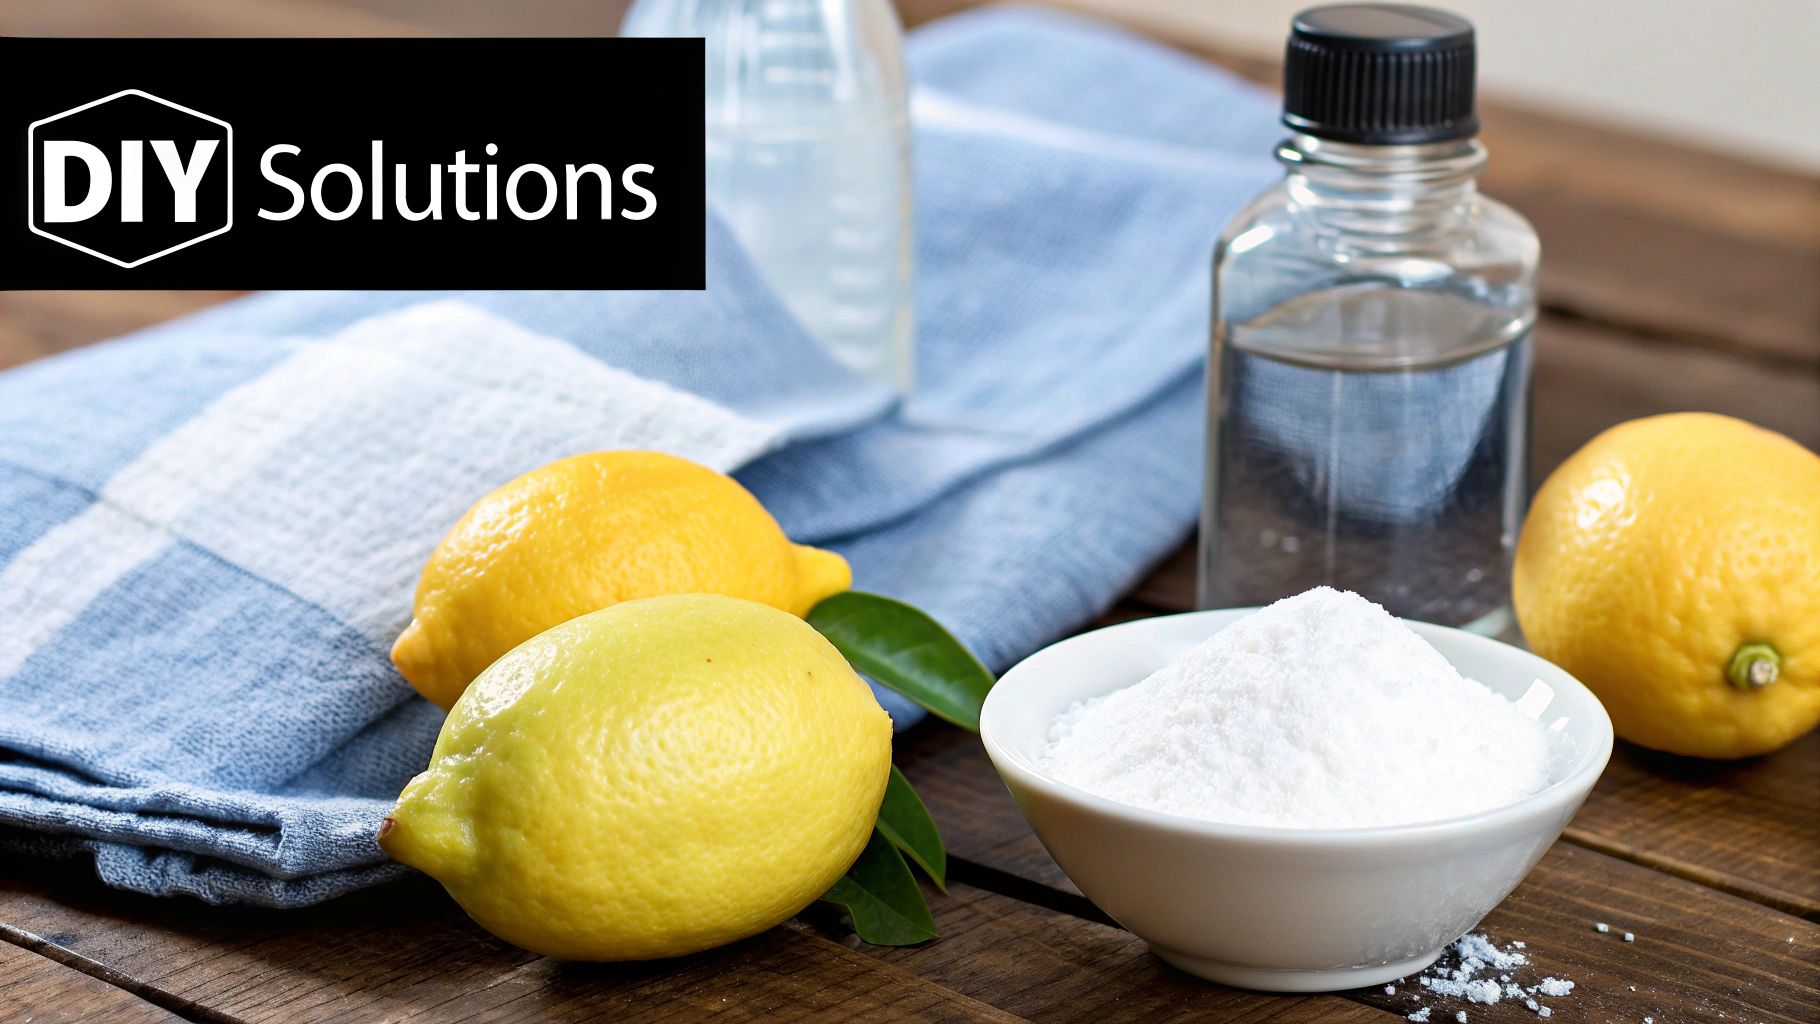
Switching to healthy home cleaning doesn't mean you need a shopping spree for pricey "green" products. Believe it or not, the most powerful and affordable cleaning toolkit is one you build yourself from a few simple, versatile ingredients.
You can get a spectacular clean with things you probably already have in your pantry. It's time to ditch that cluttered cabinet full of specialized bottles. We're going to create a minimalist, yet highly effective, cleaning arsenal that tackles nearly any mess in your home safely and efficiently.
The Power Trio of Natural Cleaning
At the heart of any DIY cleaning kit are three core ingredients. These items are cheap, easy to find, and incredibly effective because of their basic chemical properties.
- Distilled White Vinegar: The acidity of vinegar makes it a superstar for dissolving mineral deposits (like hard water stains), cutting through grease, and wiping out grime. It's also a fantastic natural deodorizer and works wonders on glass.
- Baking Soda (Sodium Bicarbonate): This mild alkali is a gentle but tough abrasive. It’s perfect for scrubbing away stubborn gunk on sinks, tubs, and stovetops without scratching. It also excels at absorbing and neutralizing odors—not just covering them up.
- Castile Soap: This vegetable-based soap is a true multi-tasker. Unlike harsh detergents, it cleans gently but effectively. A small amount goes a long way to lift dirt and grease from floors, dishes, and even laundry.
These three ingredients are the foundation of your healthy cleaning routine, but you can always take them a step further.
Enhancing Your Cleaners Naturally
For extra cleaning power and a fresh scent, think about adding essential oils. A few drops of tea tree oil can add antimicrobial properties to your sprays, while lemon or orange oil boosts degreasing power and leaves behind a bright, clean aroma.
The goal is to move away from the idea that a "clean" smell comes from synthetic fragrances. A naturally clean home often smells like nothing at all, or carries a light, fresh scent from essential oils like lavender or eucalyptus.
Understanding these ingredients is the first step. Next, let's put them to work with some simple, proven recipes. Using these DIY solutions is a cornerstone of a truly eco-friendly house cleaning system you can feel good about.
Essential DIY Cleaning Recipes
Armed with your basic ingredients, you can mix up cleaners that outperform many commercial alternatives. Just be sure to use clean, clearly labeled spray bottles for your creations.
Everyday All-Purpose Spray This will quickly become your go-to cleaner for countertops, spills, and general wipedowns.
- Mix: 1 part distilled white vinegar, 1 part water, and 10-15 drops of lemon or lavender essential oil (optional).
- Use: Combine in a spray bottle and shake gently before each use. It’s perfect for cutting through everyday grime on kitchen counters and bathroom surfaces.
Tough Abrasive Scrub When you need more scrubbing power for sinks, tubs, or grimy tile grout, this paste is your best friend.
- Mix: 1/2 cup baking soda with enough castile soap to form a thick paste (usually a tablespoon or two), plus 5 drops of tea tree oil (optional).
- Use: Mix in a small bowl until it has a frosting-like consistency. Apply with a sponge, scrub, and rinse well.
Streak-Free Glass and Mirror Cleaner Ditch the ammonia-based blue sprays for good. This simple mixture leaves windows and mirrors sparkling without the harsh fumes.
- Mix: 1 part distilled white vinegar, 1 part water, and 2-3 drops of castile soap.
- Use: The key here is the tiny amount of soap—too much will cause streaks. Spray on the surface and wipe clean with a microfiber cloth for the best results.
Proper Storage and Important Precautions
While these ingredients are natural, they still need to be handled with care to ensure safety and effectiveness.
| Ingredient | Best Storage Method | Surfaces to Avoid |
|---|---|---|
| Vinegar-Based Sprays | Store in a cool, dark place. Label clearly. | Marble, granite, and other natural stone (the acid can etch the surface). |
| Baking Soda Scrub | Keep the dry powder in its original box. Mix paste fresh for each use. | Delicate surfaces that might scratch, like polished wood or some plastics. |
| Essential Oils | Store in dark glass bottles away from direct sunlight and heat to preserve their potency. | Use caution around pets, as some oils can be toxic to cats and dogs. |
By building this simple yet powerful natural cleaning arsenal, you take a huge step toward a healthier home. You'll not only reduce your family's exposure to harsh chemicals but also save money and cut down on plastic waste.
A Room-by-Room Healthy Cleaning Plan
Alright, you've mixed your DIY sprays and stocked up on baking soda. Now comes the fun part: putting your new healthy cleaning arsenal to work. It’s one thing to have the recipes, but a truly healthy home is built by getting your hands dirty (so you can get things clean!).
This is where we go beyond the theory and start tackling the real-world messes in your house, one room at a time. A systematic approach is key. It keeps you from feeling overwhelmed and makes sure every corner gets the attention it deserves. The goal isn't just to make things look clean; it's about using your non-toxic methods to handle everything from kitchen grease to bathroom mildew effectively and safely.
The infographic below shows a simple flow you can adapt for any room. It's all about breaking a big job into manageable chunks.
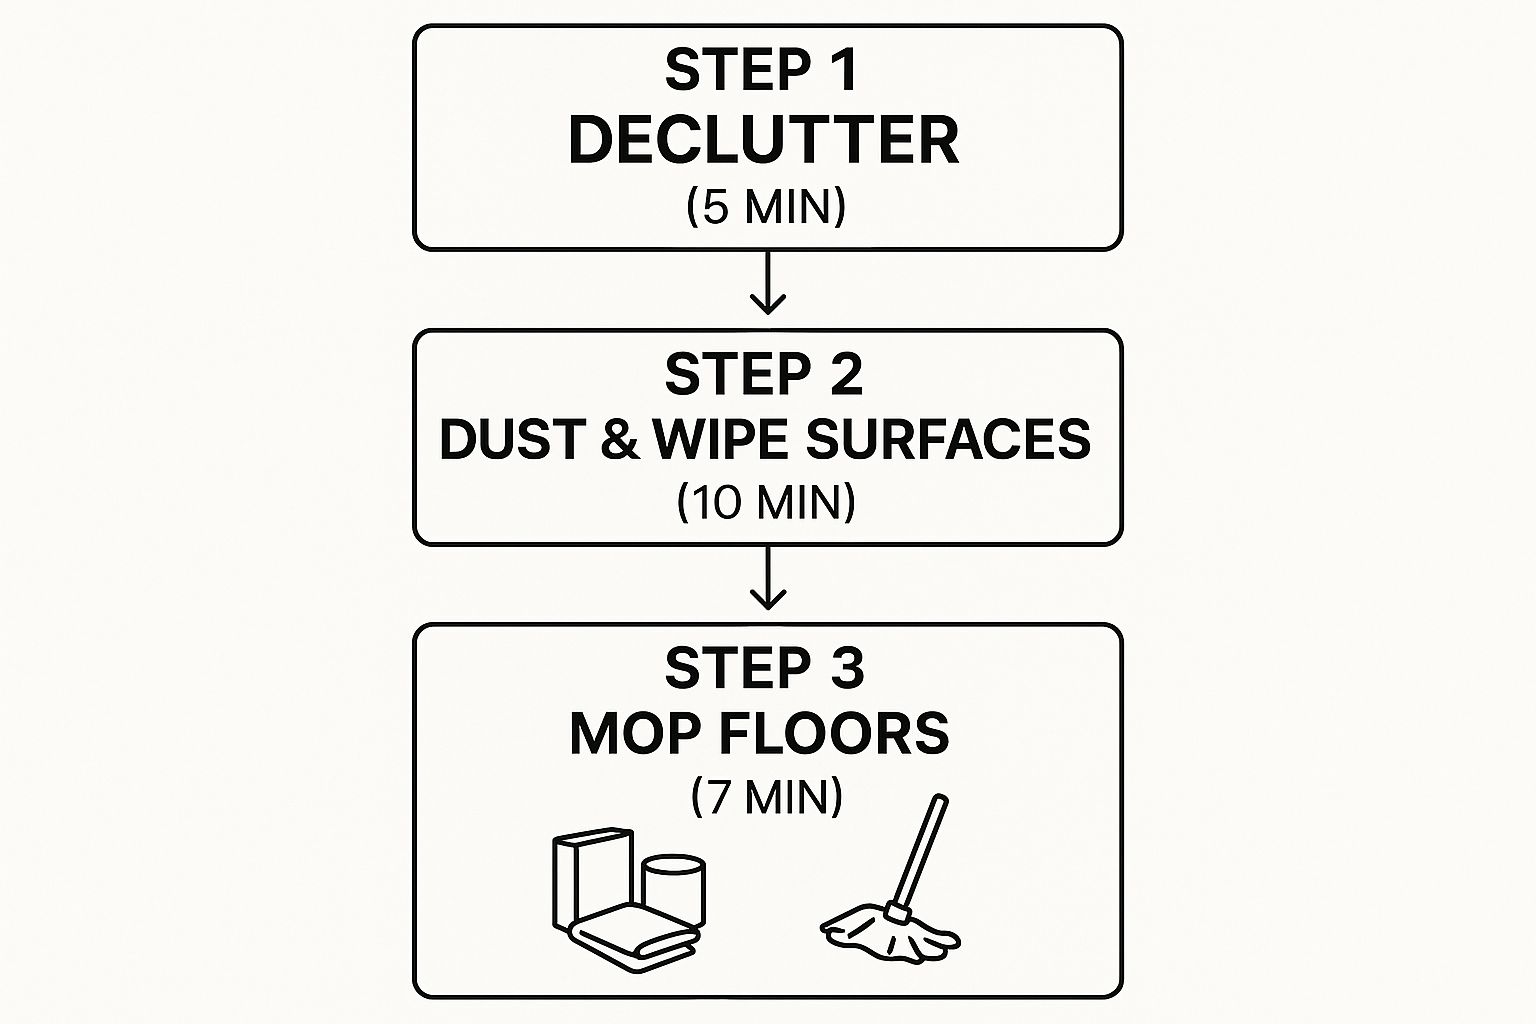
As you can see, a quick declutter before you even start scrubbing makes the whole process faster and way more efficient.
The Heart of the Home: The Kitchen
The kitchen is command central in most homes, which also makes it a hotspot for grease, crumbs, and germs. This is where a healthy cleaning routine matters most, since you're prepping food in the same space.
First things first: clear those counters. Put away the toaster, the stack of mail, and any lingering dishes. You can’t clean what you can’t see. Next, fill your sink with hot water and a squirt of castile soap—this will be your go-to spot for rinsing cloths.
Kitchen Healthy Cleaning Tasks
- Wipe Down Surfaces: Grab your all-purpose vinegar spray for countertops (just not on natural stone!), the backsplash, and cabinet doors. The vinegar cuts right through light grease and sticky fingerprints.
- Degrease the Stovetop: For that cooked-on gunk, sprinkle baking soda directly on the surface. Hit it with your all-purpose spray until it fizzes, let it hang out for a few minutes, then scrub with a non-scratch sponge.
- Make Your Sink Gleam: After the sink is empty, make a simple paste with baking soda and a bit of water. Scrub down the basin and faucet to lift water spots and food stains, then give it a good rinse.
- Clean Appliances: Wipe down the outside of your microwave, fridge, and dishwasher with your all-purpose spray. For a grimy microwave interior, heat a bowl of water and vinegar for two minutes. The steam loosens everything up for an easy wipe-down.
This targeted approach makes a huge difference. You're using the right non-toxic tool for each specific kind of kitchen mess.
Tackling the Bathroom
The bathroom throws a unique set of challenges at you: soap scum, hard water stains, mildew, and germs. Conventional cleaners nuke these problems with harsh bleach and ammonia, but your DIY kit is more than capable of winning this fight without the toxic fumes.
Just like in the kitchen, start by decluttering. Move all the bottles and razors off the counter and the edge of the tub. This gives you clear access for a real clean.
A common mistake I see is using the same cloth for the entire bathroom. To avoid spreading germs, use different microfiber cloths for the toilet, sink, and shower. Color-coding them is a simple trick that works wonders.
Bathroom Healthy Cleaning Tasks
- Toilet: Pour about a half-cup of vinegar into the bowl and let it sit for 15-20 minutes to disinfect. Dip your toilet brush in the water, sprinkle baking soda on it, and give the bowl a good scrub before flushing. Your all-purpose spray is perfect for the seat, lid, and tank.
- Shower and Tub: To demolish soap scum, spray the walls and tub generously with straight white vinegar. Let it sit for at least 15 minutes. For extra scrubbing power, follow up with your baking soda paste before rinsing everything down.
- Mirrors and Glass: Your streak-free glass cleaner is the star here. A light spritz and a wipe with a clean, dry microfiber cloth is all it takes for a perfect, clear finish.
- Sink and Countertops: The all-purpose spray works great for general wipedowns. For that crusty toothpaste grime around the faucet, the baking soda scrub provides just enough gentle abrasion to get it clean.
Staying on top of these areas regularly makes your deep-cleaning days much less frequent and far easier.
Refreshing Your Living Spaces and Bedrooms
In living areas and bedrooms, the main enemies are dust, allergens, and stagnant air. The focus here shifts from scrubbing grime to improving air quality and creating a calm, fresh space. Remember, dust isn't just ugly—it's a mix of skin cells, pet dander, and pollen that can make allergies flare up.
Your best weapon against dust is a consistent routine. Always start cleaning at the highest point in the room and work your way down. That way, any dust you knock loose will land on surfaces you haven't cleaned yet.
For a more structured weekly plan, following a detailed guide can be a lifesaver. You can explore a comprehensive house cleaning checklist to make sure you never miss a spot.
Living Area and Bedroom Tasks
- Dust High Surfaces: Use a damp microfiber cloth to wipe down ceiling fans, light fixtures, and the tops of bookshelves. A damp cloth is crucial because it traps dust instead of just flinging it into the air.
- Clean Furniture and Decor: Dust all your hard surfaces—coffee tables, nightstands, dressers, you name it. Don’t forget to give a quick wipe to electronics, lamps, and window sills.
- Vacuum Thoroughly: It’s time to vacuum all carpets, rugs, and even your upholstered furniture. Use the attachments to get into corners and along baseboards where dust bunnies love to party.
- Mop Hard Floors: For any hardwood, tile, or laminate, use a simple mix of warm water with a splash of vinegar or a few drops of castile soap. The key is to wring your mop out well—you never want to oversaturate wood floors.
By following this room-by-room plan, you turn healthy cleaning from a chore into a manageable and rewarding habit. You're not just getting a spotless home; you're building a safer, healthier sanctuary for yourself and your family.
Developing a Sustainable Cleaning Routine
While a deep clean feels incredible, the real secret to a consistently healthy home is what happens between those big sessions. A single, exhausting day of scrubbing is a sprint, but keeping your home truly clean is a marathon. The key is to build a routine that fits your actual life, not some impossible ideal.
Creating a sustainable system stops cleaning from turning into a massive, overwhelming chore. It’s all about weaving small, healthy cleaning habits into your daily and weekly rhythm until they become second nature. This consistency is what maintains your home as a true sanctuary in the long run.
Creating Your Cleaning Cadence
First things first, stop thinking of "cleaning" as one giant task. Instead, break it down by how often things really need to be done. Some tasks need daily attention, while others are fine weekly or even monthly. This approach keeps everything manageable and prevents burnout.
Understanding the right frequency is crucial. For a deeper dive, our guide on how often you should clean your house can help you create a schedule that makes sense for your home and lifestyle.
Here’s a flexible template to get you started:
- Daily Tasks (5-10 Minutes): These are quick hits that prevent messes from piling up. Think wiping kitchen counters after meals, making the bed, and a quick sweep of high-traffic floors.
- Weekly Tasks (1-2 Hours): This is your main cleaning session. It covers things like dusting all surfaces, vacuuming carpets, mopping floors, and giving the bathroom a thorough wipe-down.
- Monthly Tasks (1-2 Hours): These are the deeper-clean jobs you don't need to tackle every week. This includes cleaning inside the microwave and oven, wiping down baseboards, and washing shower curtains.
This tiered approach ensures you’re always on top of things without losing an entire weekend to cleaning.
Smart Strategies for Efficient Cleaning
Once you know what to clean and when, you can make the process even smoother with a few simple strategies. These aren't just time-savers; they’re smart habits that help integrate healthy home cleaning into your life seamlessly.
One of the most effective methods is task batching. Instead of cleaning one room from top to bottom before moving on, you group similar tasks together. For example, do all the dusting in every room at once, then move on to vacuuming everywhere. This creates a rhythm and stops you from constantly switching tools and mindsets.
Another powerful tool is the "15-Minute Reset." Set a timer for just 15 minutes every evening and have the whole family pitch in to tidy up. This isn't about deep cleaning; it’s about putting things back where they belong. You’ll be stunned by how much chaos you can conquer in such a short burst of time.
Weaving Sustainability into Your Routine
A truly sustainable routine goes beyond just the schedule. It also involves the products you use and the waste you create. As you get comfortable with your new cadence, you can expand your focus. Beyond your cleaning products, embracing comprehensive zero waste kitchen tips is a game-changer for developing a truly sustainable and healthy home.
Here’s how these ideas all work together:
| Strategy | How It Helps | Healthy Home Connection |
|---|---|---|
| Task Batching | Boosts efficiency and focus by grouping like-tasks. | Ensures essential cleaning (like dusting) gets done consistently, reducing allergens. |
| 15-Minute Reset | Prevents daily clutter from snowballing into overwhelming messes. | Keeps surfaces clear, making them easier to wipe down and sanitize regularly. |
| Tiered Schedule | Breaks down cleaning into manageable daily, weekly, and monthly jobs. | Guarantees that both high-touch surfaces and deep-clean areas get the right attention. |
By adopting these habits, you transform healthy cleaning from an occasional project into a simple, integrated part of your lifestyle. It’s about making small, consistent efforts that add up to a big impact on your home's health—and your own peace of mind.
Answering Your Top Questions About Healthy Home Cleaning
Deciding to clean your home with natural, healthier products is a fantastic move. But let's be honest—it's normal to have a few questions. When you're used to the conventional cleaners you grew up with, making a switch can feel like stepping into unknown territory. So, let’s clear the air and tackle some of the most common concerns.
Getting past these practical hurdles will give you the confidence you need to go all-in on a greener cleaning routine. People everywhere are focusing more on creating safer, healthier homes. It's a big deal, and it's reflected in the global cleaning services industry, which was valued at USD 415.93 billion, with North America holding a 36.4% market share. This huge investment shows just how much we all want healthier living spaces. You can discover more insights about this growing trend and what it means for modern cleaning.
Are DIY Cleaners Really as Effective at Disinfecting?
This is probably the number one question on everyone's mind. While it's true that commercial disinfectants are powerful, many natural ingredients have impressive antimicrobial properties that are more than enough for everyday cleaning. For instance, solutions with white vinegar or essential oils like tea tree are great at tackling common household bacteria on your countertops and surfaces.
For day-to-day messes and general upkeep, these natural options are fantastic for keeping germs under control without harsh chemicals. The secret to a truly healthy home isn't just about blasting every surface with disinfectants—it's about regular cleaning that stops germs from building up in the first place.
How Can I Start Without Feeling Totally Overwhelmed?
The idea of tossing out everything under your sink and starting from scratch can feel pretty daunting. My advice? Start small and take it one step at a time. There’s no need to do a complete overhaul overnight.
A really simple, budget-friendly strategy is to just replace one product as you run out of it.
- All-purpose cleaner empty? Mix up a bottle of water, white vinegar, and a few drops of lemon essential oil. You'll be amazed at how many other cleaners this one simple mix can replace.
- Abrasive scrub gone? Whip up a quick paste with baking soda and a little castile soap. It works wonders on sinks and tubs.
- Glass cleaner finished? A simple vinegar and water solution will get your windows and mirrors sparkling.
This gradual method makes the transition manageable and affordable, and it lets you figure out what works best for your home without any pressure.
How Do I Get My Family on Board with This?
So many of us have been conditioned to think that the strong, sterile smell of bleach or ammonia means a room is clean. It's a common hurdle, but you can definitely shift that mindset by reframing what "clean" actually smells like.
The absence of a harsh chemical smell isn't a sign that something is dirty—it's a sign of better indoor air quality. True cleanliness often has no scent at all, or just a light, fresh one.
To help your family adjust, use pleasant, natural scents from essential oils like lavender, citrus, or eucalyptus in your DIY cleaners. Here’s a pro tip: let your family help pick out the scents! When they have a say, they feel more involved and are more likely to embrace the change.
Ready to experience a professionally cleaned, healthy home without lifting a finger? The experts at Custom Maids have been providing trusted, meticulous cleaning services to Mid-Michigan since 1982. Whether you need a one-time deep clean or a regular maintenance plan, let us create a spotless, healthy sanctuary for you. Learn more and get your free consultation at https://custom-maids.co.