
If you want to clean your bathroom the right way, you need a system. The secret all pros use is a simple but powerful one: work top-to-bottom, dry-to-wet. This simple shift in strategy means you won't accidentally undo your own work by knocking dust and debris onto surfaces you've already scrubbed. It saves a surprising amount of time and frustration.
The process is straightforward: start by getting rid of clutter, then dust all the high surfaces before you even think about grabbing a wet sponge for the fixtures and floors.
Your Smart Strategy for a Spotless Bathroom
Forget spending your Saturday afternoon scrubbing away only to be left with mediocre results. The real key to an efficient and effective clean isn't about brute force—it's about having a smart, methodical game plan.
Adopting the same principles the professionals use will completely transform your bathroom cleaning routine. You'll work faster and end up with a truly sparkling finish every single time. This isn't just about wiping down surfaces; it's about having a strategy that works with gravity, not against it.
In recent years, we've all become more focused on home hygiene, turning cleaning from a dreaded chore into a key part of keeping our homes healthy. This trend is happening everywhere. The bathroom cleaning service market was valued at around $25.72 billion in 2025 and is expected to keep growing, thanks to busy schedules and a greater awareness of cleanliness. You can read more about the growth of professional cleaning services to see just how much people value a properly sanitized bathroom.
Preparing for Success
Before you even pick up a sponge, a few prep steps are absolutely crucial. Getting this initial phase right sets the stage for a smooth, fast clean. Don't skip these.
- Declutter Everything: Get all your personal items off the countertops, out of the tub or shower surround, and off the floor. This means shampoo bottles, soap, decor, bathmats—even the trash can. You can't clean what you can't reach.
- Get Some Air Flowing: Open a window or flip on the exhaust fan. Good ventilation is a non-negotiable for safety, especially when you're using cleaning products. It helps dissipate any fumes and, as a bonus, helps everything dry faster.
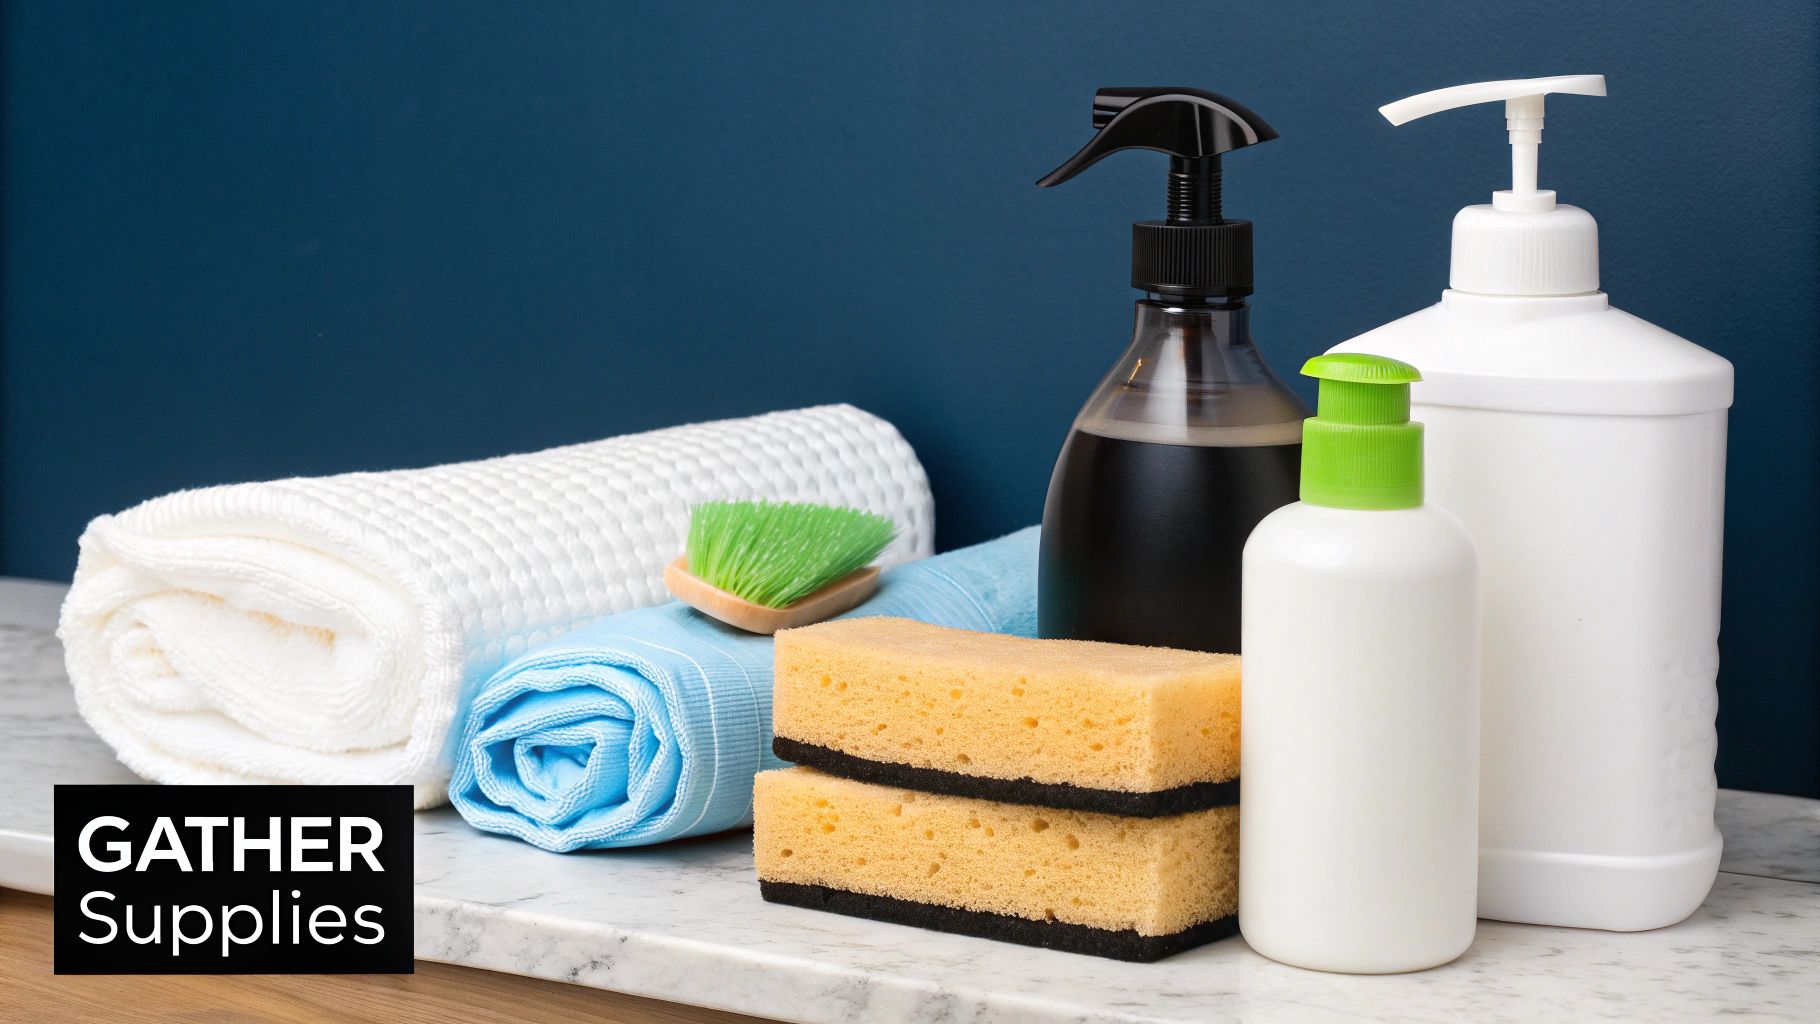
- Gather Your Toolkit: Pull all your supplies together before you start. This stops you from having to run back and forth for a forgotten cleaner or cloth. Having everything you need within arm's reach is a massive time-saver.
The most common mistake people make is cleaning in a random order. If you start high—dusting light fixtures, vents, and the tops of cabinets first—all that falling dust lands on surfaces you haven't cleaned yet. It's a simple change that prevents so much frustrating rework.
The Power of the Right Tools
The tools you use make a huge difference. Swapping out paper towels for high-quality microfiber cloths, for example, is a total game-changer. Microfiber is designed to trap dust and grime instead of just pushing it around, and it does it all without leaving lint behind. Plus, you can wash and reuse them hundreds of times.
The same goes for other tools. Using a dedicated scrub brush for stubborn grout lines or a squeegee for glass shower doors will give you that professional-level finish that a simple cloth just can't match. Having the right tool for each specific job makes the entire process feel smoother and more satisfying.
To make it easy, here’s a quick rundown of the essential supplies you'll want to have on hand before you get started.
Your Essential Bathroom Cleaning Toolkit
| Tool/Product | Primary Use | Pro Tip |
|---|---|---|
| Microfiber Cloths | All-purpose dusting, wiping surfaces, and polishing fixtures. | Use a color-coded system: one color for the toilet, another for sinks/mirrors to prevent cross-contamination. |
| All-Purpose Cleaner | Countertops, sinks, tub, and shower walls. | Look for a pH-neutral formula to avoid damaging sensitive materials like natural stone. |
| Glass Cleaner | Mirrors and glass shower doors. | Spray the cleaner onto your cloth, not the mirror, to prevent drips from running down the surface. |
| Toilet Bowl Cleaner | Disinfecting and cleaning the inside of the toilet bowl. | Apply it under the rim and let it sit for 5-10 minutes to break down grime before scrubbing. |
| Toilet Brush & Holder | Scrubbing the toilet bowl. | After cleaning, let the brush air dry by propping it between the seat and the bowl before putting it back in the holder. |
| Scrub Brush | Grout lines, tough stains, and textured surfaces. | An old toothbrush works perfectly for tight corners and around faucet bases. |
| Squeegee | Glass shower doors and mirrors for a streak-free finish. | Wipe the blade with a dry cloth after each pass to ensure you don't leave streaks behind. |
| Vacuum with Attachments | Removing hair and debris from floors and vents. | Use the crevice tool along baseboards and the brush attachment for the exhaust fan cover. |
| Mop and Bucket | Cleaning and sanitizing the bathroom floor. | A spin mop is great for controlling water levels, which is key for protecting grout and baseboards. |
| Rubber Gloves | Protecting your hands from chemicals and germs. | Rinse and hang them to dry after each use to keep them in good condition. |
With these tools ready to go, you’re equipped to tackle any bathroom cleaning challenge efficiently and effectively.
How to Deep Clean Your Shower and Bathtub
Let's be honest, the shower and bathtub are ground zero for the toughest grime in your home. We're talking cloudy soap scum, stubborn hard water stains, and that sneaky mildew that loves to creep into grout lines. To clean this area right, you need a smart strategy—one that lets your cleaning products do the heavy lifting for you.
The absolute game-changer is to pre-treat all the surfaces. Before you even think about scrubbing, spray your cleaner generously over the tub, tiles, and glass doors. Now, walk away. Give it a solid 10-15 minutes to work while you tackle something else. This "dwell time" is your secret weapon; it breaks down all that buildup, which means way less elbow grease for you later.
Before you jump in, it's always a good idea to get prepped. This quick visual guide lays out the essential first steps for any bathroom cleaning project.
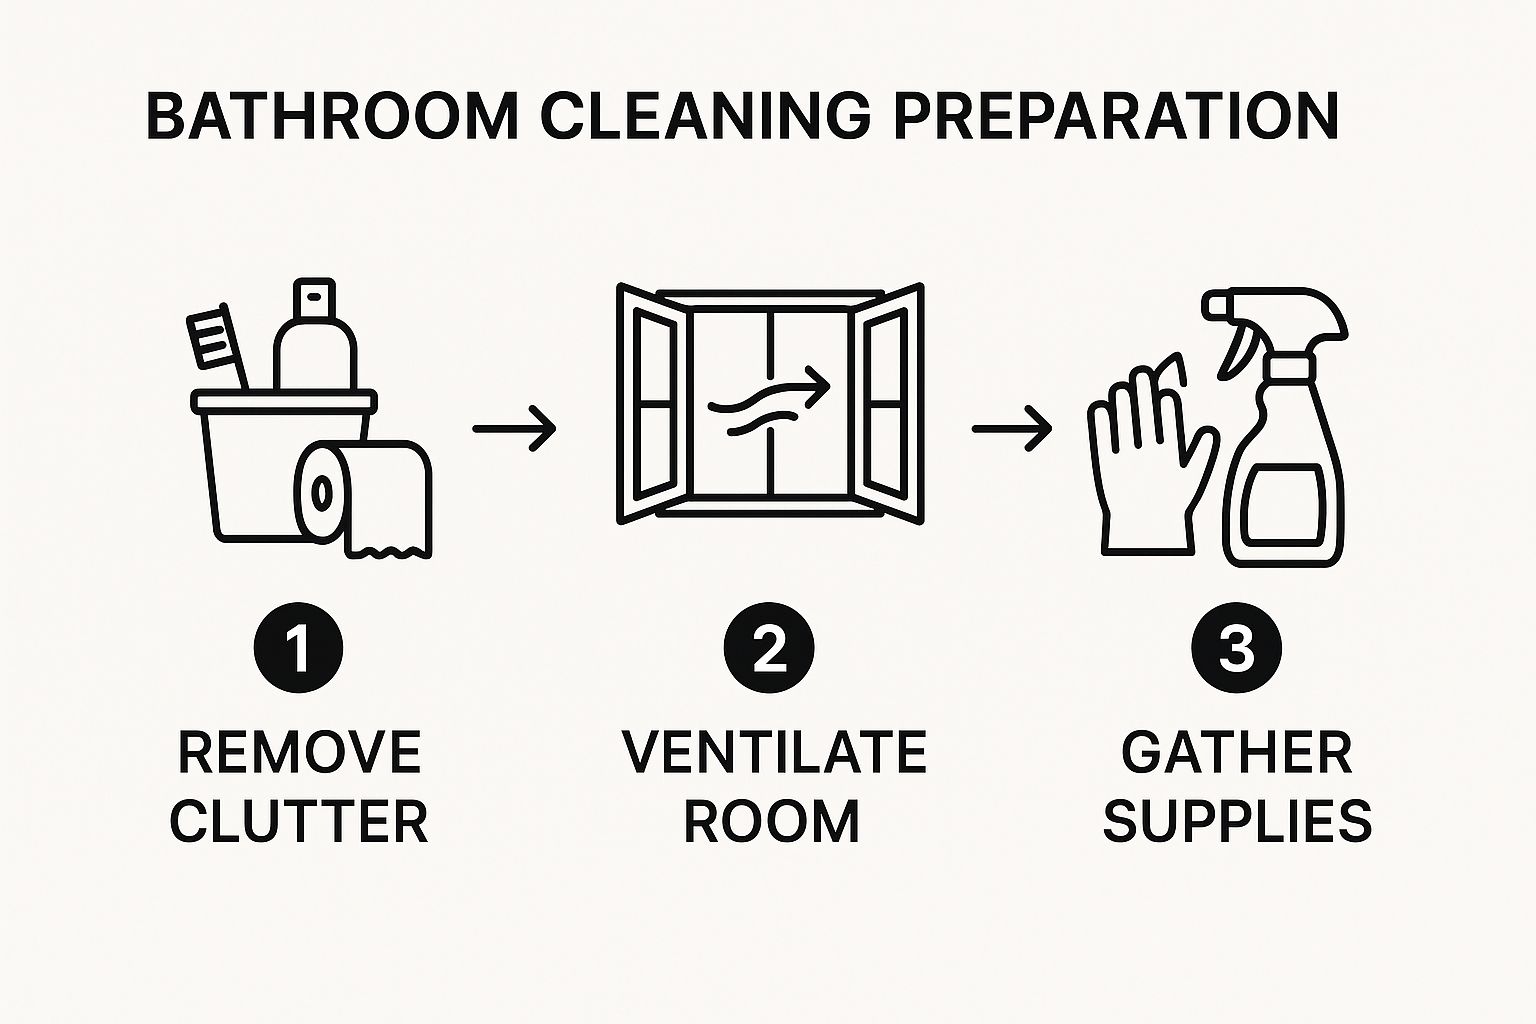
As you can see, clearing the clutter and getting some air flowing are non-negotiable first moves for an efficient clean.
Conquering Soap Scum and Grime
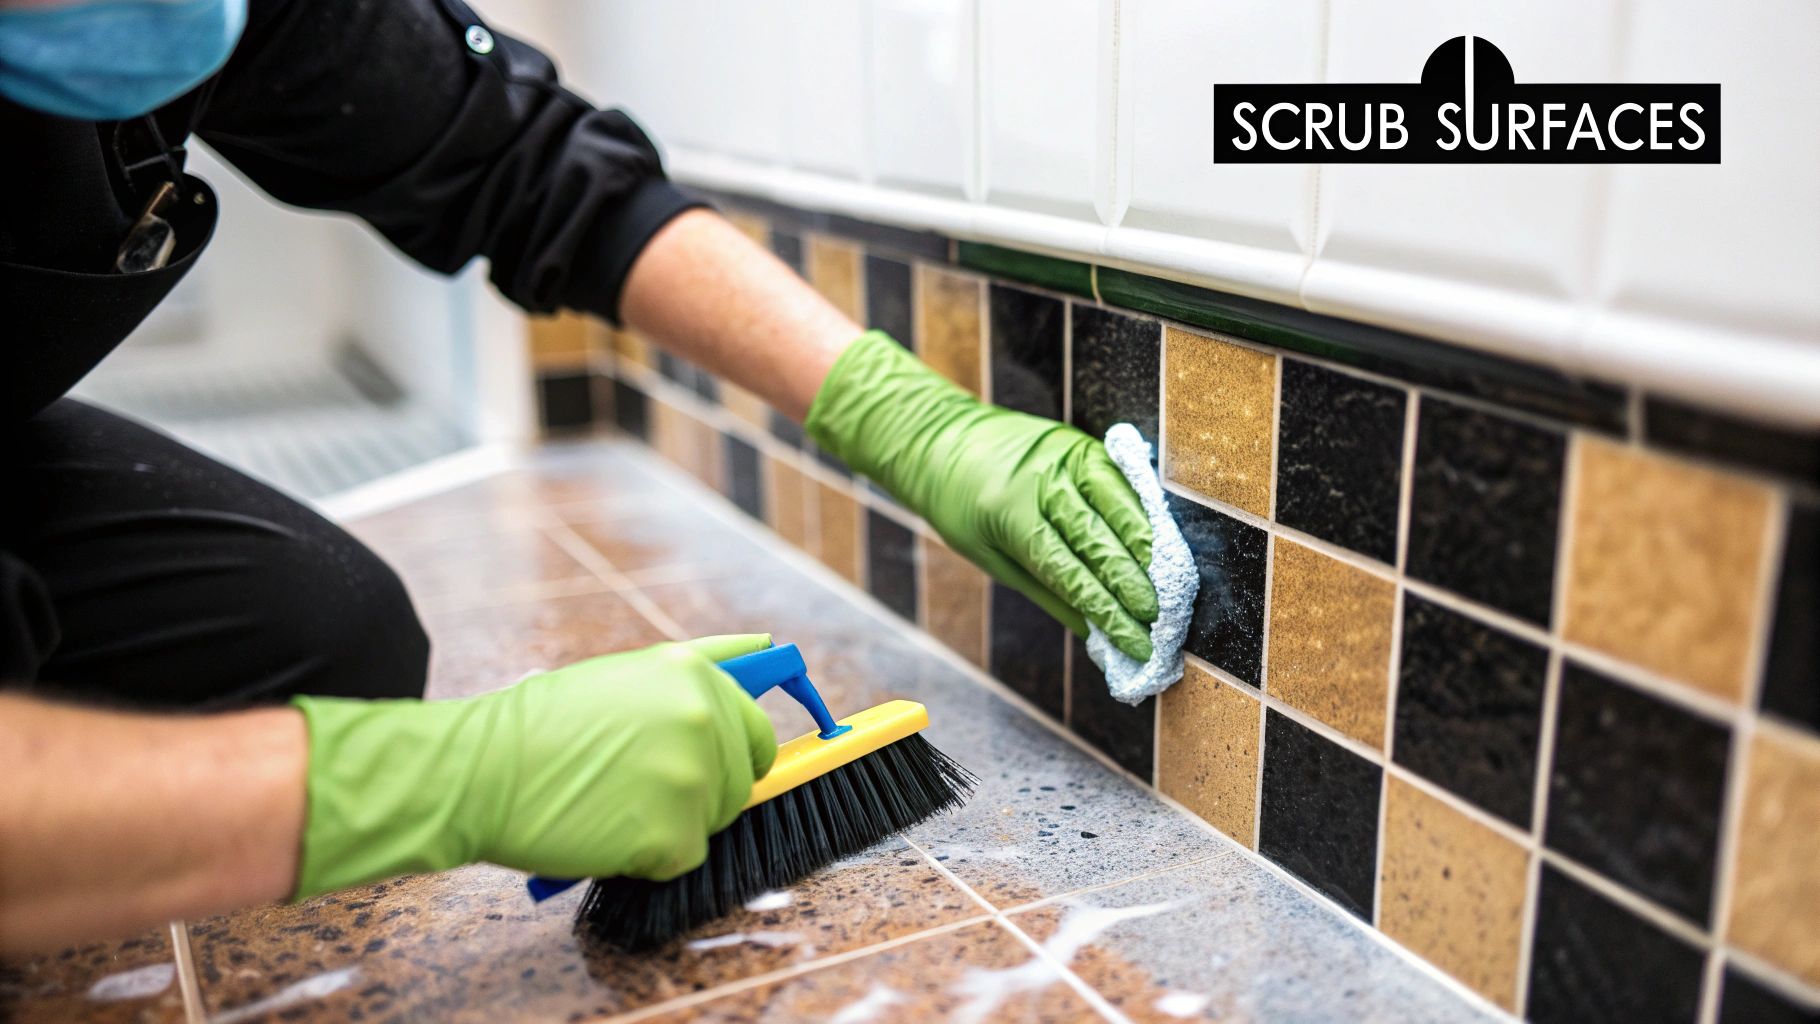
Once your cleaner has had time to work its magic, it’s time to get down to business. The right tool for the job really depends on what your shower is made of—fiberglass, porcelain, and tile all need a slightly different touch.
- For fiberglass or acrylic tubs: Stick with a non-abrasive sponge or a microfiber cloth. Anything harsher will leave scratches.
- For porcelain or tile: A stiff-bristled scrub brush is your best friend here. It gets right into textured surfaces and grout lines without causing any damage.
Work in small sections and scrub in circular motions to lift all that loosened grime. If you're dealing with really caked-on soap scum, a simple paste of baking soda and water offers some gentle scrubbing power. For a deeper dive, our guide on how to remove soap scum from shower surfaces is packed with advanced tips.
Pro Tip: Don't forget the shower door track! An old toothbrush is perfect for digging into those narrow crevices where gunk loves to hide.
Achieving Streak-Free Glass and Gleaming Fixtures
Getting glass shower doors perfectly clear can feel impossible, right? The secret is a two-step attack. First, use your main cleaner to cut through the soap scum. Then, come back with a dedicated glass cleaner and a fresh microfiber cloth for a truly streak-free shine. A squeegee after every shower is the best way to keep it looking that way.
Finally, let's get those fixtures sparkling. Mineral deposits from hard water can clog up your shower head and make faucets look dull and dingy.
- Descale the Shower Head: Grab a plastic bag and fill it with white vinegar. Secure it over the shower head with a rubber band so the head is completely submerged. Let it soak for at least an hour—or even overnight if the buildup is bad.
- Polish the Faucets: After you take the bag off, give the fixtures a quick scrub with a soft brush to knock off any leftover deposits. A final polish with a dry microfiber cloth will bring back that brand-new shine and get your water flowing perfectly again.
Getting the Toilet and Sink Hygienically Clean
Alright, with the big surfaces out of the way, it’s time to zero in on the germ hotspots: the toilet and the sink. These get used every single day, so a quick wipe-down just won’t cut it. A truly sparkling bathroom hinges on getting these two fixtures disinfected and shining.
When it comes to the toilet, I always treat the inside and outside as two separate jobs. First, apply a good toilet bowl cleaner under the rim, making sure it coats the entire bowl. Let that sit for at least 5-10 minutes to really break down stains and kill germs while you move on to the exterior.
A Deeper Clean for the Toilet Exterior
The outside of the toilet is so easy to overlook, but it’s a major hub for bacteria. Grab your disinfectant spray and a dedicated microfiber cloth (this is where that color-coding system comes in handy!) and wipe down every single surface.
This isn’t just a quick pass. You need to hit:
- The top and underside of the lid
- Both sides of the toilet seat itself
- The tank, plus the flush handle or buttons
- The entire base, all the way down to where it meets the floor
Pay special attention to the hinges that connect the seat to the bowl—that area is notorious for collecting grime. An old toothbrush is your best friend for getting into those tight spots. After the outside is sparkling, head back to the bowl and give it a good scrub with a toilet brush before you flush.
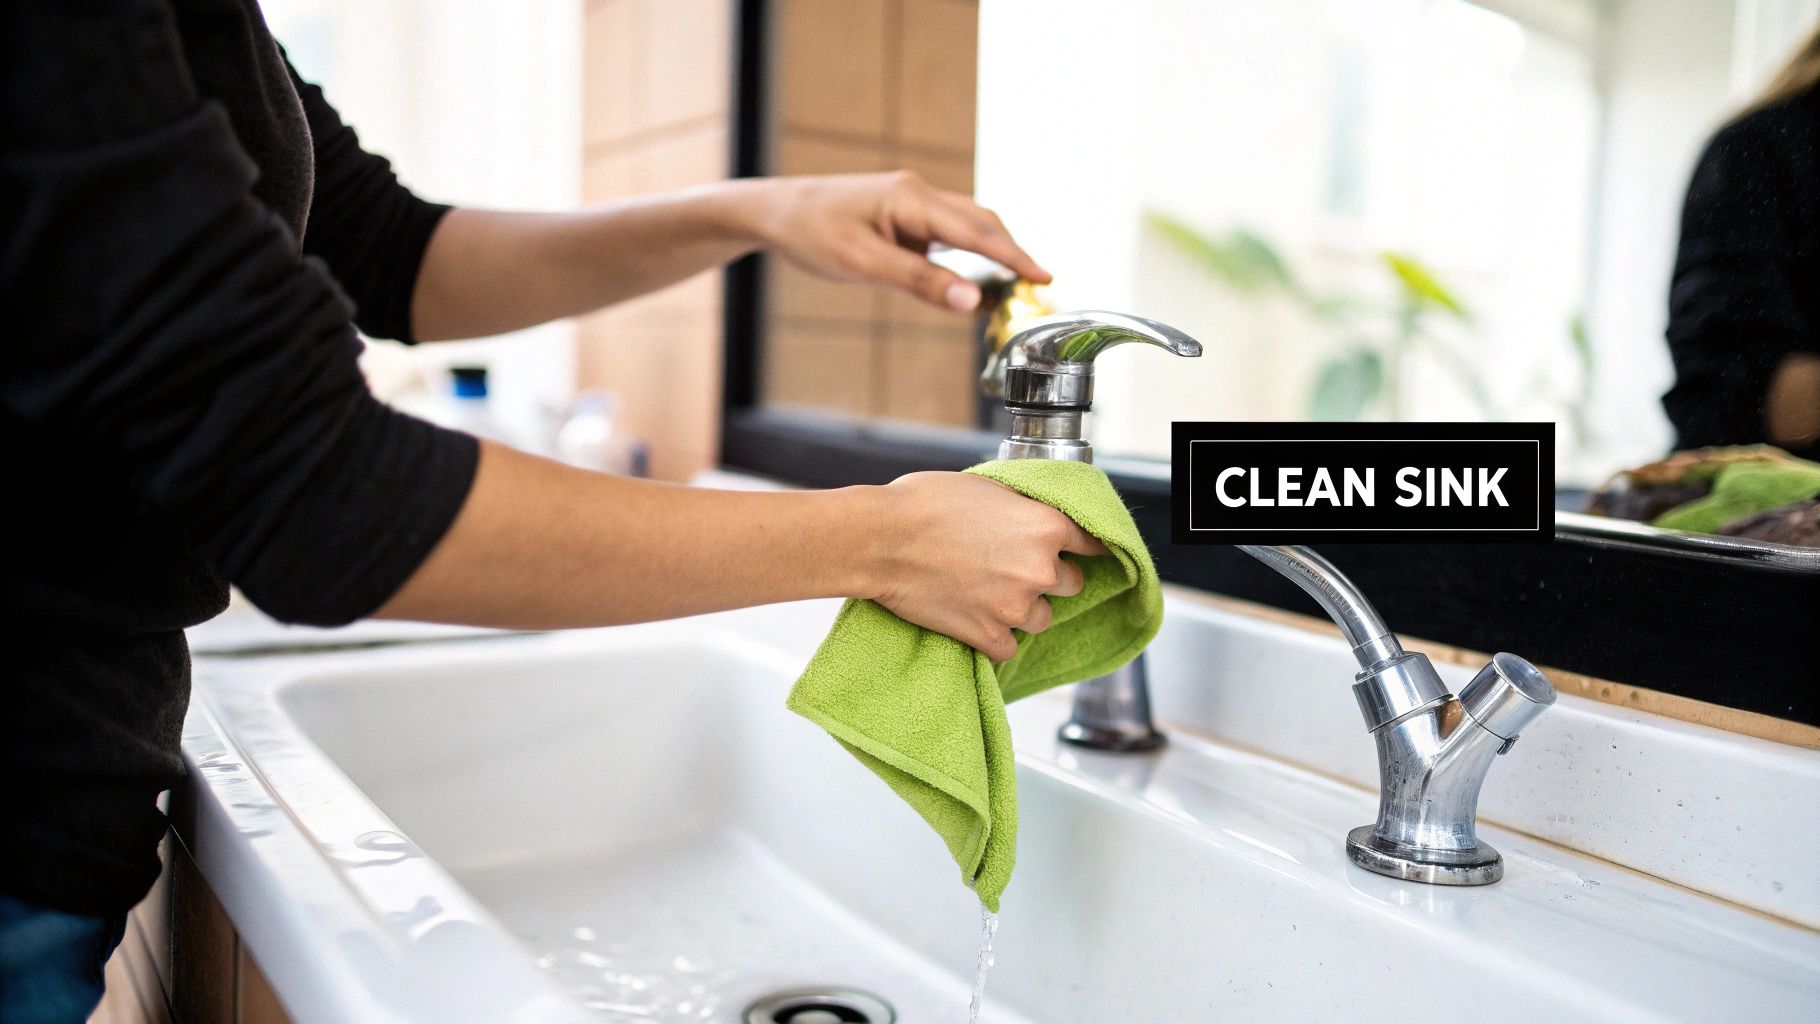
Tackling the Sink and Vanity
Your bathroom sink sees it all—toothpaste splatters, soap scum, makeup, and stray hairs. Start by spraying the entire sink basin, faucet, and countertop with an all-purpose bathroom cleaner. Just like with the shower, give it a few minutes to work its magic and dissolve all that buildup.
Wipe down the countertops first with a soft sponge or cloth, then move into the sink basin itself. You might need a little extra elbow grease for stubborn, dried-on toothpaste, but a gentle scrub is all it takes. The area around the faucet base and the drain are prime spots for gunk to accumulate, so don't miss them.
For an extra gleaming finish on your fixtures, you can find some great quick tips for cleaning bathroom faucets that really make a difference.
A slow or smelly drain can completely undermine your hard work. It's usually the first sign of a clog forming from hair and soap scum. Tackling this early keeps your sink hygienic and working properly. We’ve put together a full guide on how to unclog a sink without chemicals to help you out.
Polishing Floors, Mirrors, and Final Details
You've tackled the shower grime, sanitized the toilet, and wiped down every inch of the vanity. Awesome. Now it's time for the final push that takes your bathroom from clean to sparkling. This is all about the little things—the floors, mirrors, and those often-missed spots that really tie the whole room together.
Getting a perfectly streak-free mirror can be one of the most maddening parts of the job. The secret isn't just about what you spray, but how you wipe. My advice? Don't spray cleaner directly on the glass. That's how you get those annoying drips and an uneven clean. Instead, just lightly mist a clean, flat-weave microfiber cloth.
Getting a Flawless Finish on Mirrors
I swear by the "S-Pattern" for this. Start at the top left corner of the mirror, wipe straight across to the right, drop down a bit, and wipe back to the left. Keep snaking your way down like that until you've covered the whole surface. This simple motion ensures you're actually lifting the grime, not just pushing it around.
For the final touch, grab a second, completely dry microfiber cloth and give the glass a quick buff. This two-cloth system is the most foolproof way I’ve found to banish every last streak and speck of lint.
So many people reach for paper towels here, but it's a huge mistake. They just shred and leave tiny fibers all over the glass. A good, dedicated glass cloth is a small investment that pays off with professional-looking results every single time.
The Right Way to Clean Bathroom Floors
Okay, on to the floor. We've been working from top to bottom, so this is the very last surface we'll touch. All the dust, hair, and spray that fell while you cleaned everything else is now sitting right here, ready to be gone for good.
First, give the floor a thorough sweep or vacuum. Get right into the corners, around the base of the toilet, and along the baseboards—that's where hair and dust love to hang out. A vacuum with a crevice tool is your best friend for this part.
Now, it's mopping time. The key is to use the right cleaner for your floor type and—this is crucial—don't drown it in water. Using too much water can wreck your grout over time and even seep under the baseboards.
- For Ceramic or Porcelain Tile: A simple mix of all-purpose cleaner and warm water does the trick. A steam mop is also a fantastic chemical-free option that deep cleans and sanitizes grout lines like a champ.
- For Vinyl or Laminate: Stick to a cleaner made specifically for these floors. You'll want to use a damp mop, not a sopping wet one, to keep water from sneaking into the seams and causing the planks to swell.
Once you’re done mopping, you can let the floor air dry or speed things up by running a big, dry towel over it.
Don't Skip the Finishing Touches
With the heavy lifting done, these last few steps bring it all home. They only take a couple of minutes but make a massive difference in how fresh and put-together the room feels.
- Dust the High Spots: Grab a microfiber duster and do a quick pass over light fixtures, the top of the door frame, and the exhaust fan cover.
- Restock Everything: Refill the toilet paper holder, top off the hand soap, and make sure there’s a clean hand towel ready to go.
- Take Out the Trash: Swap in a new trash bag and give the outside of the can a quick wipe with a disinfectant wipe.
- Hang Fresh Towels: There’s just something about fresh, neatly hung bath towels that screams "this space is truly clean."
Think of these final steps as the period at the end of a sentence. They wrap up your hard work, leaving the bathroom not just looking clean but feeling refreshed and ready for anyone.
Building Your Cleaning Arsenal: Store-Bought vs. DIY
Walking down the cleaning aisle can feel like preparing for battle. You’re faced with a wall of bottles, each promising to be the ultimate weapon against grime and germs. Then you hop online and see a hundred recipes for cleaners you can whip up with stuff already in your kitchen.
So, which path do you choose? Honestly, the best answer is usually a little of both. A truly effective cleaning caddy has a mix of powerful store-bought products and trusty homemade solutions, tailored to your budget and how you like to clean.
It's no surprise that the market for these products is booming. With a growing focus on home hygiene, the global bathroom cleaning products market, valued at around $50 billion in 2025, is expected to hit nearly $70 billion by 2033. We all want our homes to be clean and safe, and we're looking for the best tools for the job.
The Case for Commercial Cleaners
There’s a reason commercial cleaners are so popular: they’re convenient, and they work. Formulated by chemists for very specific jobs, their main advantage is targeted power. An alkaline cleaner, for example, is built to cut right through greasy soap scum, while an acidic one is your go-to for dissolving mineral deposits and rust.
When you need something that works fast and delivers reliable results, it’s hard to beat a good store-bought product. For a deeper dive, our guide on https://custom-maids.co/blogs/news/how-to-choose-cleaning-products can help you make sense of the labels.
Here’s why they earn a spot in my caddy:
- Specialized Formulas: Products made specifically for grout, glass, or toilets have the right ingredients to tackle those unique challenges without guesswork.
- Disinfecting Power: Many commercial cleaners are EPA-registered, which means they are proven to kill a high percentage of germs when you follow the directions.
- Convenience: Sometimes, you just need to grab a spray bottle and go. Ready-to-use formulas save precious time and effort.
The Power of DIY Solutions
If you’re leaning toward a more natural approach or just want to save a few bucks, DIY cleaners are a fantastic alternative. You’d be amazed at what the simple combo of white vinegar and baking soda can accomplish. They can handle everything from tough hard water stains on your shower door to deodorizing a funky drain.
The magic of vinegar is its acidity. It breaks down mineral buildup and soap scum like a champ. Baking soda, on the other hand, is a gentle abrasive that scrubs away grime without scratching delicate surfaces like acrylic tubs.
Ready to try a simple, all-purpose cleaner? Here's my favorite recipe:
- Mix one part white vinegar with one part water in a spray bottle.
- Toss in a few drops of an essential oil like tea tree or lemon. This adds a nice, clean scent and gives it a little antimicrobial boost.
- Just give it a good shake before you spray.
Remember, your cleaning arsenal isn't just about what's in the bottles. The tools you use matter just as much. To save your back and cut down on elbow grease, consider investing in tools like powerful spin scrubbers designed specifically for bathroom cleaning. The right brush or scrubber can make a world of difference.
Answering Your Toughest Bathroom Cleaning Questions
Even with a solid plan, certain bathroom cleaning dilemmas can feel like a losing battle. If you've ever wondered whether you're really getting things clean, you're not alone. Let's dig into some of the most common questions and give you some real-world, practical answers to help you clean smarter.
Many people get hung up on how often they should be cleaning. Is a quick weekly wipe-down enough? Do you need to deep clean the whole space every time? The reality is that a balanced approach is the only way to keep your bathroom truly clean without driving yourself crazy.
How Often Should I Really Deep Clean?
Here’s the secret: consistency beats intensity every time. The most efficient way to keep a bathroom spotless is to break up the work into smaller, more manageable tasks. I like to think of it as a two-part system: weekly upkeep and a more thorough monthly deep clean.
Your Weekly Refresh:
- Wipe down sinks, countertops, and faucets.
- Clean the mirror to get rid of toothpaste splatters and smudges.
- Give the toilet a good scrub inside and use a disinfectant wipe for the outside.
- Do a quick sweep or vacuum of the floor to grab hair and dust bunnies.
Your Monthly Deep Dive:
- Scrub the shower, tub, and grout lines to tackle any buildup.
- Descale the shower head and faucets to clear out mineral deposits.
- Wipe down baseboards, light fixtures, and the exhaust fan cover.
- Mop the floor with a proper disinfecting cleaner.
Following this kind of schedule means grime never gets a chance to build up, which makes every cleaning session faster and way less daunting.
What's the Best Way to Get Rid of Stubborn Mold and Mildew?
Mold and mildew are frustrating, to say the least. They love damp, dark spaces and can be tough to eliminate for good. Just wiping them away doesn't kill the spores, which means they'll be back before you know it. You need a targeted attack.
For a surprisingly powerful solution, mix up a paste with one part hydrogen peroxide and one part baking soda. Dab this directly onto the moldy grout or caulk and let it sit for about 10-15 minutes. You’ll see it start to bubble—that’s how you know it’s working. After it sits, grab an old toothbrush and give the area a good scrub before rinsing it all away.
Key Takeaway: The best defense against mold is to control the moisture. Always run your exhaust fan for at least 20 minutes after a shower. If you really want to stay ahead of it, squeegee the shower walls to get rid of excess water. This one proactive step makes a world of difference.
Are Natural Cleaners Strong Enough for the Tough Stuff?
This is a huge one, especially when you're staring down a wall of caked-on soap scum. While there are definitely times when you might need a heavy-duty commercial cleaner, you’d be amazed at what simple, everyday household items can do.
For soap scum, white vinegar is your best friend. Its acidity is perfect for dissolving the minerals and fatty acids that create that grimy film.
- Grab a spray bottle and fill it with an equal mix of warm white vinegar and water.
- Add a teaspoon of dish soap—this helps cut through the greasy part of the grime.
- Spray the solution generously all over the affected areas and let it sit for at least 15 minutes.
- Scrub it down with a non-abrasive sponge, rinse well, and you're done.
For most of your daily cleaning and even moderately tough jobs, natural solutions are more than up to the task.
If tackling these tasks feels overwhelming, let the pros handle it. For over 40 years, Custom Maids has provided meticulous, reliable cleaning services to Mid-Michigan. Get your free, no-obligation consultation by visiting us at https://custom-maids.co today.